

Intro
This article explains how to register a fiscal calendar, register a localized standard calendar, and edit or disable a registered calendar for a Snowflake or Databricks Cloud Integration. This is available for Snowflake and Databricks Cloud Integrations. You configure it once per integration, and every card and DataSet connected to that integration can use it.Note: You need Owner or Admin access to the Snowflake or Databricks integration to configure calendars for it. If you’re not sure what access level you have, or need to request Owner or Admin access, contact the integration’s current owner or your Domo administrator.
Review the Calendar Types
You can register two independent calendar types on the same integration, side by side:
Registering both is optional and independent — you might set up only a Fiscal Calendar, only a Standard Calendar, or both.
Prerequisites
Before you register a calendar, you need a calendar table in your Snowflake or Databricks warehouse that matches Domo’s expected schema: 25 columns with specific names, covering every date in the years you want to report on. Row values (day and month names) can be in any language, but the column names themselves must always be in English. If you already have a table like this, you can register it directly (see Register an Existing Calendar Table). If you don’t have a Fiscal Calendar table, use the built-in generator to create one (see Generate a New Fiscal Calendar). The generator only builds Fiscal Calendar tables — a Standard Calendar table must be built manually before you can register it.Reference the 25-Column Schema
Example values assume a fiscal year starting in March.Access Calendar Settings
- Open the Snowflake or Databricks integration whose calendar you want to configure.
-
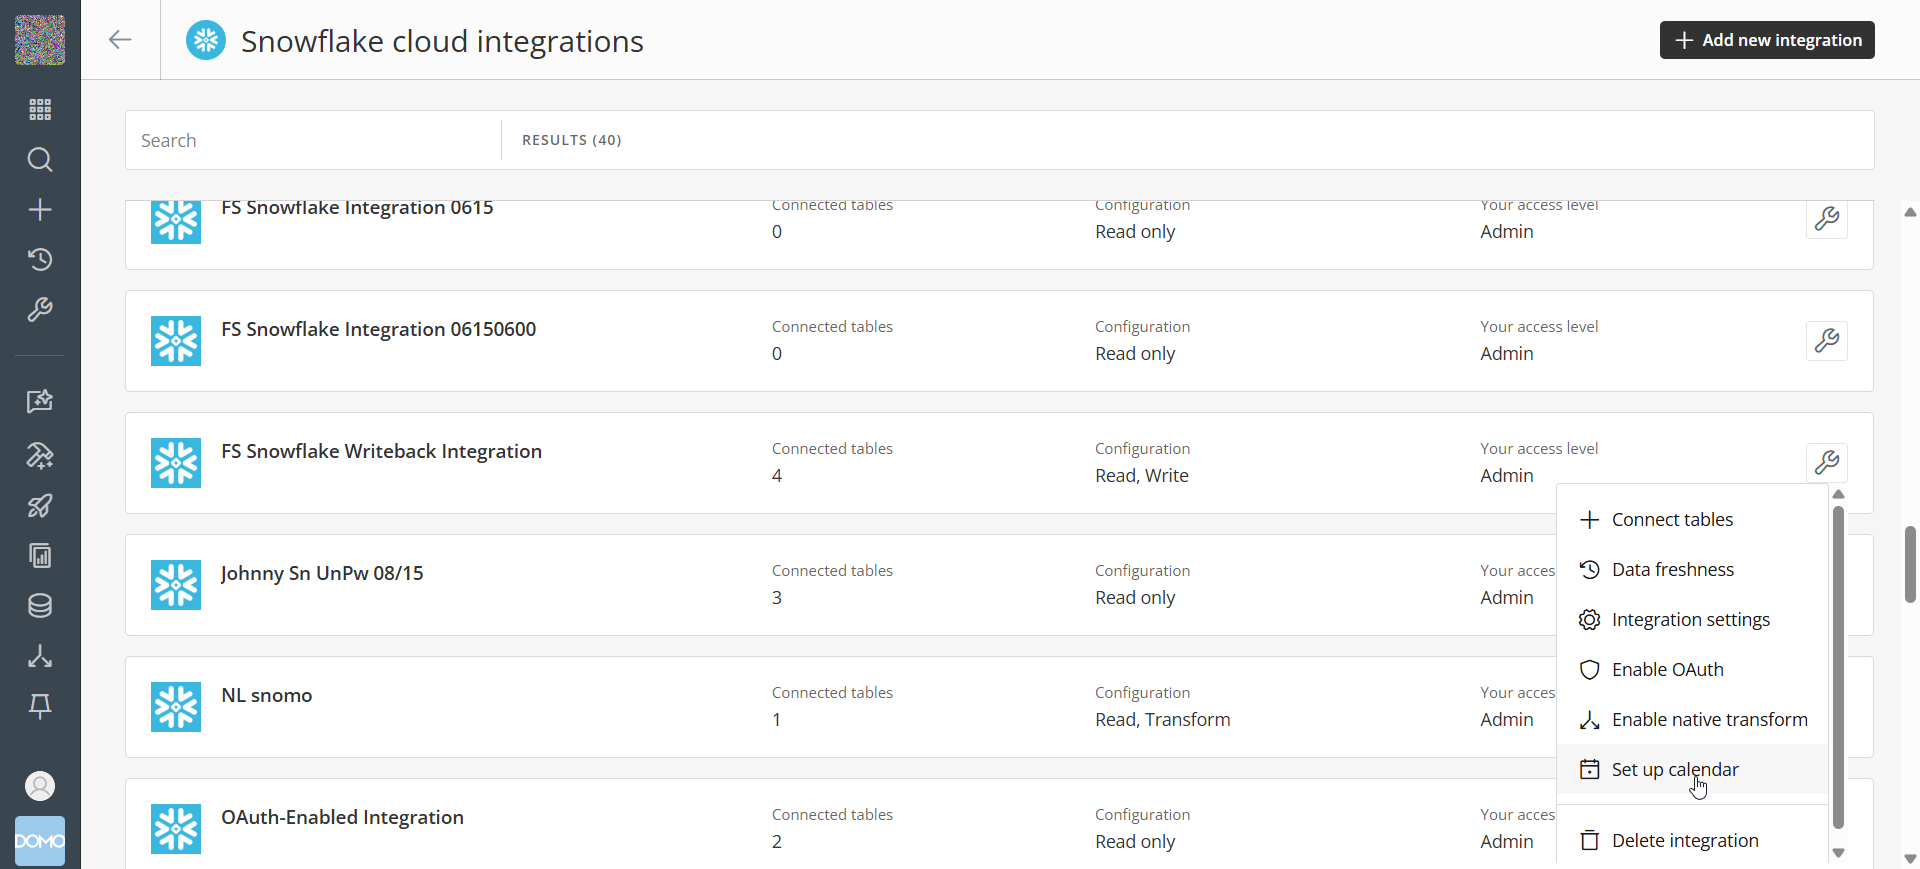
Select the wrench icon. A menu opens.
-
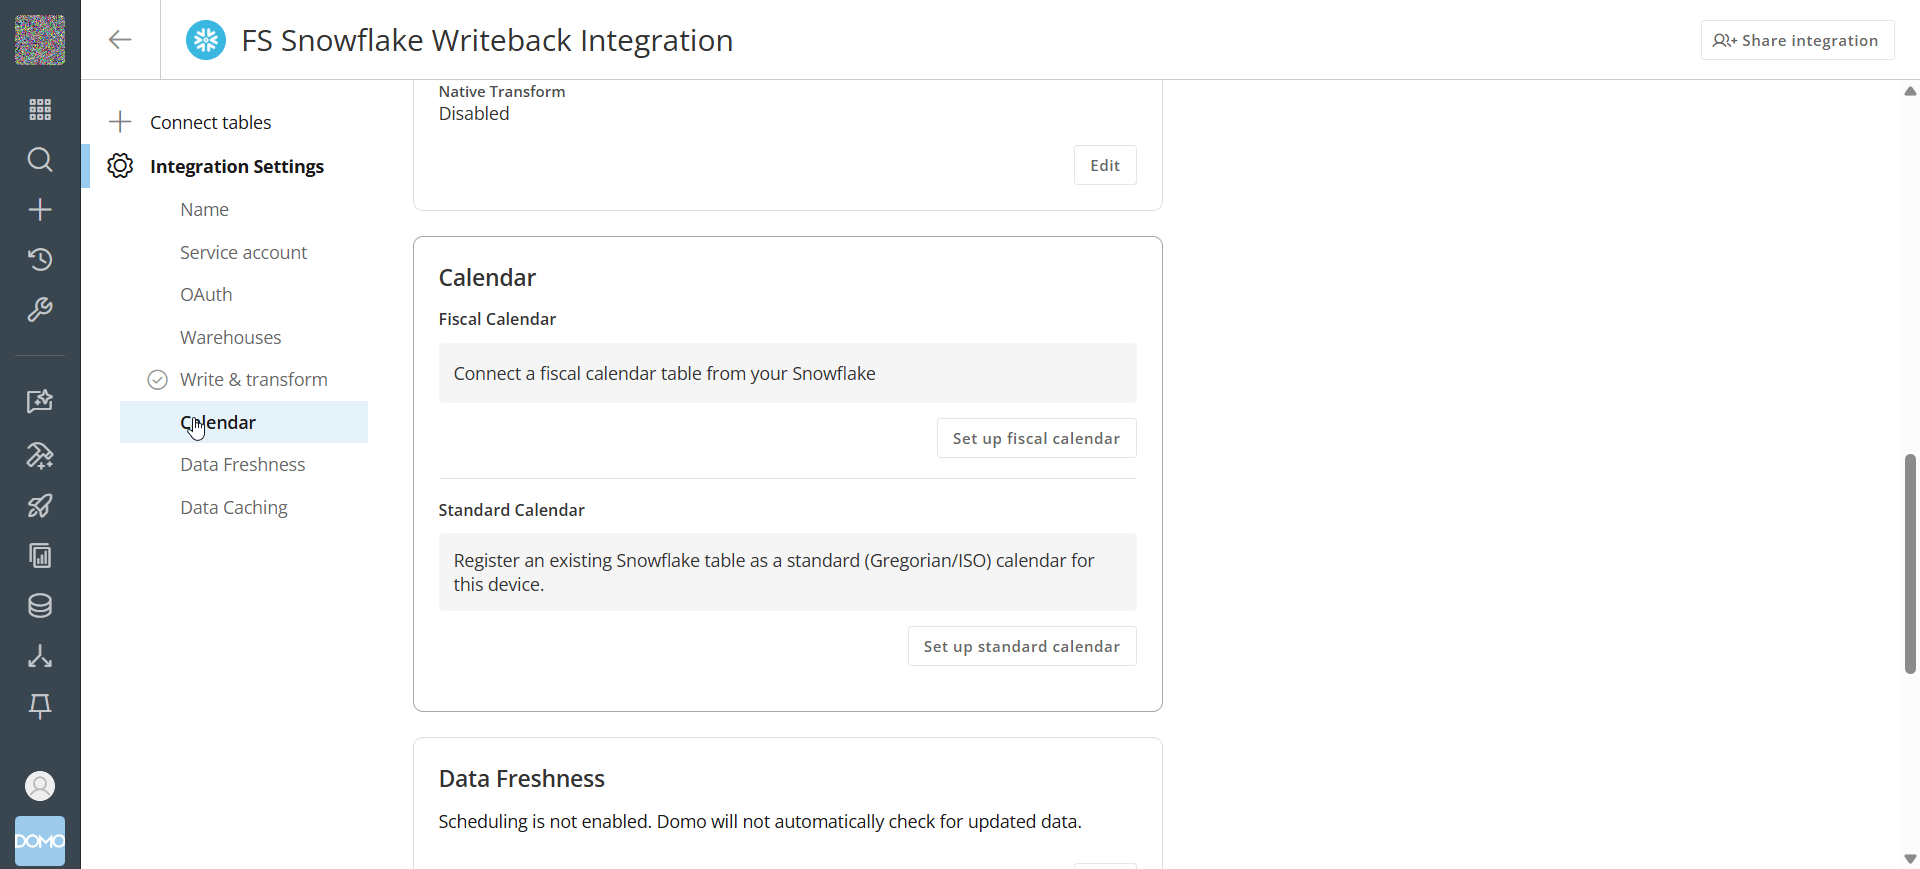
Select Set up calendar. The Calendar section of the integration’s settings opens, showing Fiscal Calendar and Standard Calendar subsections.
Generate a New Fiscal Calendar
If you don’t already have a fiscal calendar table, Domo can generate one for you as a downloadable CSV that already matches the required schema. You then load that CSV into a table in your own warehouse before registering it.- In the Calendar section, under Fiscal Calendar, select Set up fiscal calendar. A menu opens.
-
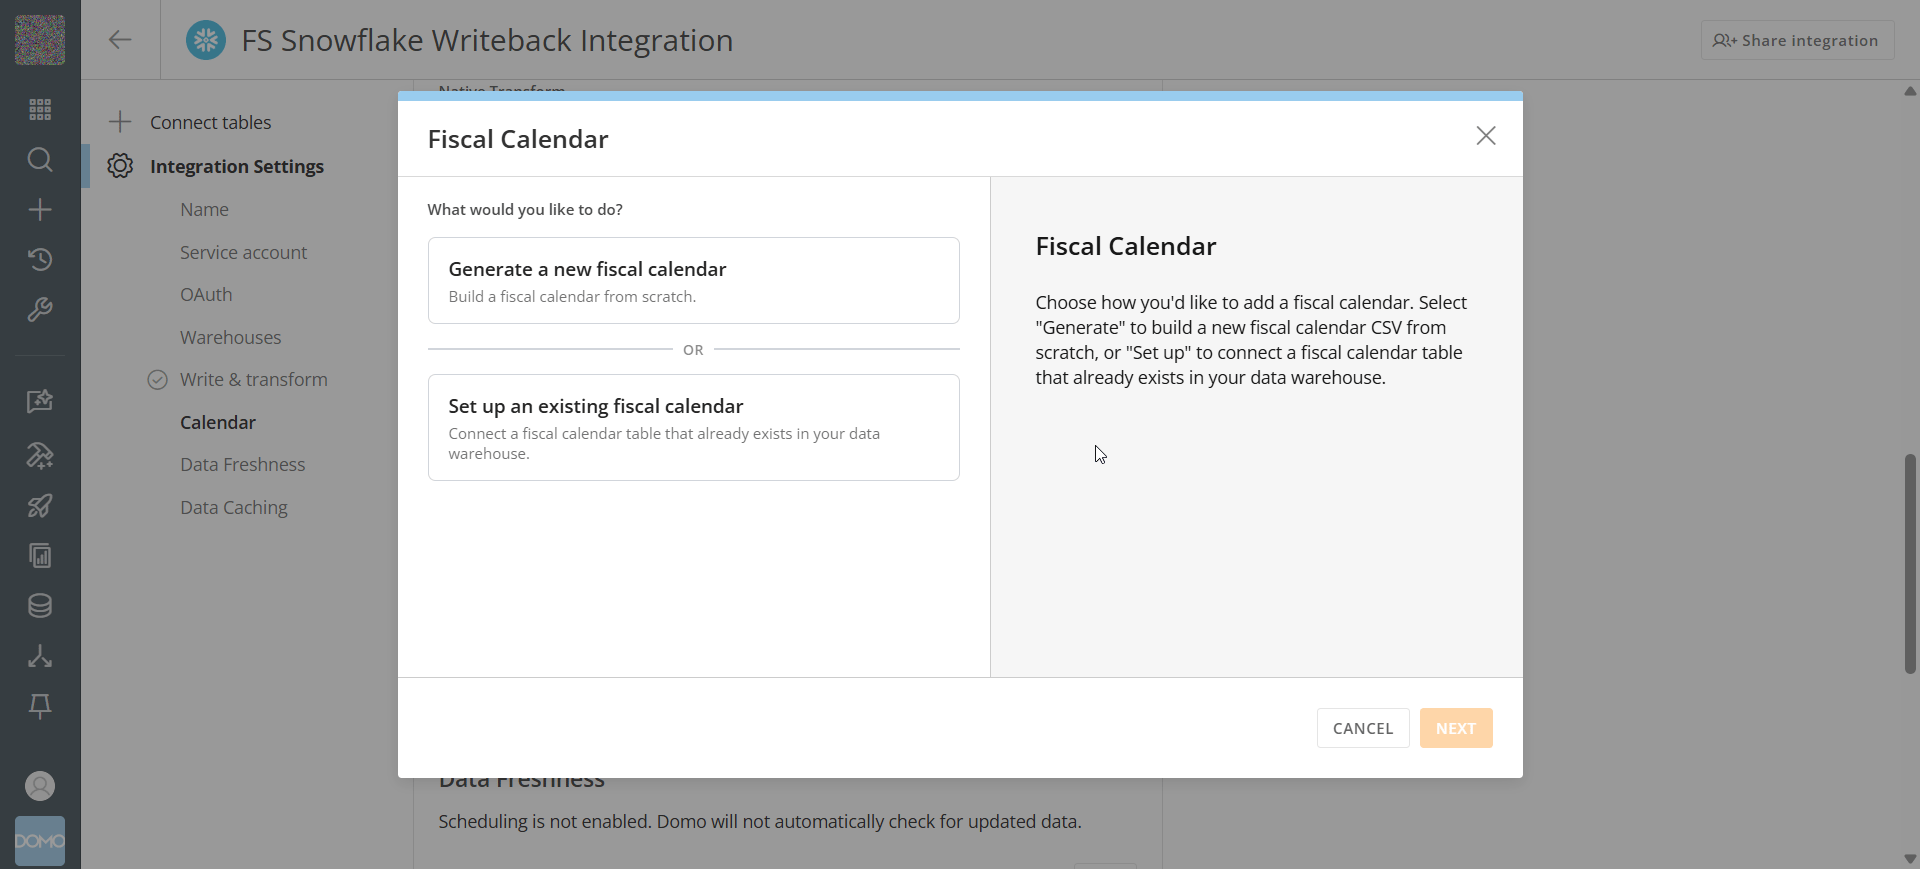
Select Generate a new fiscal calendar. The fiscal calendar generator opens to the Select Type step.
-
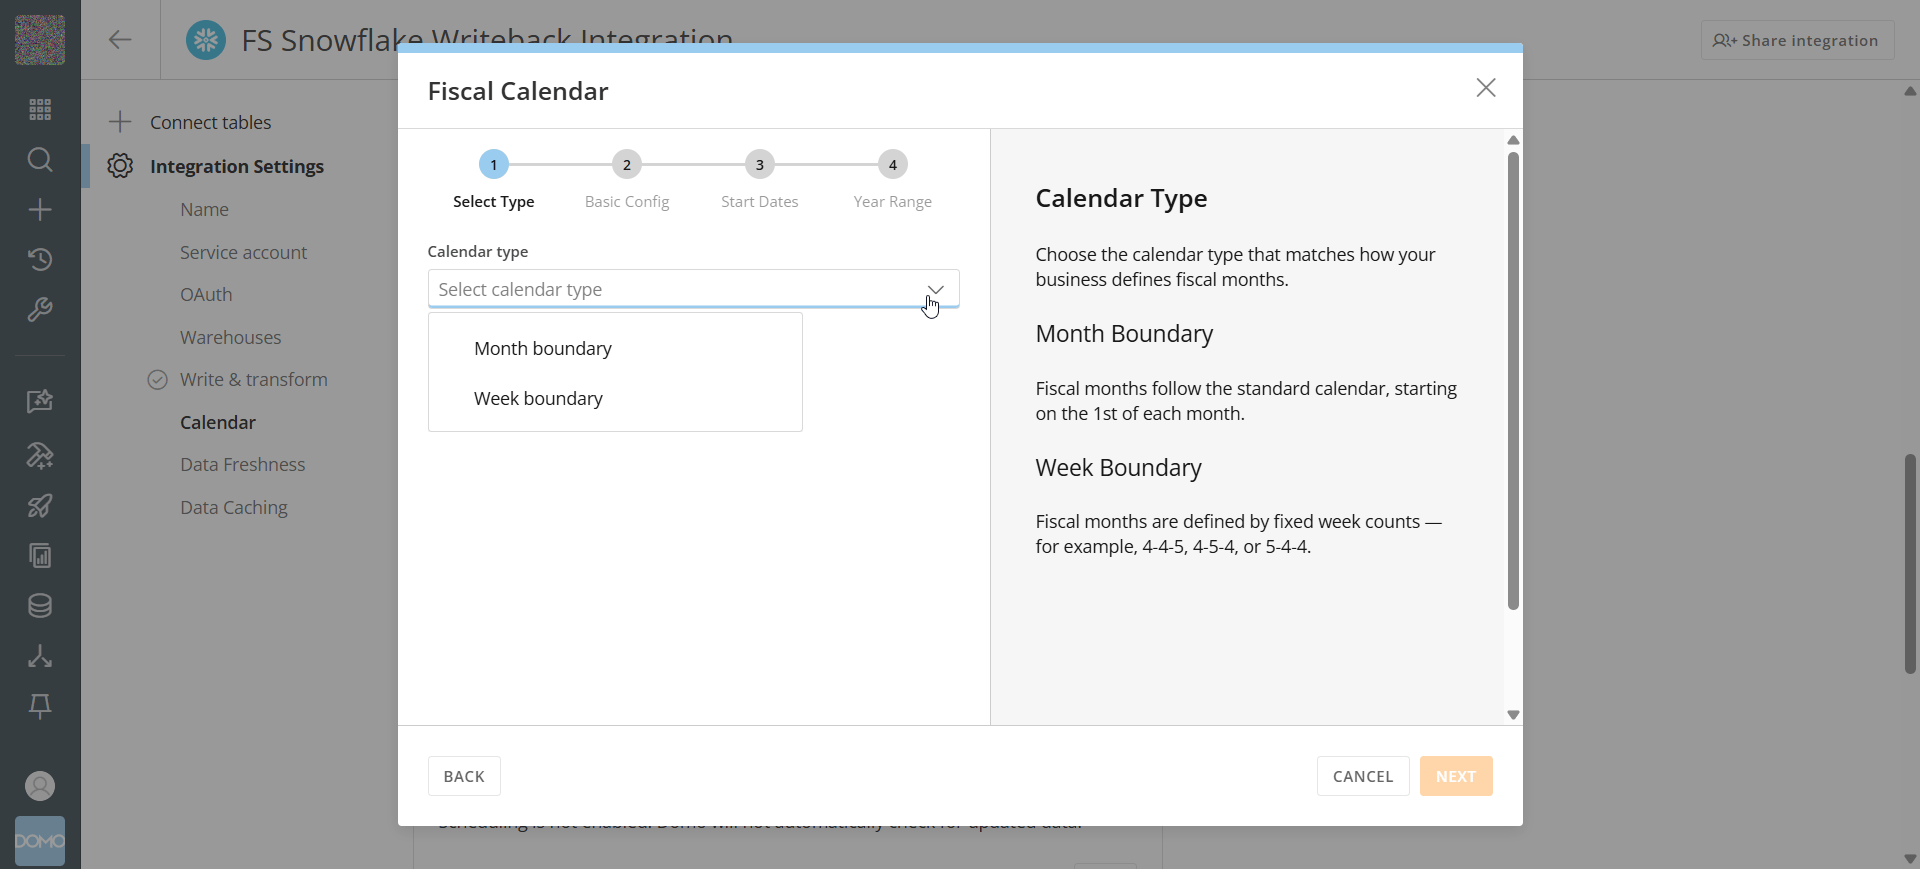
Choose how your fiscal year is structured, then select Next:
- Month Boundary — fiscal months follow the standard calendar, starting on the first of each month.
- Week Boundary — fiscal months are defined by fixed week counts (for example, 4-4-5, 4-5-4, or 5-4-4).
- Select your Week start day.
- (Conditional) If you selected Month Boundary, select your Fiscal year start month. This field only appears for Month Boundary calendars.
-
(Optional) Enable Label fiscal year by end year if you want a fiscal year that starts in, for example, October 2025 to be labeled FY2026 instead of FY2025.
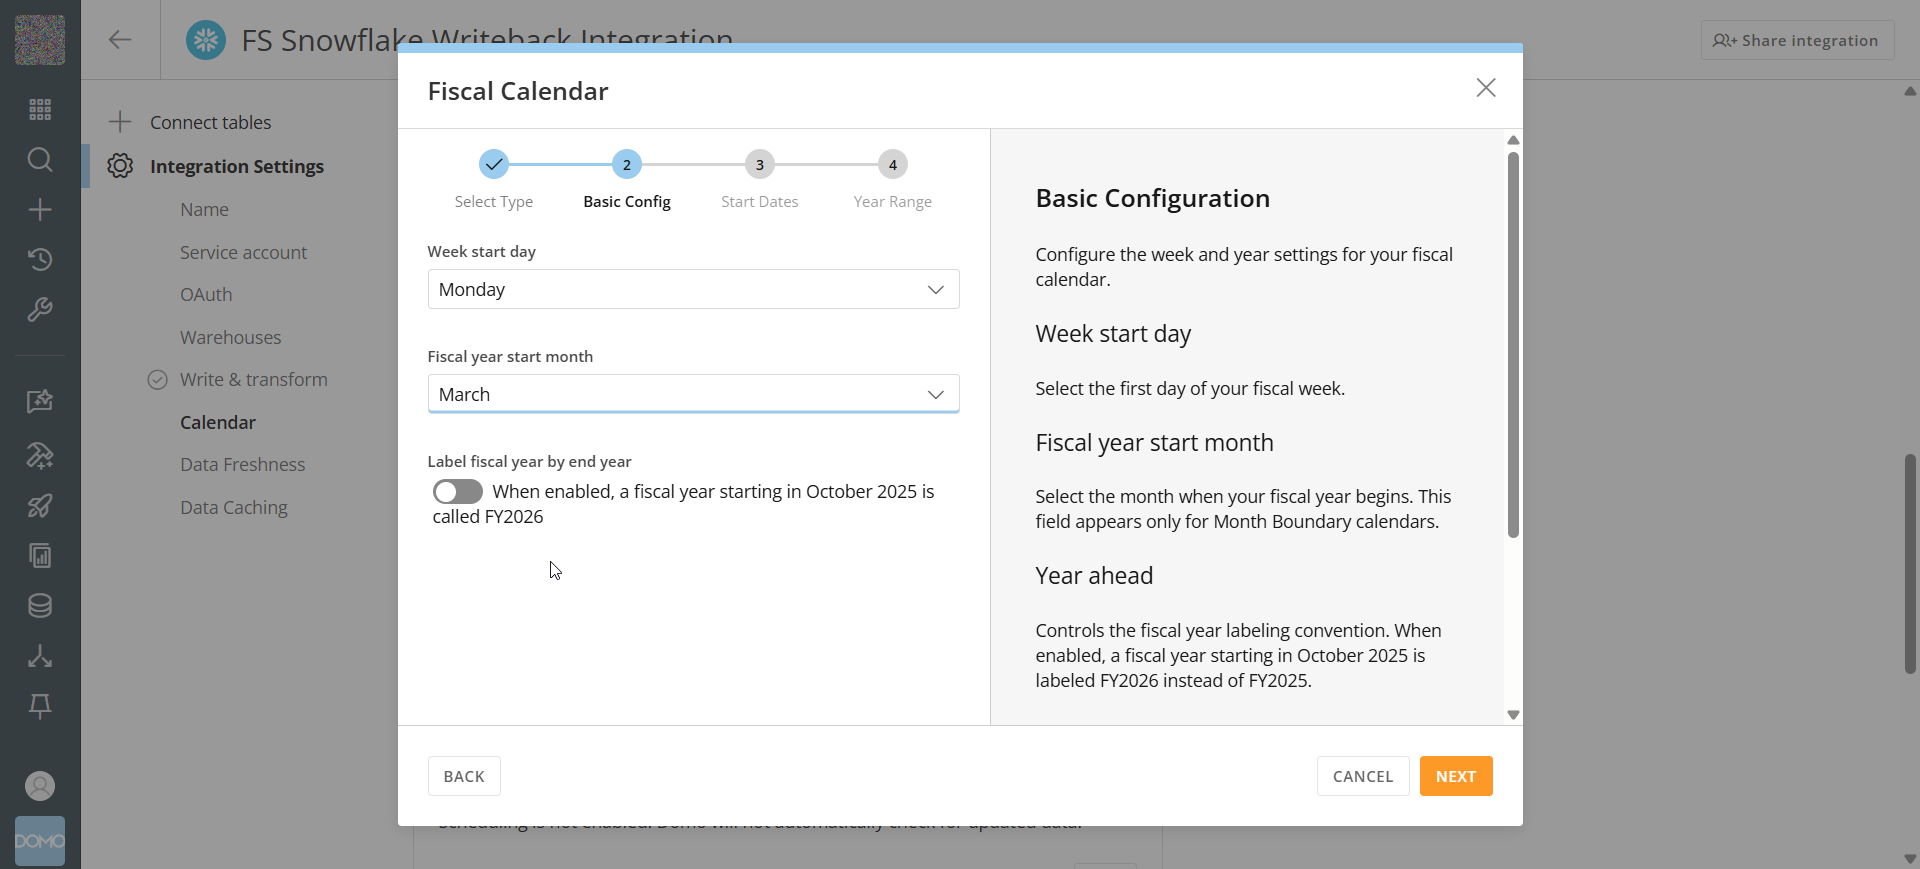
- Select Next.
-
Enter the start date for three sample fiscal years, using the same month and day with different years, then select Next. Domo uses these dates to validate that the calendar it generates matches the pattern you described.
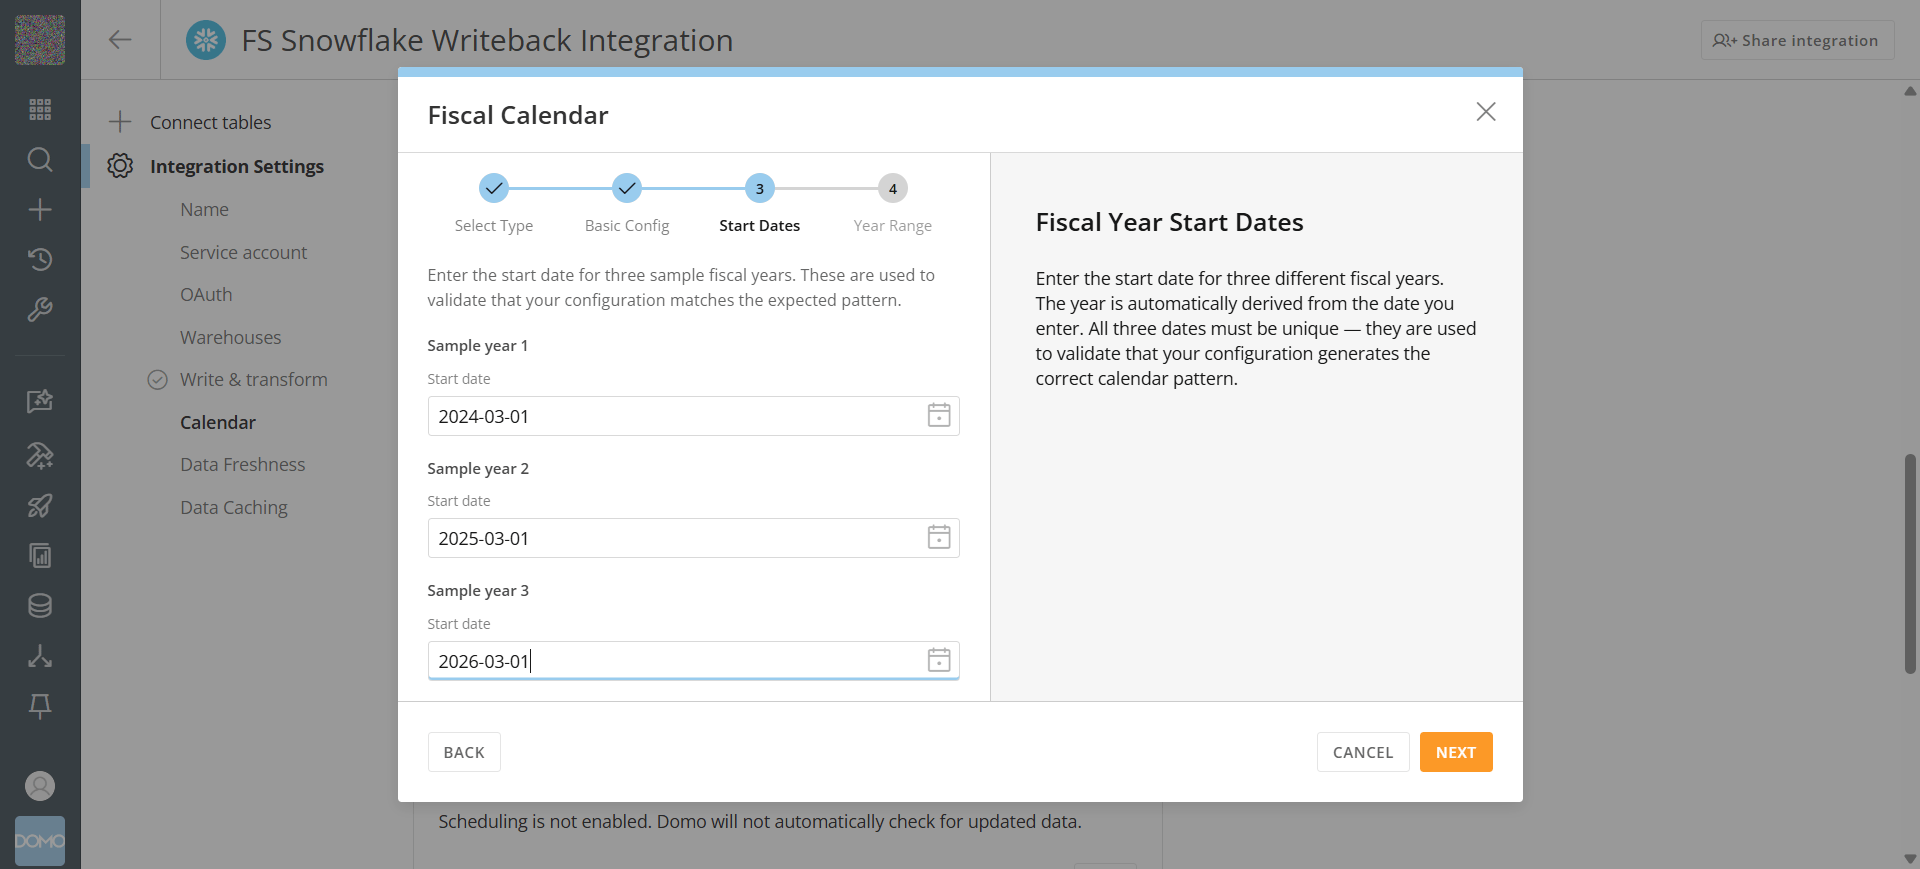
-
Set the range of calendar years to generate. The default range, 1990 to 2099, covers most business needs.
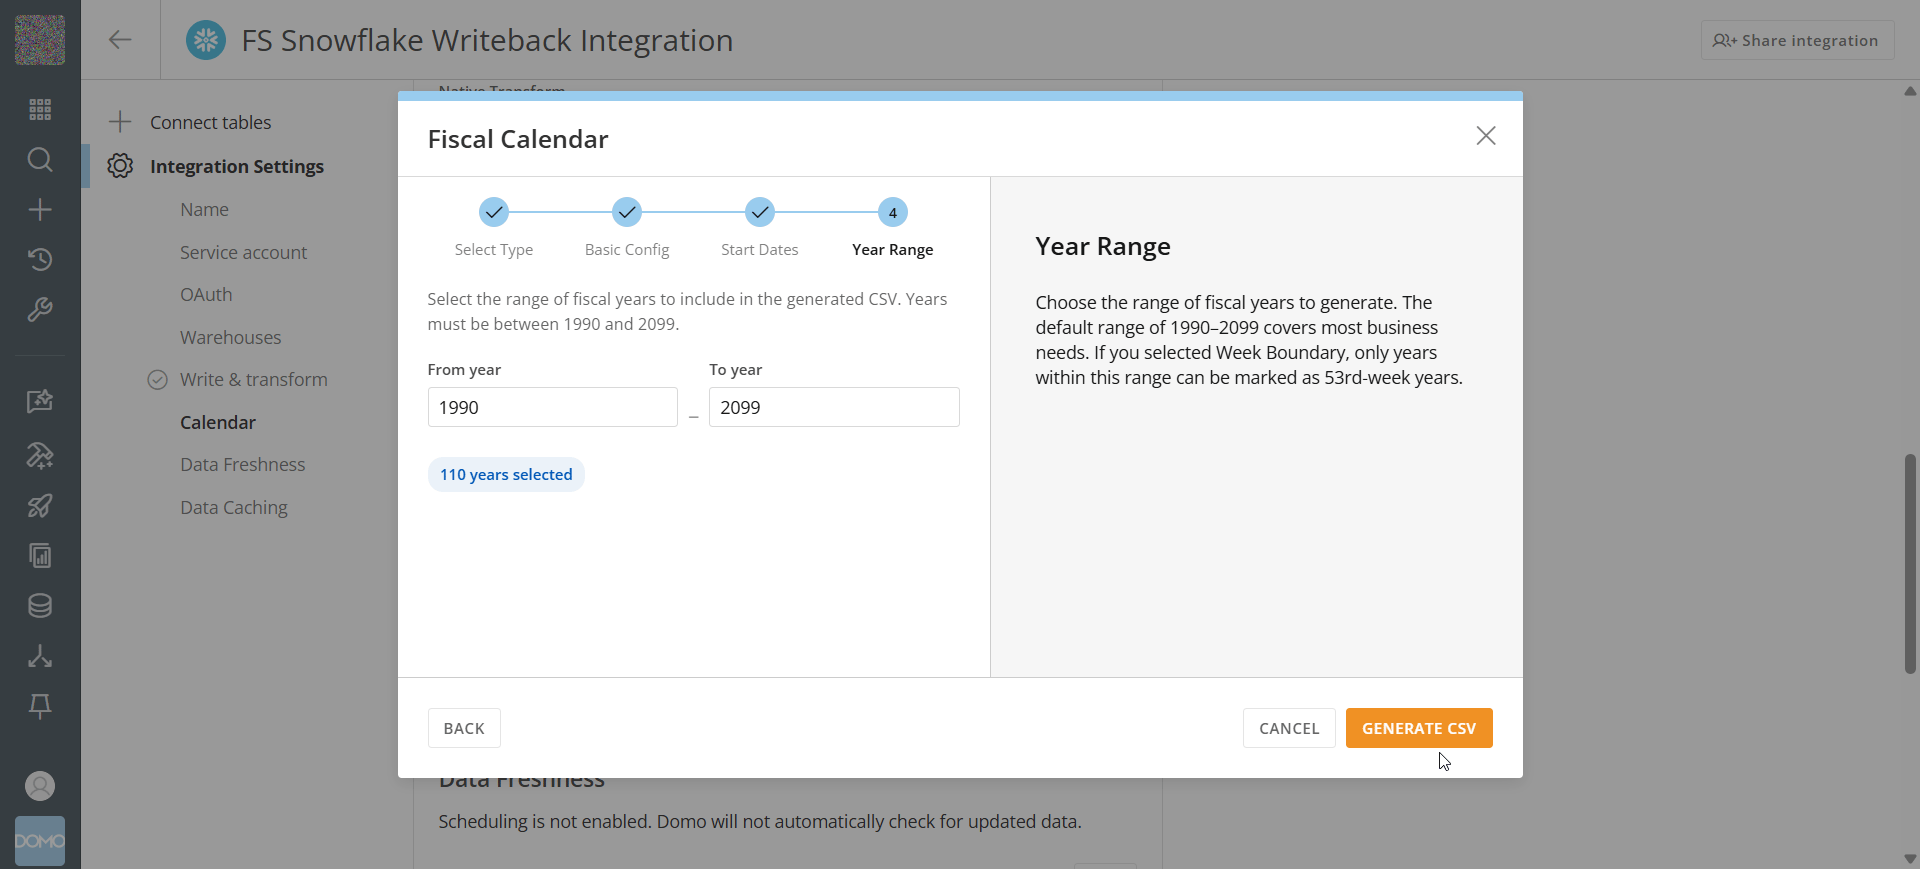
-
Select Generate CSV. Domo downloads a CSV file matching the 25-column schema.
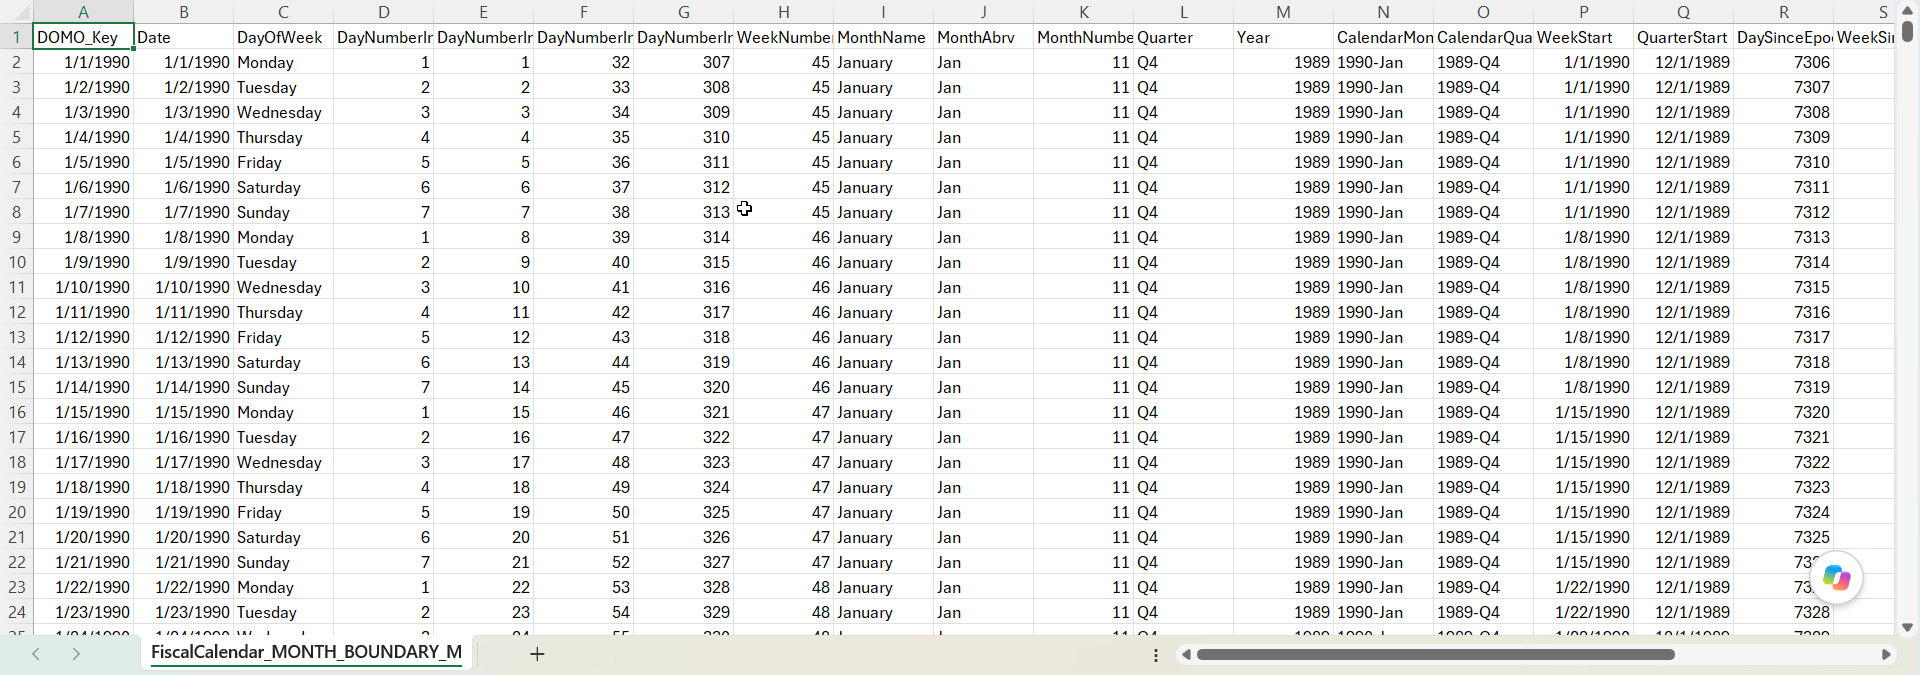
-
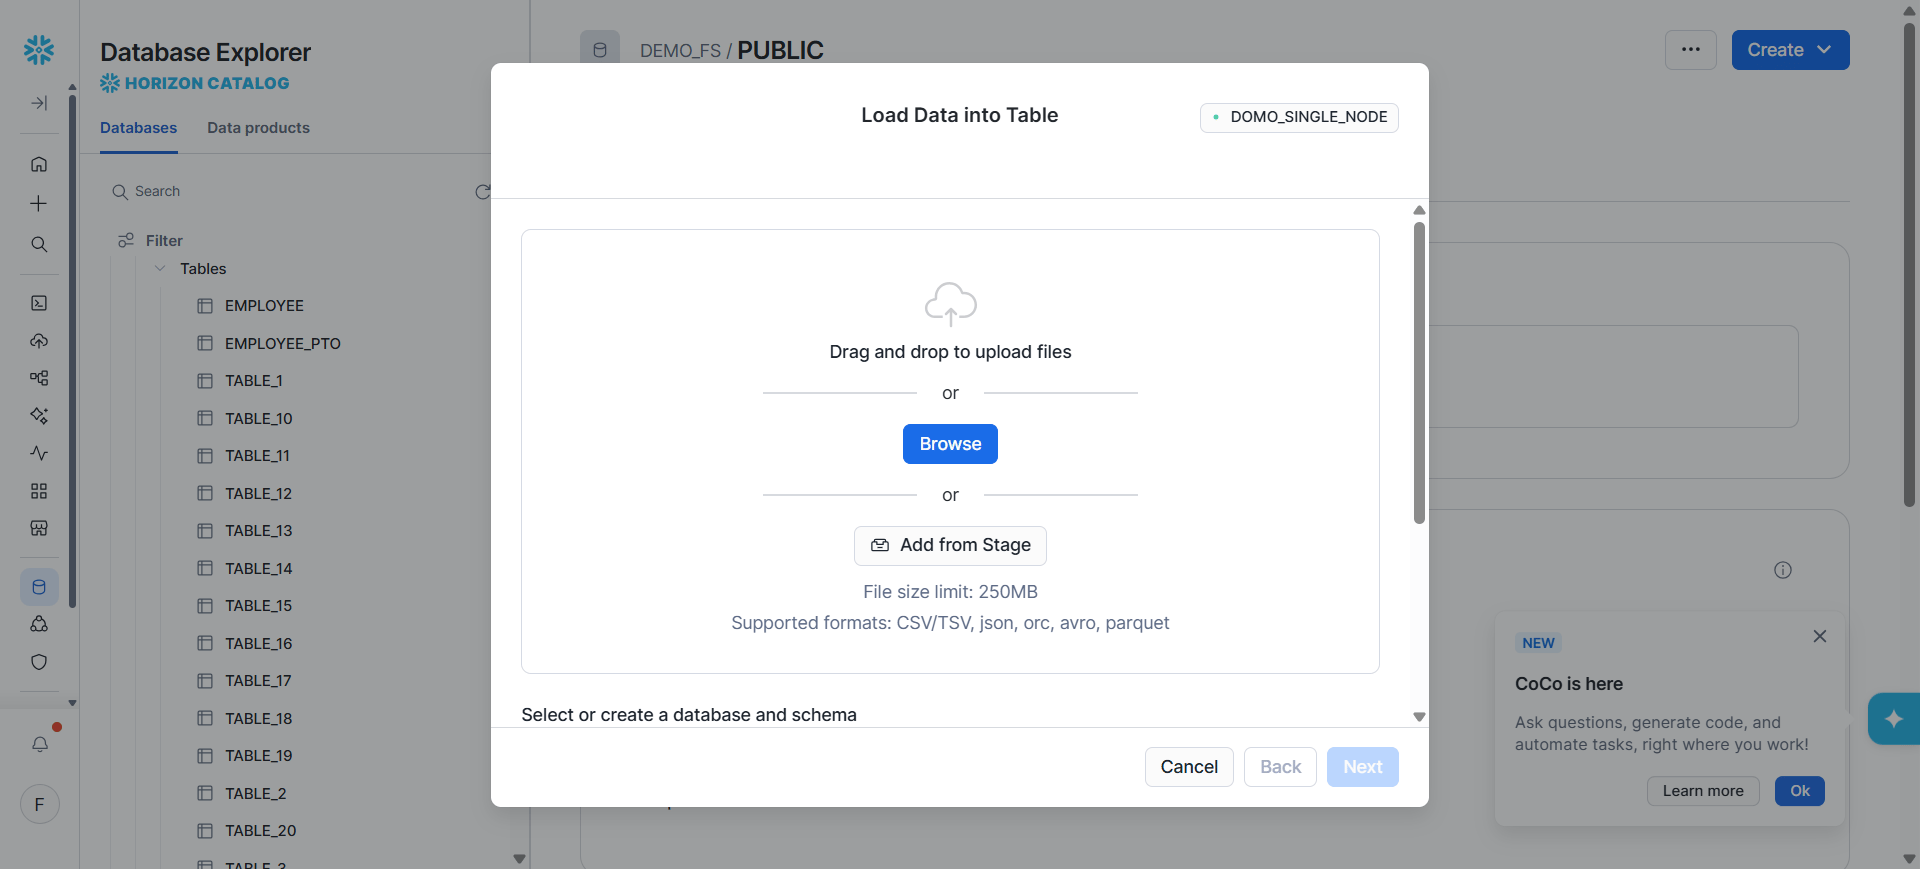
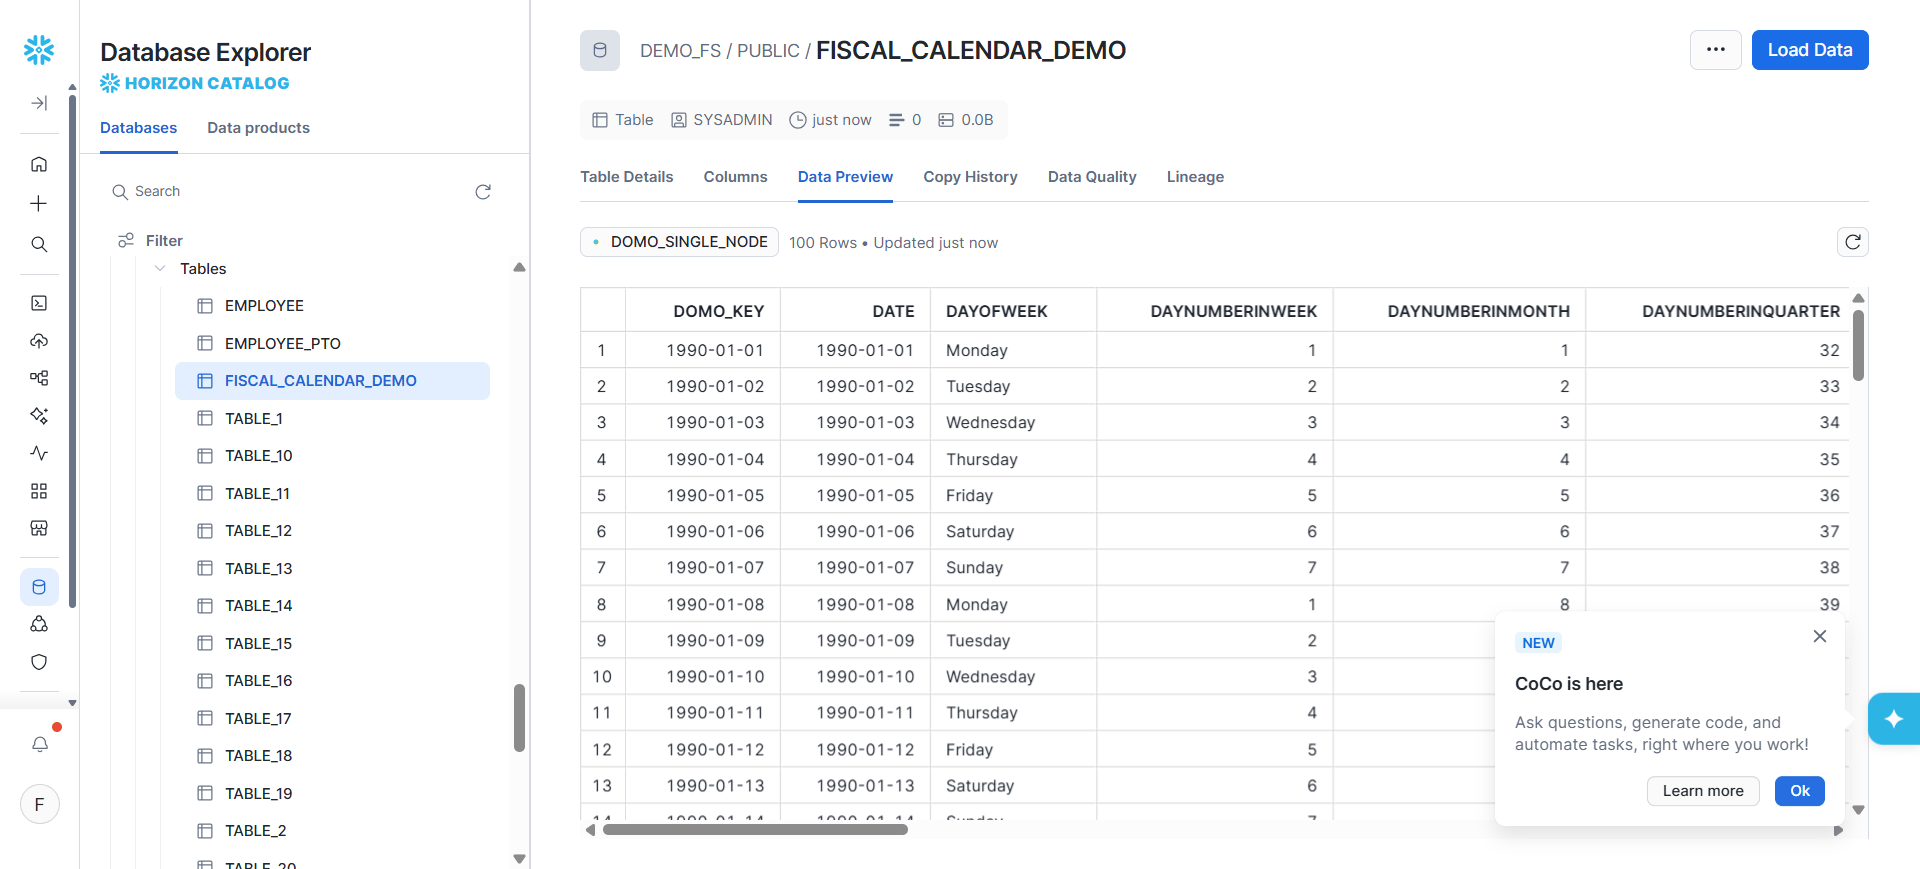
Load the downloaded CSV into a new table in your warehouse, using your warehouse’s standard CSV import process (for example, Snowflake’s Load Data into Table wizard, shown below, or Databricks’ table creation from a file upload).
- Register the table you just created (see Register an Existing Calendar Table).
Register an Existing Calendar Table
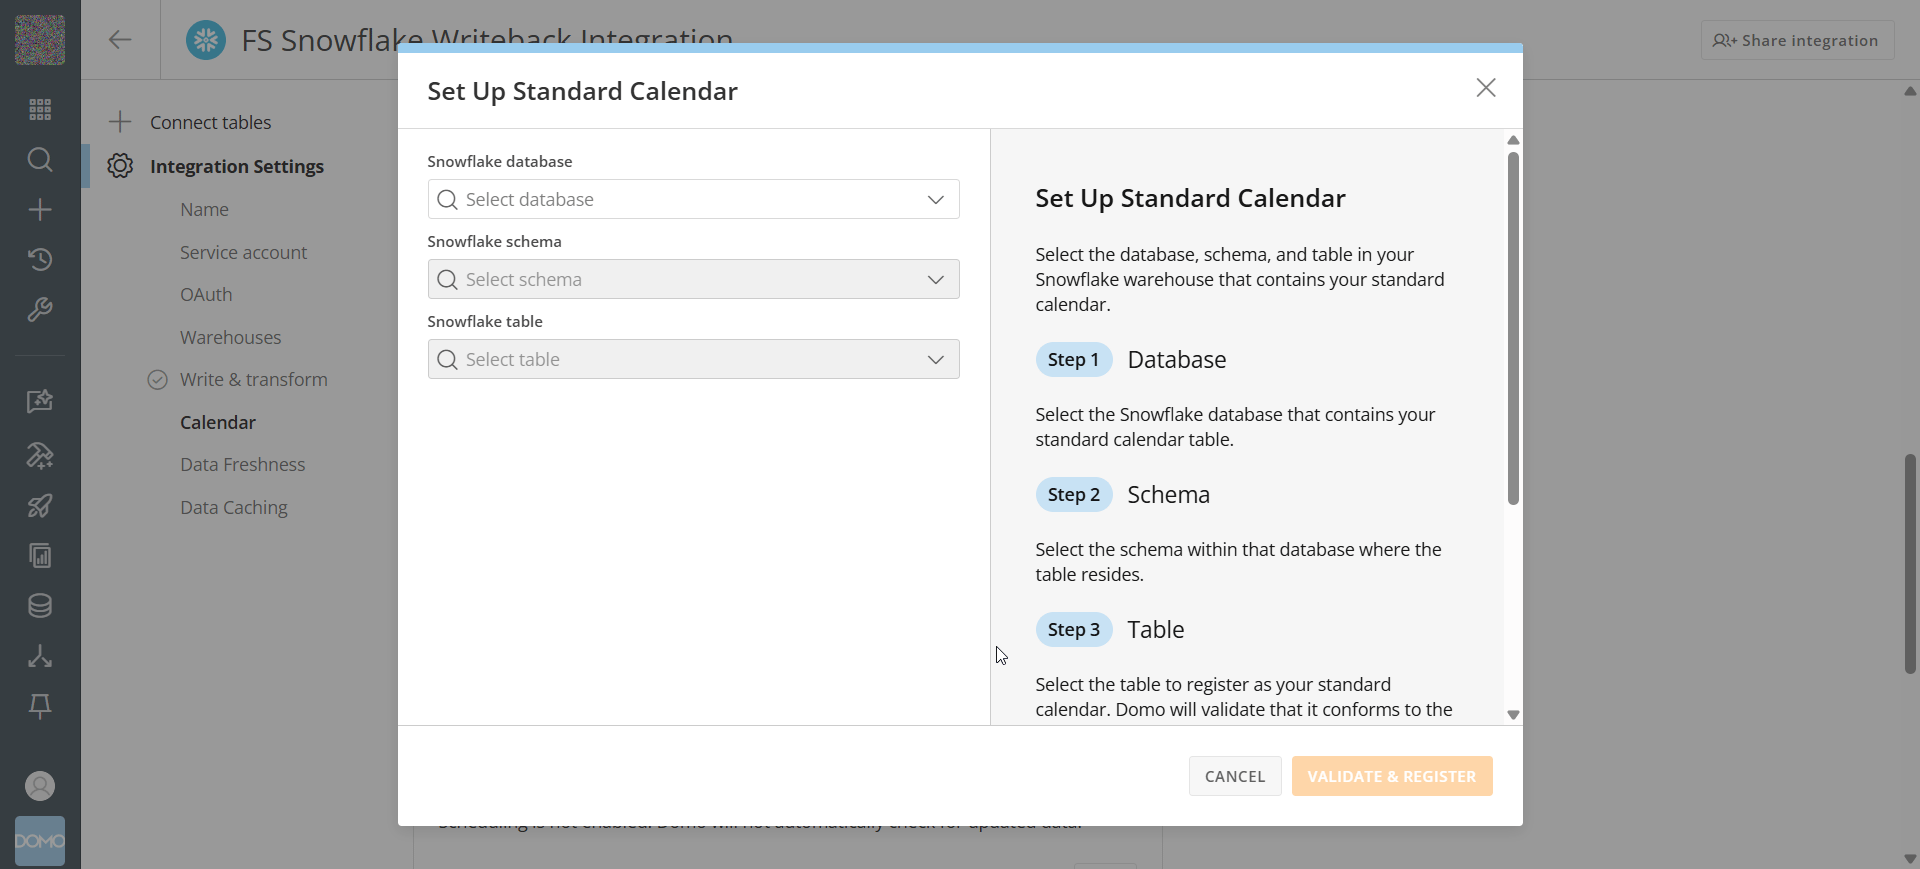
Use this flow if you already have a fiscal or standard calendar table in your warehouse, including one generated in the previous section.- In the Calendar section, select Set up fiscal calendar or Set up standard calendar, depending on which you’re registering. A menu opens.
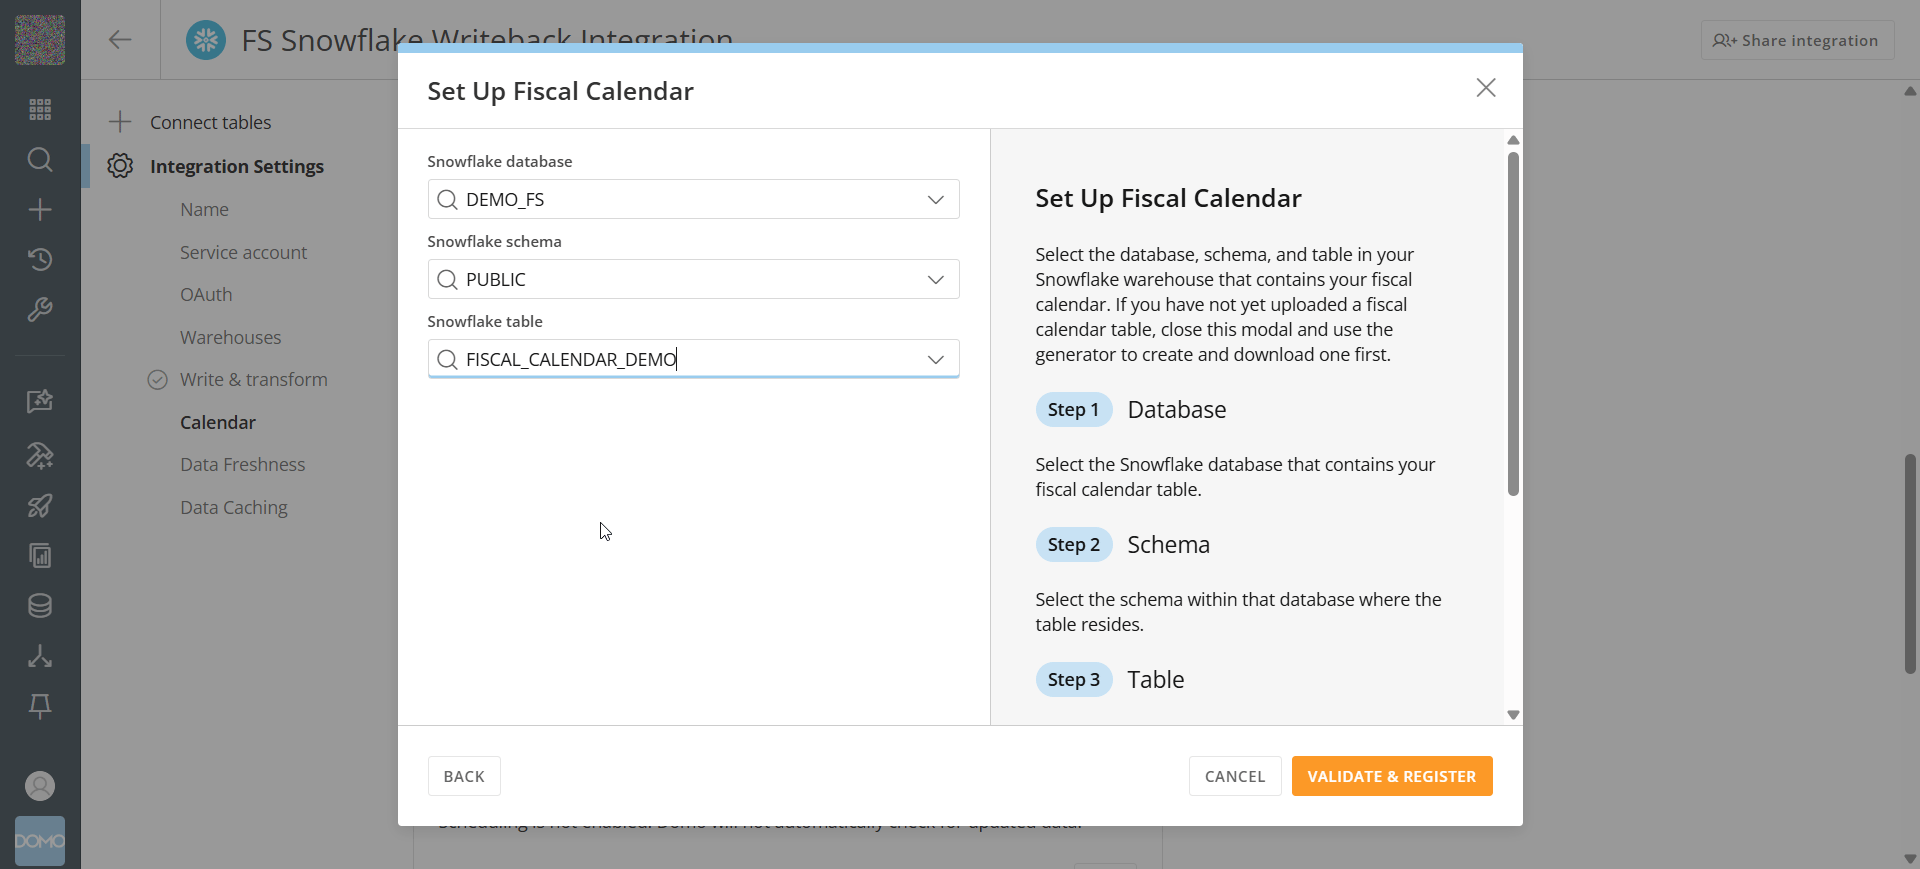
- Select Set up an existing calendar. The database, schema, and table pickers appear.
-
Select the database, schema, and table that contain your calendar.
-
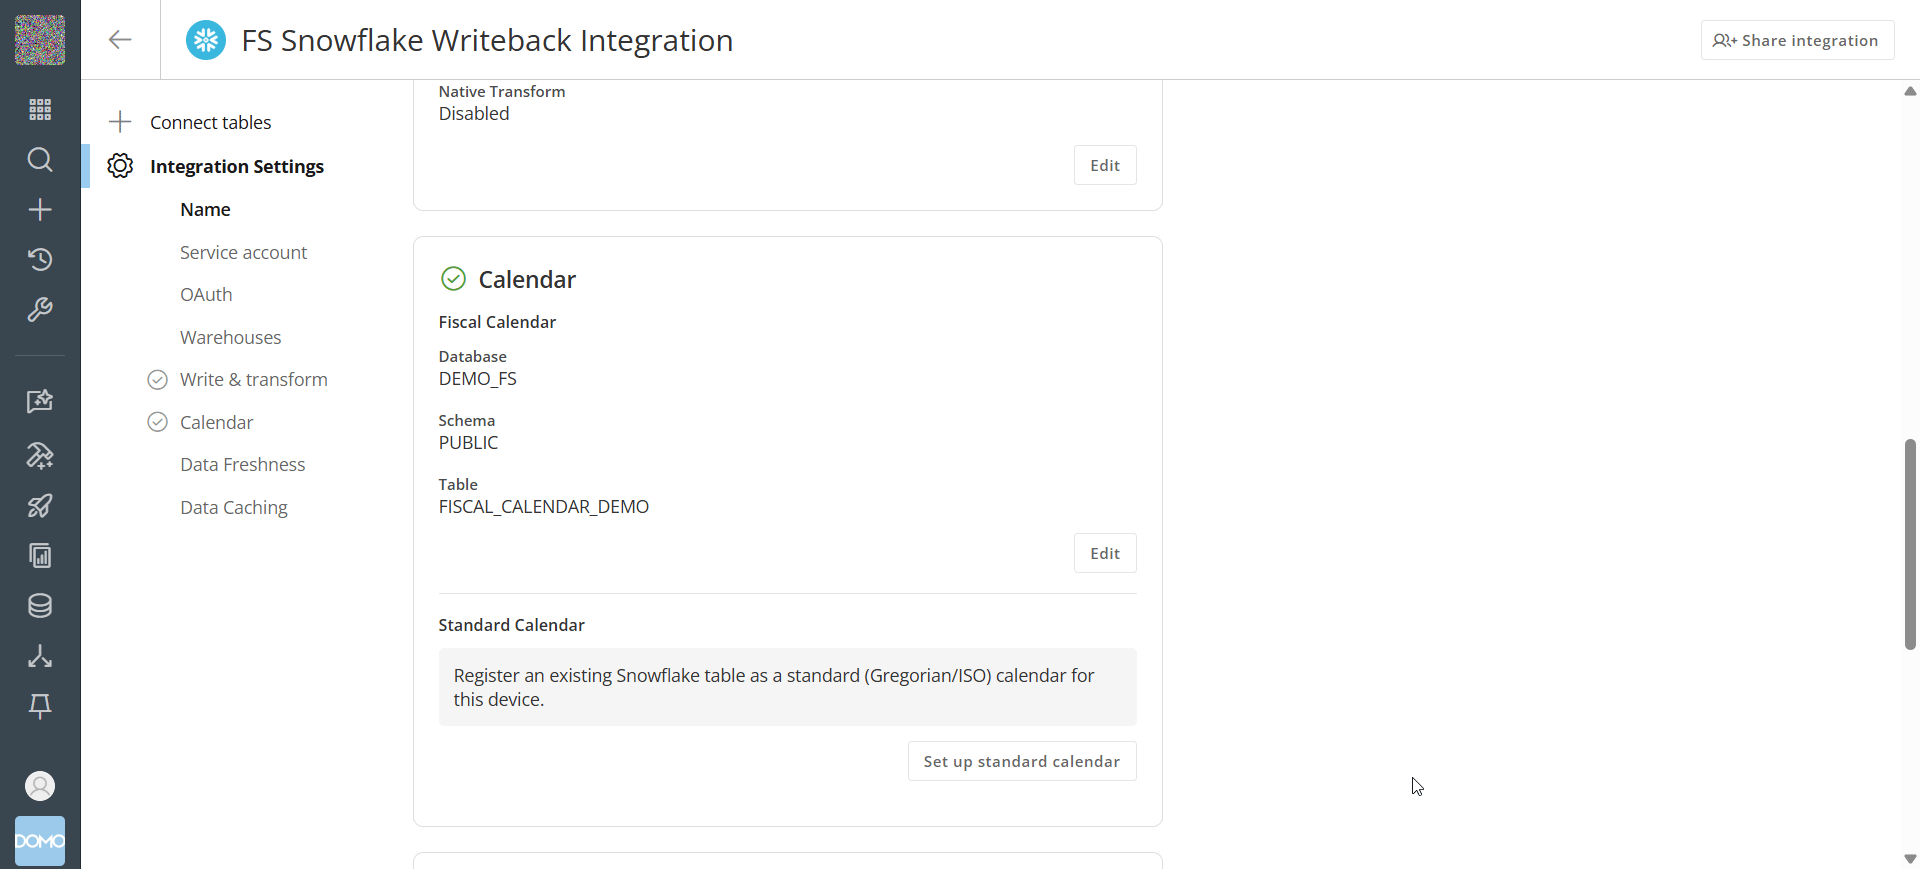
Select Validate & Register. Domo checks that the table has all 25 required columns with the correct names and types, then registers it.
Edit, Update, or Disable a Registered Calendar
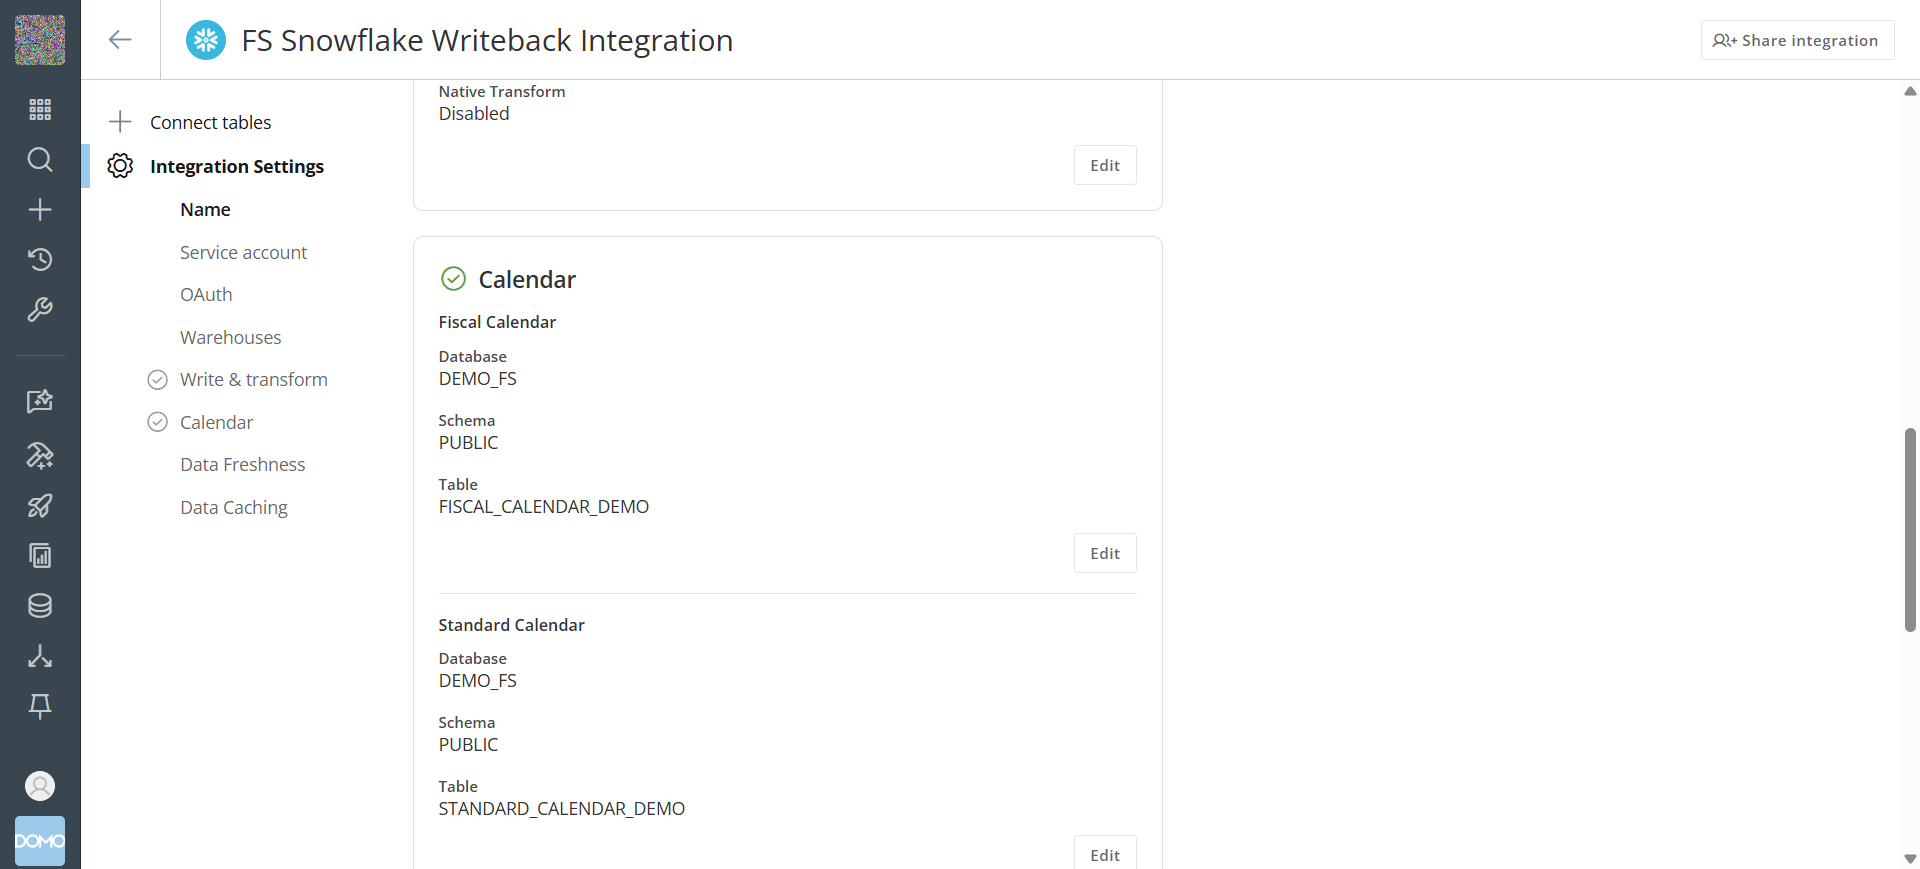
After you register a calendar, its section in the integration settings shows the registered database, schema, and table, with an Edit option. To change which table a calendar points to:- Select Edit next to the registered calendar.
-
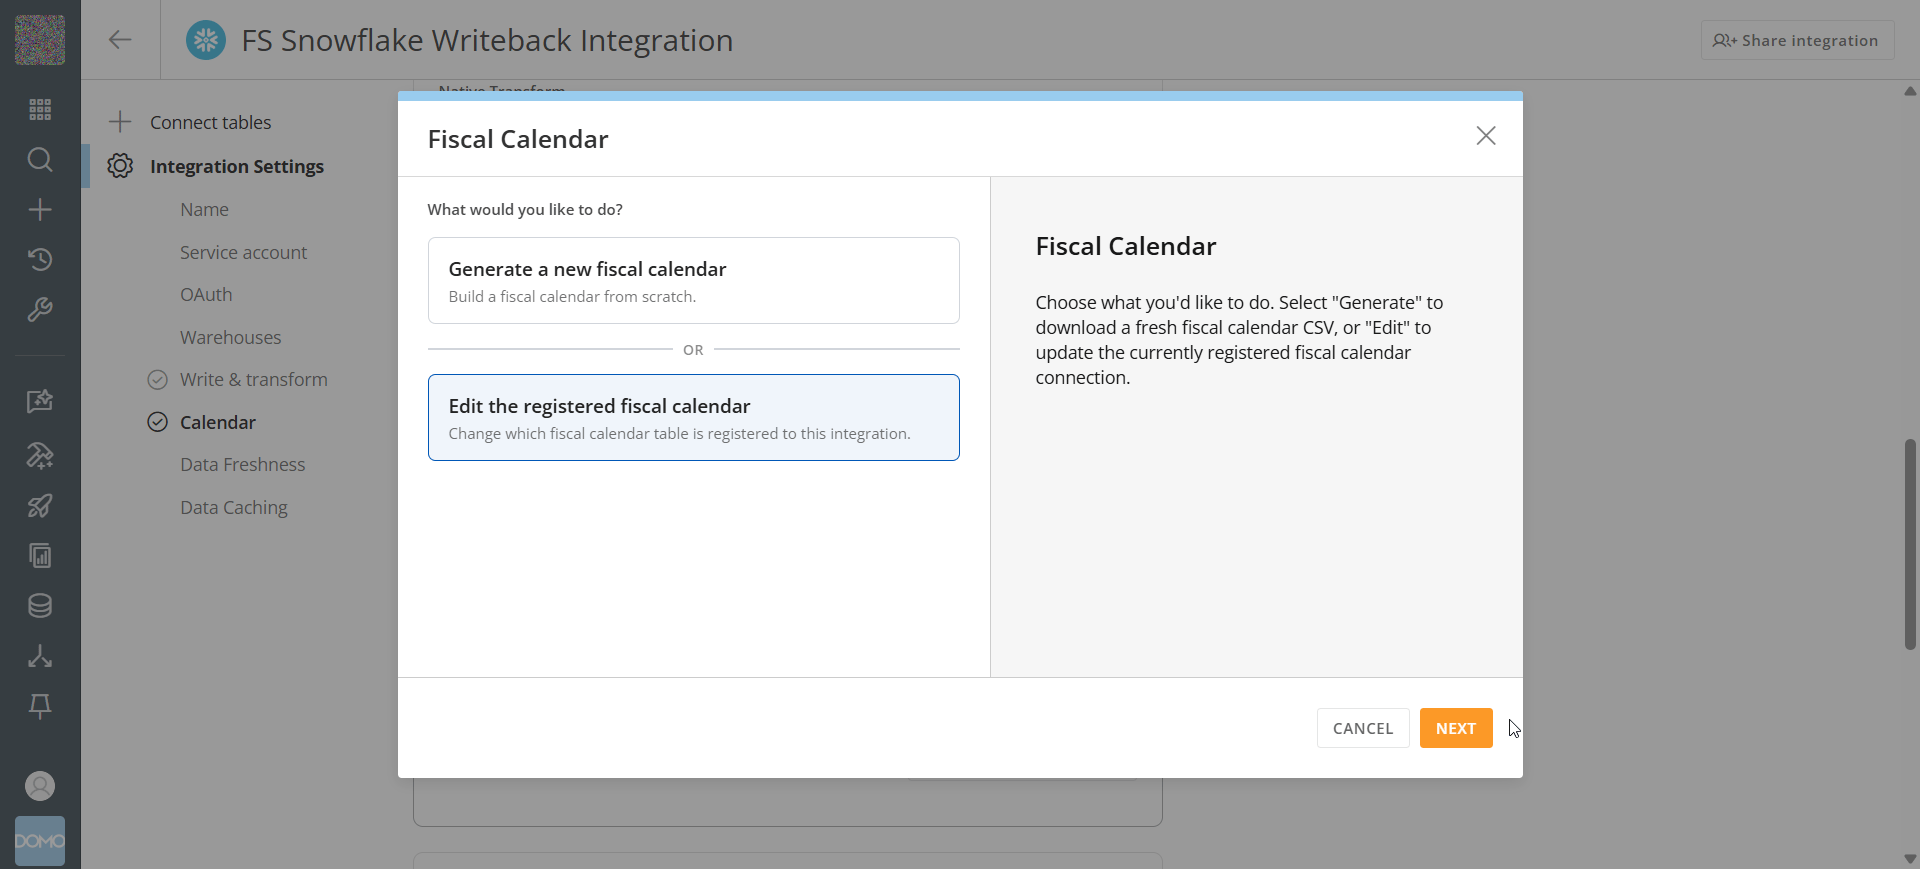
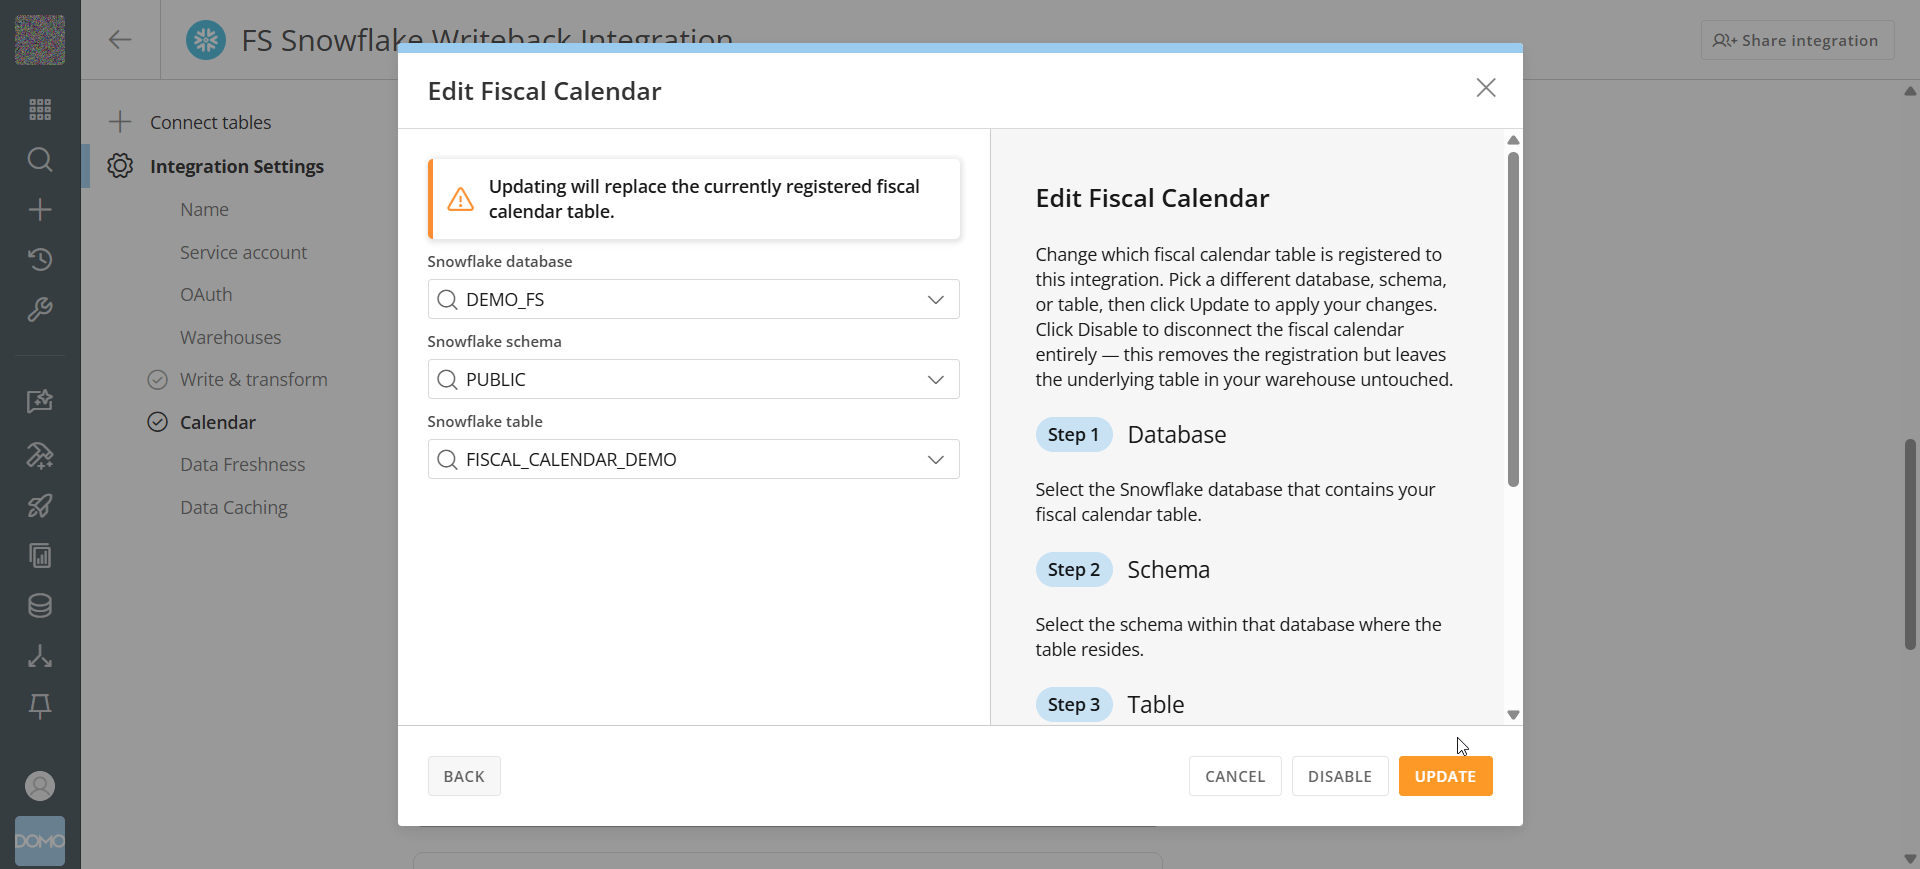
Select a different table. If you’re editing a Fiscal Calendar and don’t already have a replacement, you can instead select Generate a new fiscal calendar to build one from scratch (Standard Calendars don’t have a generate option — select a different existing table).
-
Select Update. Domo replaces the currently registered table; it does not affect the underlying table in your warehouse.
FAQ
Why don't I see a Calendar option in my integration settings?
Why don't I see a Calendar option in my integration settings?
This feature is currently available only for Snowflake and Databricks Cloud Integrations. If your integration uses a different engine (for example, BigQuery or Redshift), the Calendar section won’t appear yet.
Can I register more than one fiscal calendar on the same integration?
Can I register more than one fiscal calendar on the same integration?
No. Each integration supports one Fiscal Calendar and one Standard Calendar at a time. You can register both together, but not multiple calendars of the same type.
Do I need to translate the column names in my calendar table for a localized Standard Calendar?
Do I need to translate the column names in my calendar table for a localized Standard Calendar?
No. Column names must always be in English, matching the 25-column schema. Only the row values you want displayed to users (month names, day names, and so on) need to be in the target language.