

Required Grants
To use the AI Library feature, the following grants must be enabled for your role:- Use AI Services — Access to features and Apps built using the AI Services Layer.
- Use AI Chat — Access to the Domo AI Assistant.
- Use MCP — Access to connect external AI tools to Domo’s MCP Server.
Prerequisites
- Access to the Amazon Quick web console with permission to create connectors for your team.
-
The Domo Basic MCP server endpoint from the AI Library:
Connect Amazon Quick Suite (Web) Using OAuth
This is the recommended way to connect Amazon Quick Suite to Domo. Use the Client ID/Secret setup only if your Amazon Quick environment doesn’t offer a default OAuth app.- Log in to the Amazon Quick web console.
-
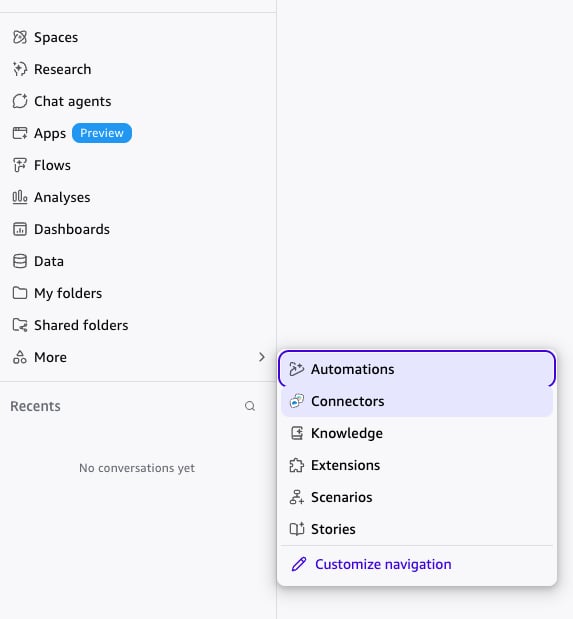
In the left navigation, select More, then select Connectors.
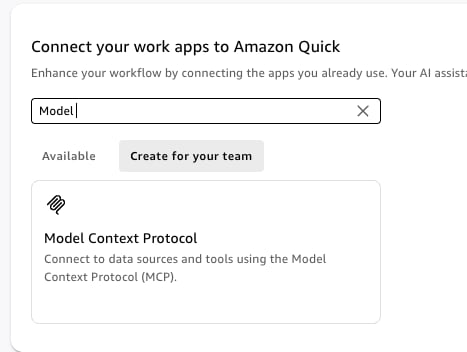
- Select Create for your team.
-
Search for Model Context Protocol and select it from the results.
-
Give the MCP server a Name, Description, and MCP server endpoint:
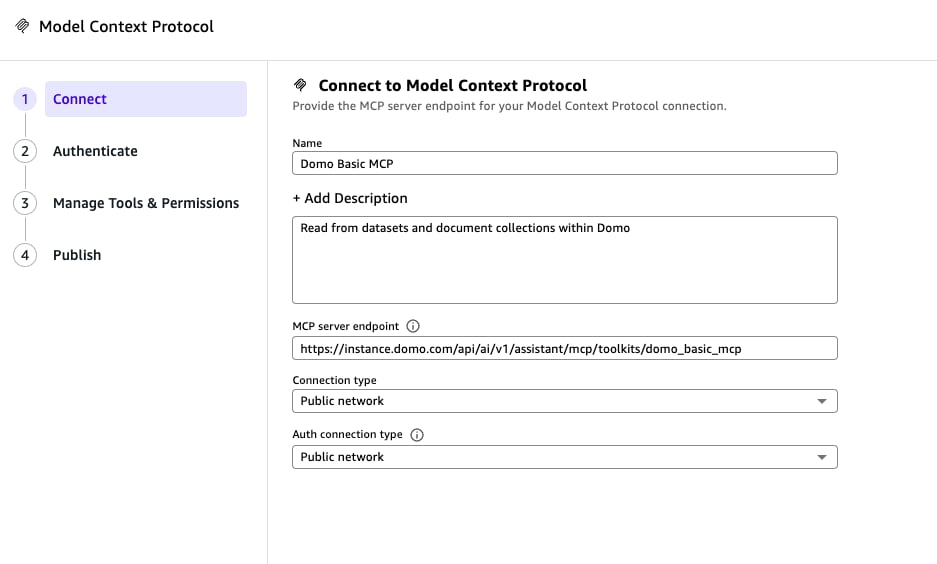
- Name — A name for the connector, such as
Domo Basic MCP. - Description — An optional description, such as
Read from datasets and document collections within Domo. - MCP server endpoint —
https://<instance>.domo.com/api/ai/v1/assistant/mcp/toolkits/domo_basic_mcp - Connection type — Public network
- Auth connection type — Public network
- Name — A name for the connector, such as
- Select Next.
-
On the Authenticate step, leave Auth configuration set to Default OAuth app. No changes are needed.
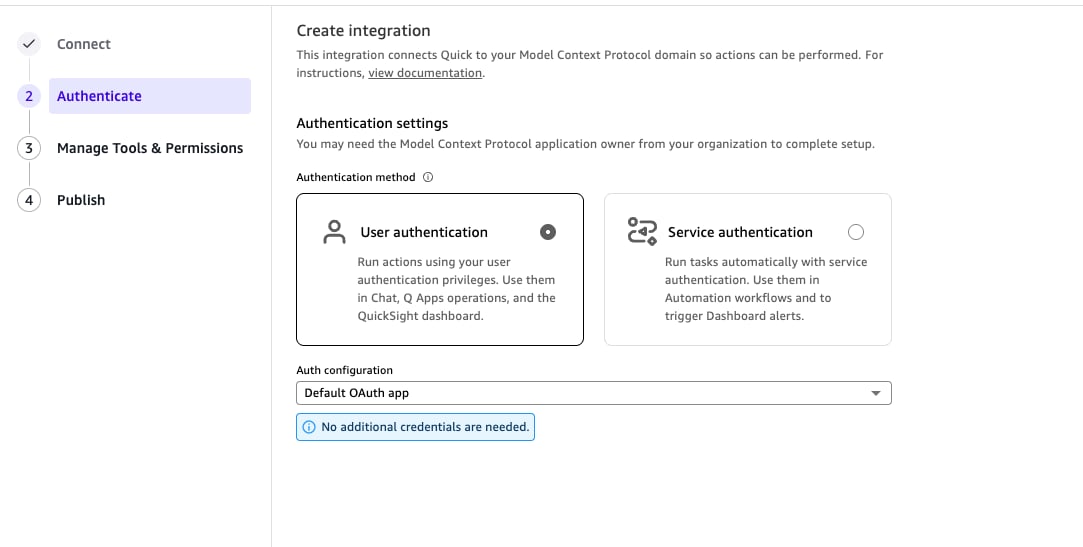
- Select Create and continue.
-
A pop-up displays asking you to allow Amazon Quick Suite MCP Client access to Domo. Select Allow.
 Note: If you don’t get a pop-up, make sure your browser isn’t blocking pop-ups for the Amazon Quick domain.
 -
Select Next and continue through the remaining steps.
Note: On the Manage Tools & Permissions step, the
domo_basic_mcpserver doesn’t currently expose any write tools, so this step may not populate. This can change in the future. - Select Publish & test.
Connect with a Client ID and Secret (Fallback)
Use this method only if Default OAuth app isn’t available as an Auth configuration option.- Follow steps 1 through 6 of the OAuth setup to create the connector and reach the Authenticate step.
- Select the Auth configuration dropdown and change it to Custom user based OAuth.
- At the bottom of the screen, note the Redirect URL. You need this for the next steps, which are performed outside of Amazon Quick.
- In Domo, generate an access token. See Self-Serve Access Token Creation (Beta) for instructions, then copy and save the token.
-
Open a terminal and run the following curl command, replacing
<customer>with your Domo domain and<token>with the access token you generated:Note: Update theredirect_urisvalue to the Redirect URL from Amazon Quick if it differs from the example above. -
The response includes a
client_idandclient_secret. Copy both values. -
Return to Amazon Quick and complete the Custom user based OAuth fields:
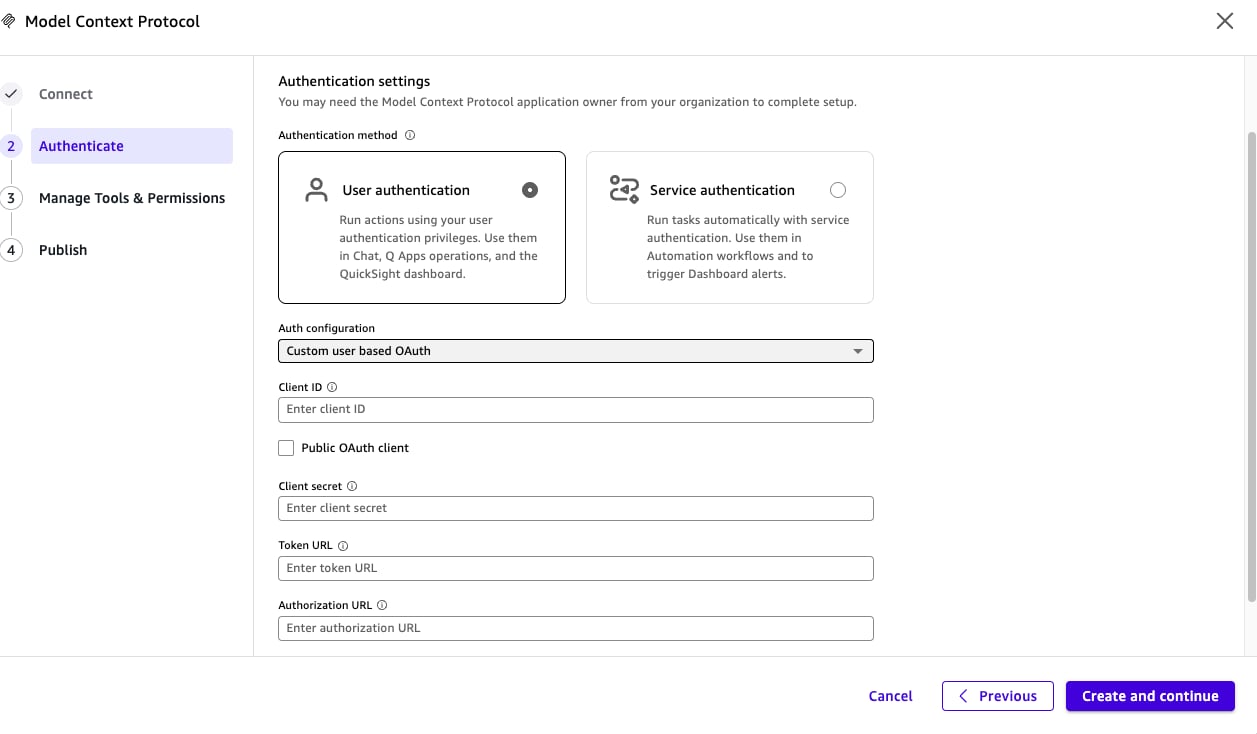
- Client ID — From the curl response.
- Public OAuth client — Leave unchecked.
- Client secret — From the curl response.
- Token URL —
https://<instance>.domo.com/oauth2/token - Authorization URL —
https://<instance>.domo.com/oauth2/authorize
- Select Create and continue and continue through the remaining screens.
Set Up the Desktop App
- Set up the connector in the Amazon Quick web console first. See Connect Amazon Quick Suite (Web) Using OAuth.
- Make sure the connector setup in the Amazon Quick web console and the desktop app use the same AWS region.
Troubleshoot
If Auth configuration only offers Custom user based OAuth and not Default OAuth app:- Double-check that the MCP server endpoint is correct.
- Double-check that you aren’t blocking requests from Amazon Quick to Domo. Amazon Quick has domain and IP exclusion/inclusion settings that can block these requests.