

Intro
This article explains how to create a Workspace, add content, organize it with folders and pins, search within a Workspace, and share a Workspace with your team.Required Grants
To access Workspaces, the following grants must be enabled for your role:- Create Workspaces — Create new Workspaces. This grant implicitly includes Edit Workspaces.
- Edit Workspaces — Edit and delete Workspaces, subject to your role on each one. Does not let you create new Workspaces.
Note: Viewing a Workspace that someone has shared with you does not
require the Create Workspaces or Edit Workspaces grant. If the option
to create a Workspace is missing or grayed out, ask your Domo admin whether
your security role includes Create Workspaces.
Find Your Workspaces
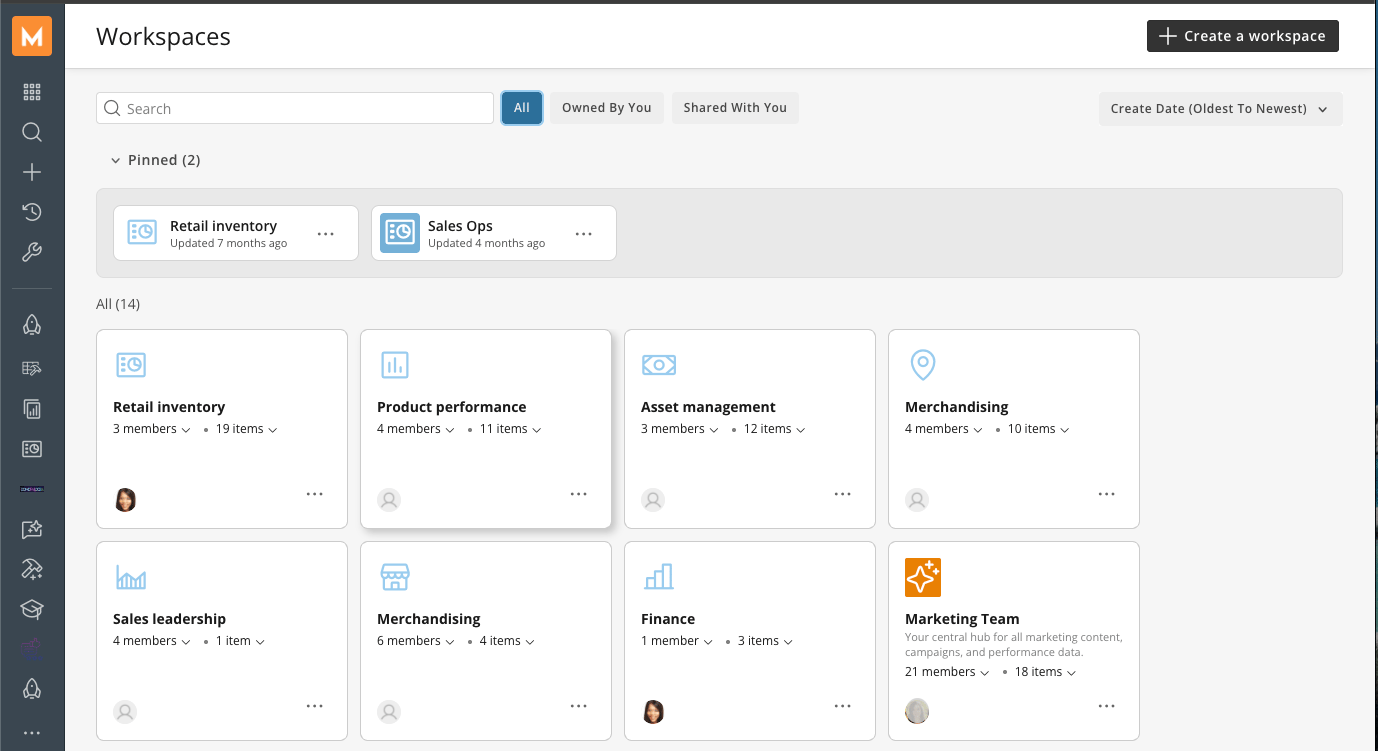
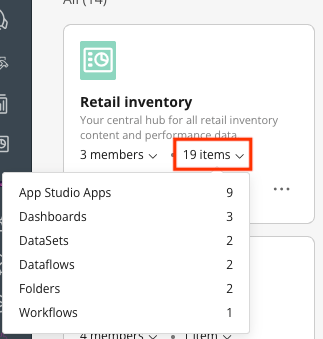
To find or create a Workspace, go to the left navigation and select Teams > Workspaces.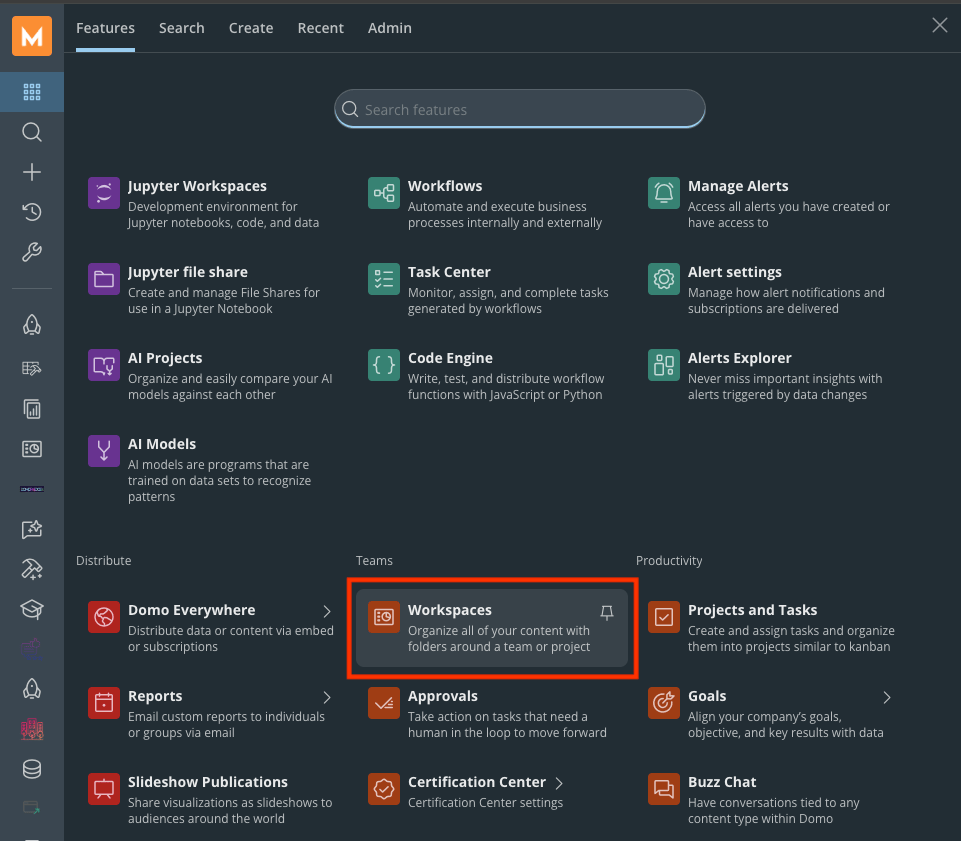
Use the More Options Menu
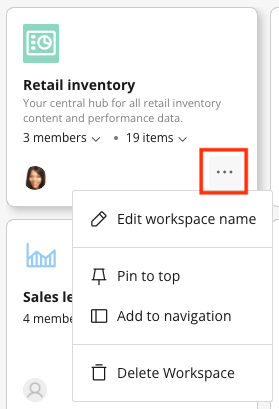
Select the more options menu (the three-dot icon) on a Workspace tile to access the following actions:- Edit Workspace — Change the Workspace’s name, description, icon, icon color, and background color.
- Pin/Unpin — Pin the Workspace to the Pinned section of the Workspaces home page, or remove it from that section.
- Add to Navigation — Add the Workspace to the left navigation bar.
- Delete Workspace — Delete the Workspace. This action cannot be undone. Deleting a Workspace also deletes its folders and subfolders, but does not delete any content that was inside them; that content remains in Domo. Members and groups who had access through the Workspace revert to whatever access they had before the Workspace granted it.
Create a Workspace
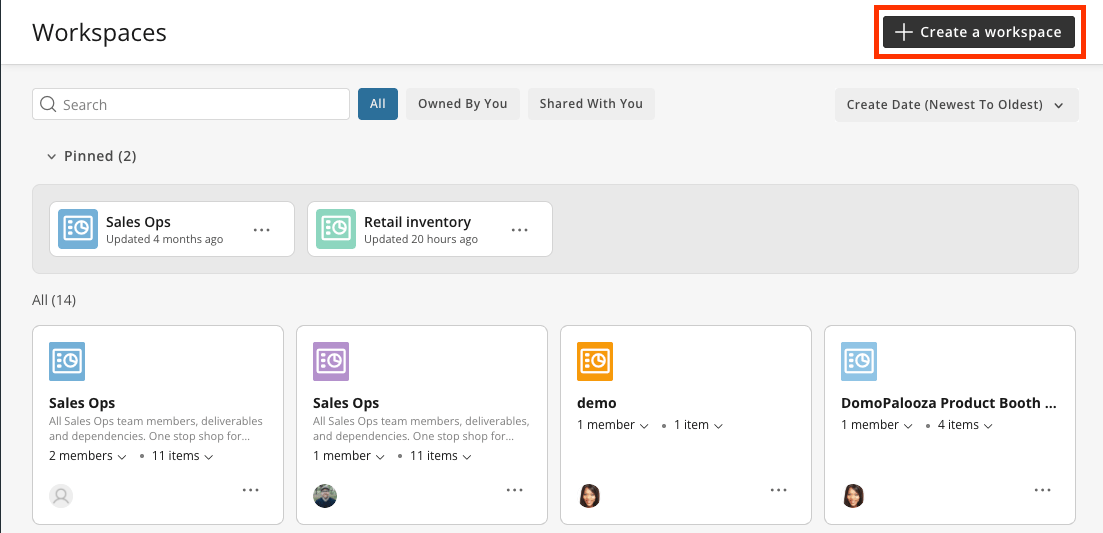
Follow these steps to create a Workspace:- From the left navigation, go to Teams > Workspaces.
- Select Create a Workspace.
The Workspace creation panel opens.
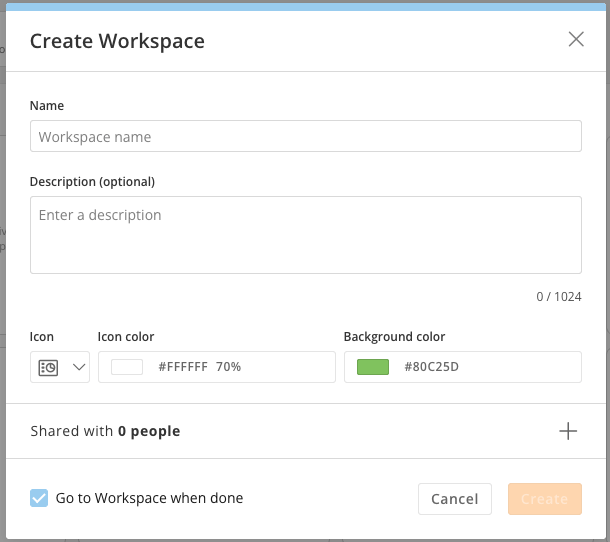
- Enter a specific, descriptive name, such as “Retail Ops—Weekly Reporting,” rather than a generic name such as “Reports.”
- Choose an icon and color. These help distinguish the Workspace on the Workspaces home page and in the mobile app.
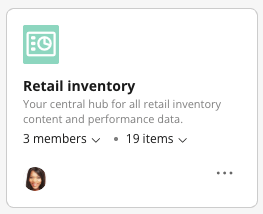
- Add a description of what the Workspace is for and who it’s aimed at. Descriptions are visible to every member and help prevent duplicate Workspaces from being created for the same purpose.
Add Content to a Workspace
There are two ways to add content that already exists to a Workspace, plus a separate way to create new content directly inside it.Add Content from Inside the Workspace
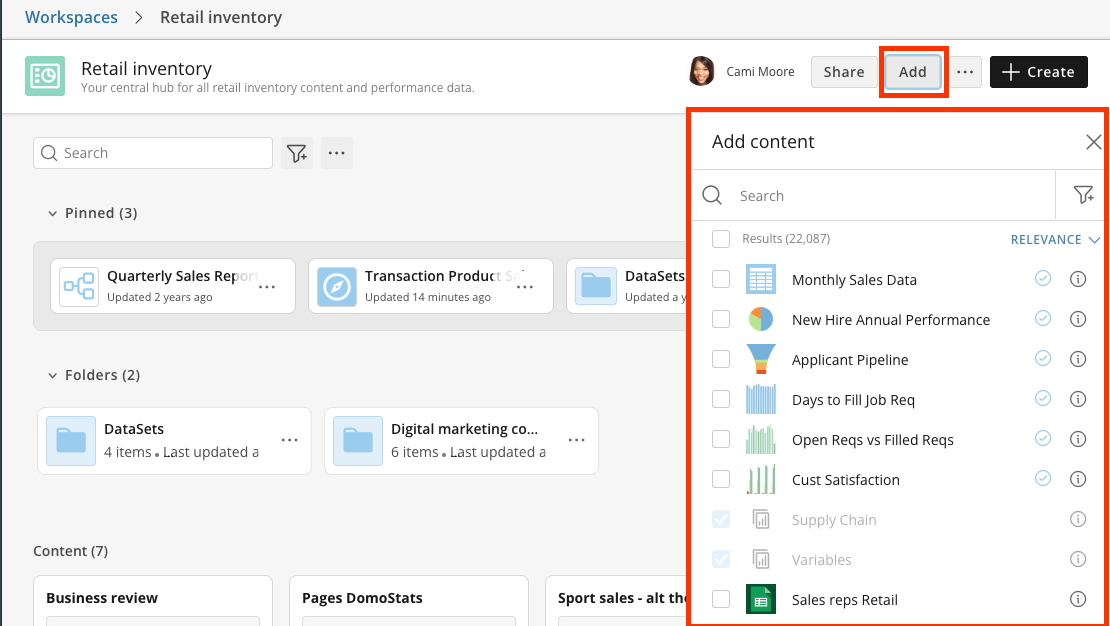
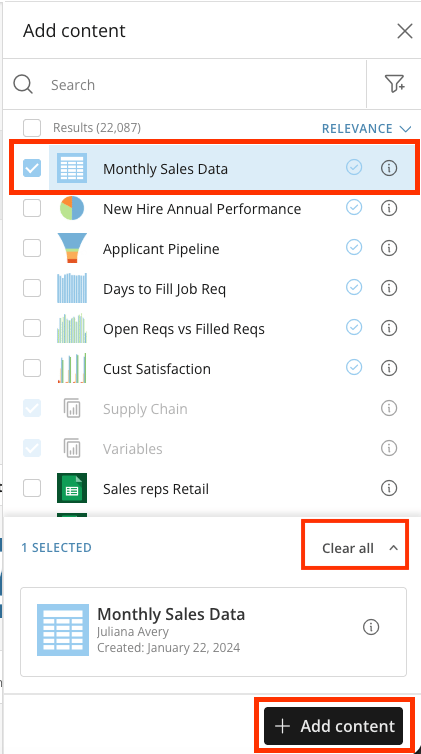
Open the Workspace and select Add. A modal opens listing content you have access to. Use the filter dropdown to narrow the list by content type and the sort dropdown to reorder it, then select everything you want and add it in a single action. This is the more efficient path when you’re setting up a Workspace from scratch and have a batch of content to place.Note: AI agents can be added only from inside the Workspace using Add,
not from an Add to Workspace option on the agent itself.
Add Content from the Content Itself
While viewing a dashboard, card, DataSet, DataFlow, Workflow, or Worksheet, open its more-options menu or wrench menu and select Add to Workspace. Choose the destination Workspace from the list.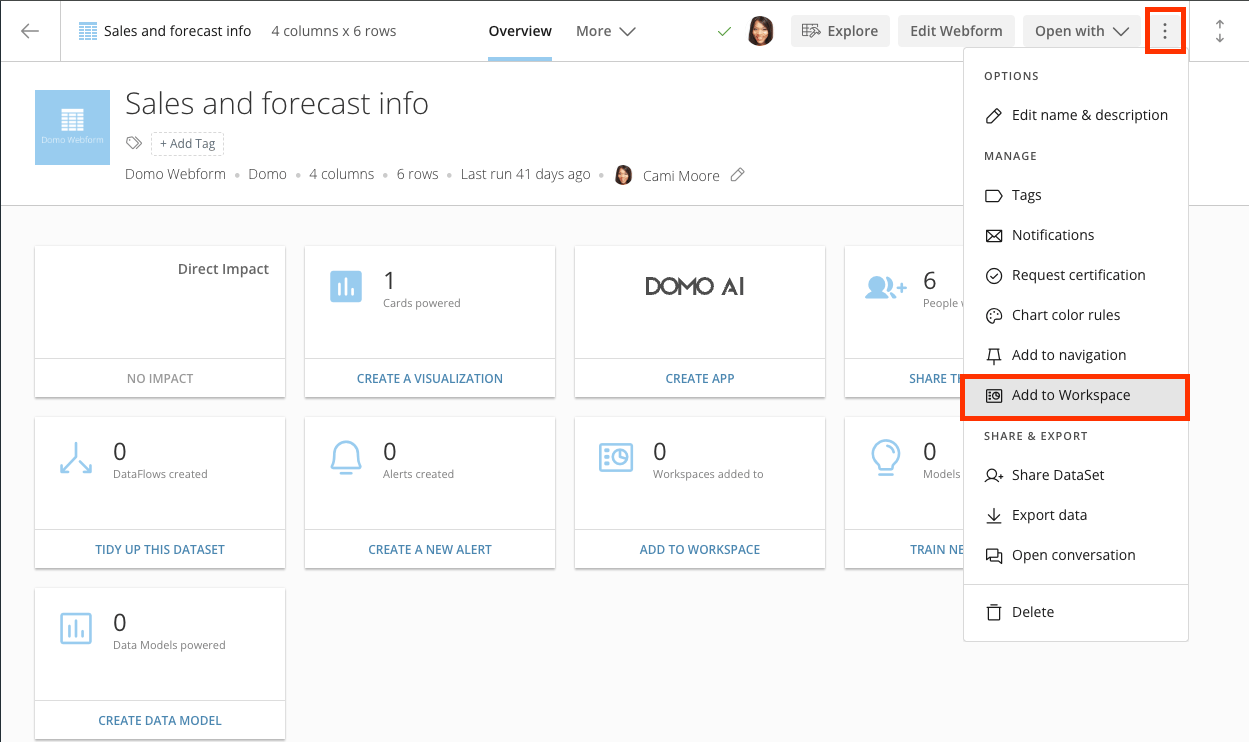
Create Content from Inside the Workspace
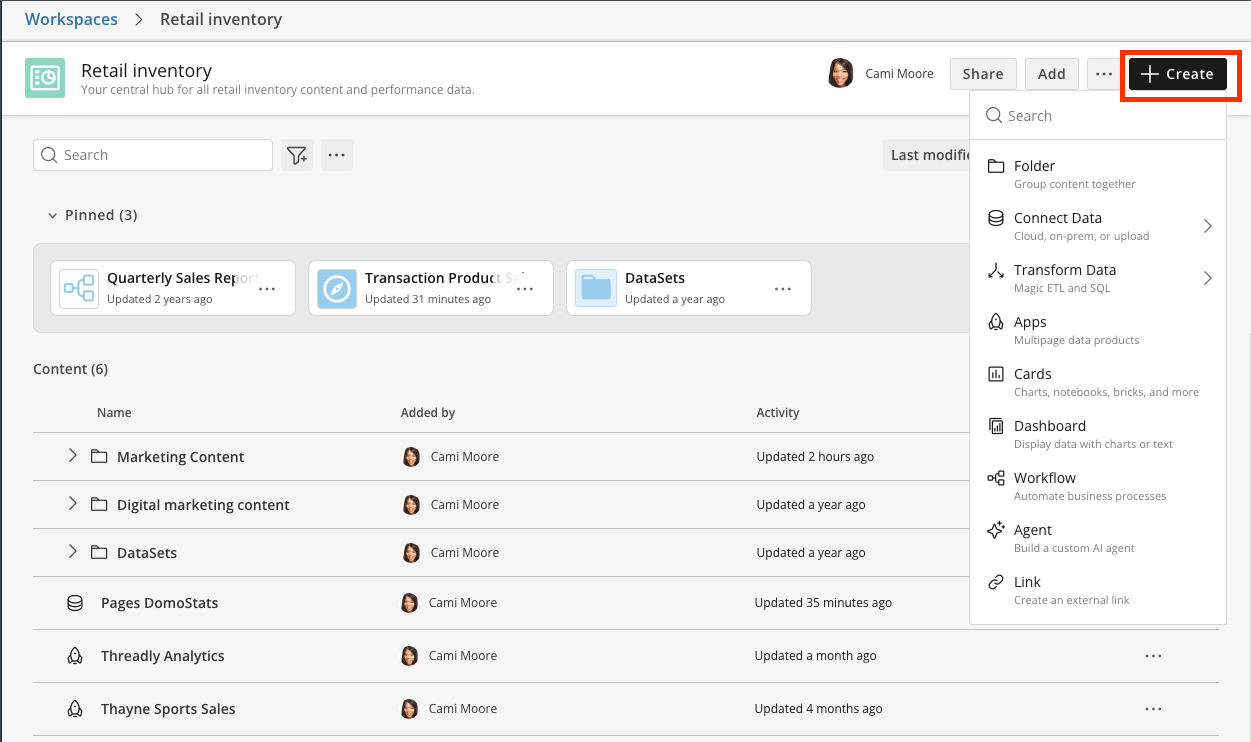
Open the Workspace and select Create. Unlike Add, which brings in content that already exists, Create opens a modal for building new content directly in the Workspace:- Connect data
- Create a Magic ETL DataFlow, App Studio app, card, dashboard, or Workflow
- Build a custom AI agent
- Add a link to external content
Identify Supported Content Types
Note: Content can belong to more than one Workspace at a time, or to none
at all. Adding a dashboard to your team’s Workspace doesn’t remove it from
anywhere else, and removing it from a Workspace doesn’t delete it from Domo.
Organize a Workspace with Folders
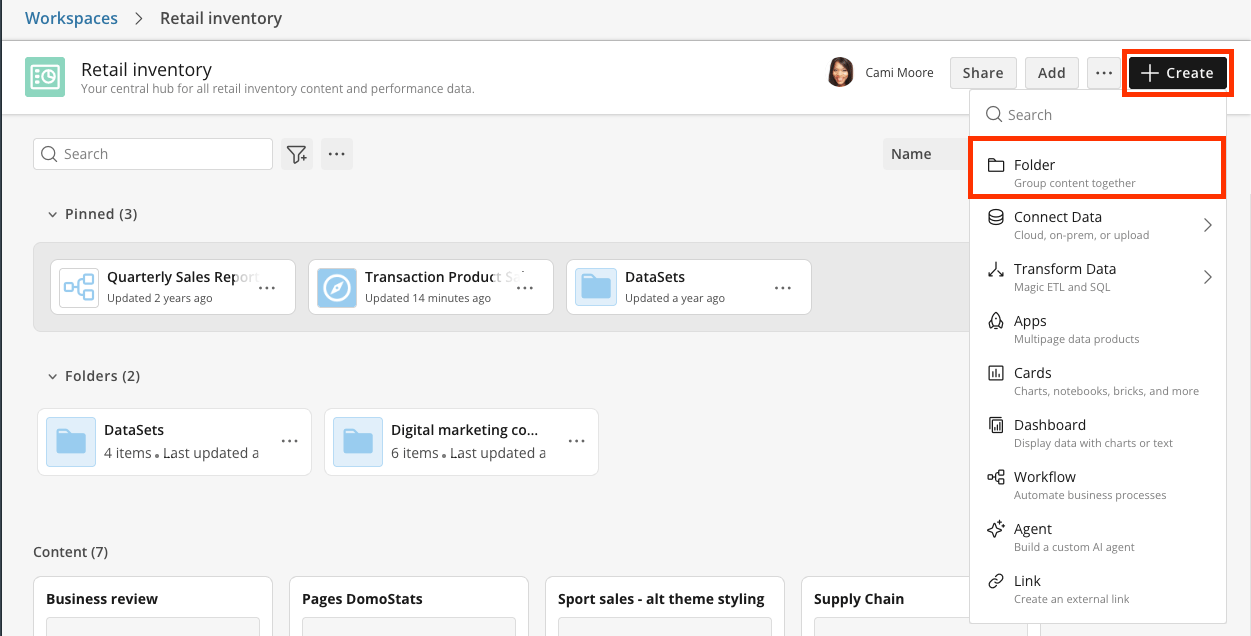
Follow these steps to organize a Workspace with folders:- Inside the Workspace, select Create and choose to add a folder. Folders can be nested into subfolders.
- Add a description to the folder. Folders support descriptions, same as Workspaces, and a clear description helps members understand a folder’s purpose over time, since a name alone may not remain clear.
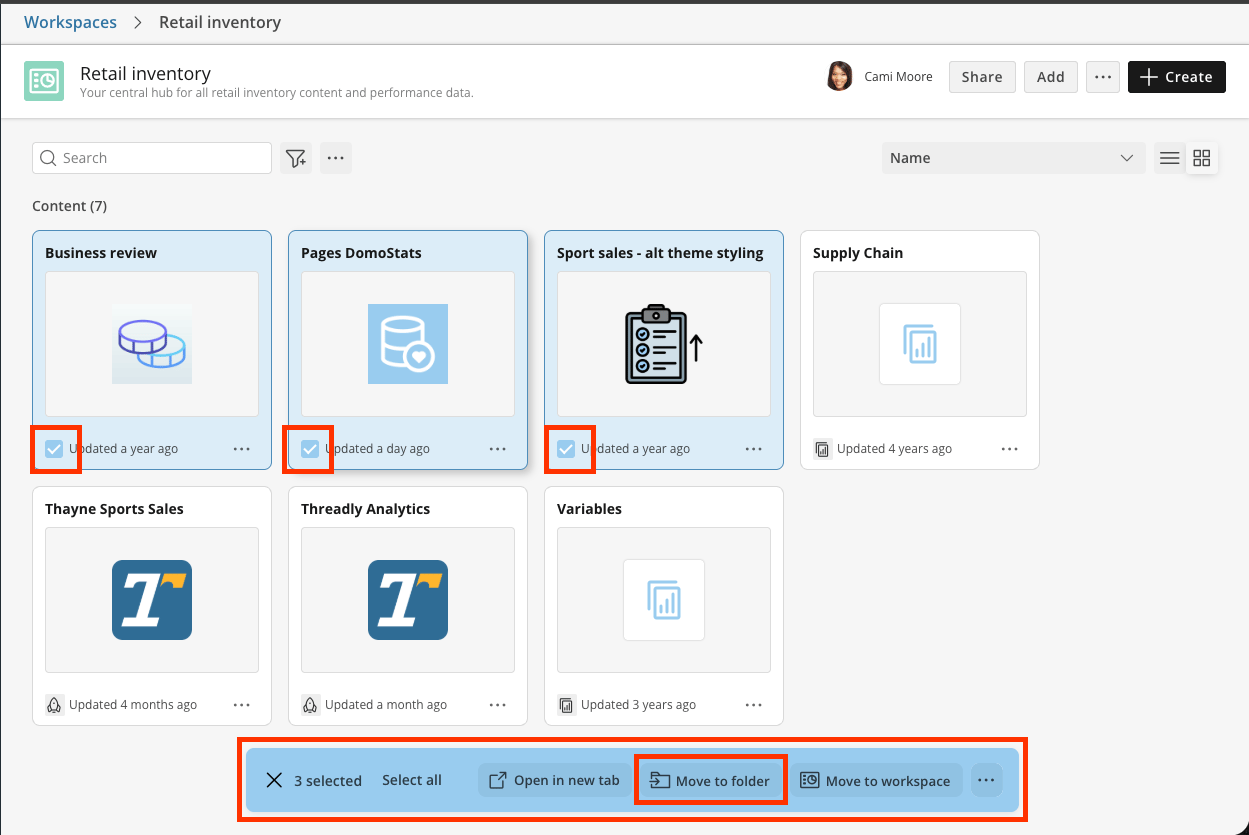
- Select one or more items, then select Move to folder to move them into it. You can multi-select across a Workspace and move a batch in a single action, and you can move content to a folder in a different Workspace the same way. You can also drag items into folders.
Pin the Items That Matter Most
Pin the handful of items your team opens daily and they surface in a Pinned section at the top of the Workspace, above everything else.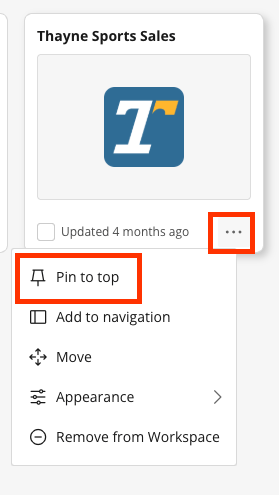
Search a Workspace
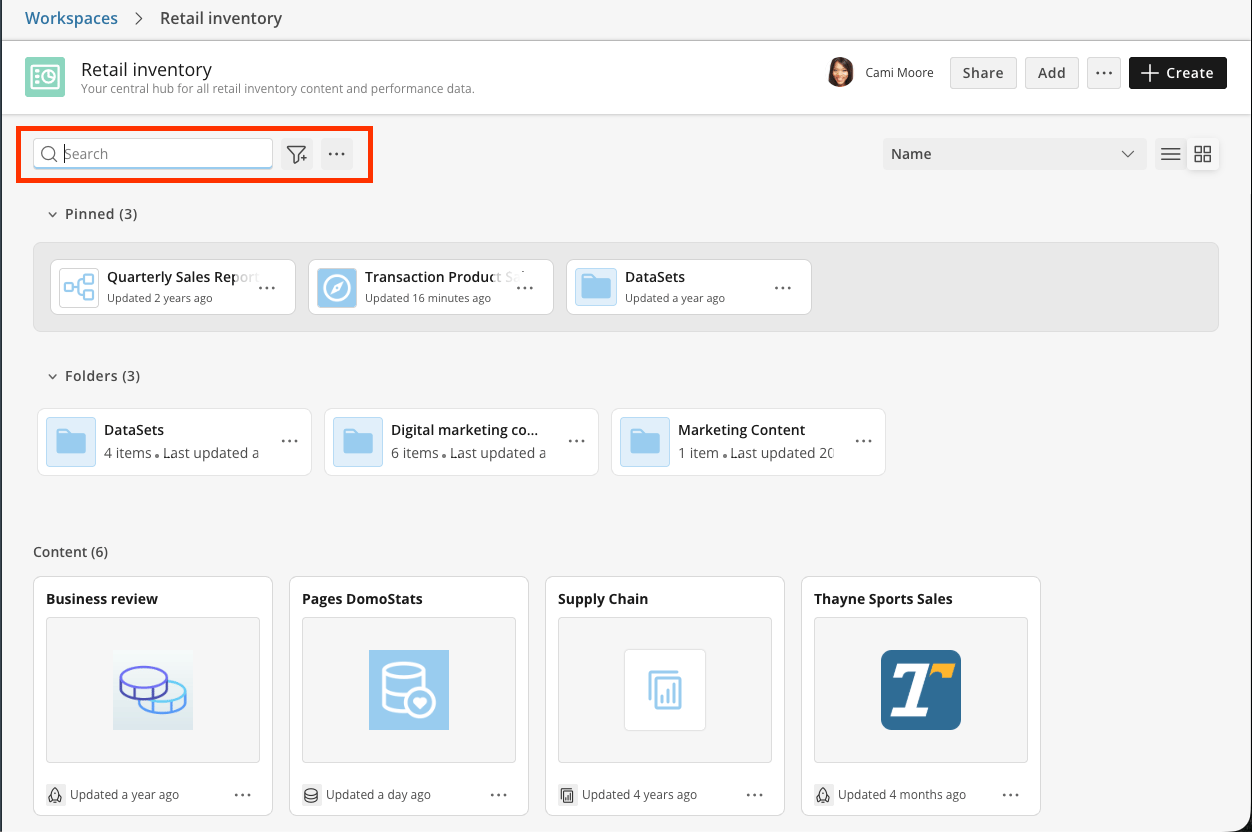
Every Workspace has its own search box, and it’s scoped to where you’re standing:- Searching from the root of a Workspace returns matches from that Workspace and all of its subfolders, however deeply nested.
- Searching from inside a subfolder returns matches only from that folder and its children, not from parent or sibling folders.
Share a Workspace
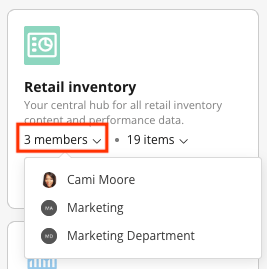
Sharing a Workspace grants access to every item inside it in a single action, rather than requiring each dashboard, app, and DataSet to be shared individually. Open the Workspace, select Share, then add users or groups and assign each one a role.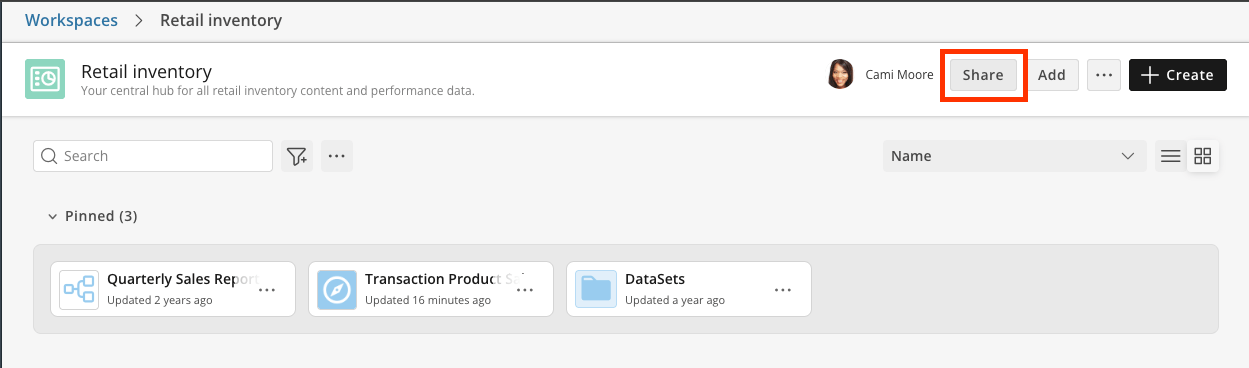
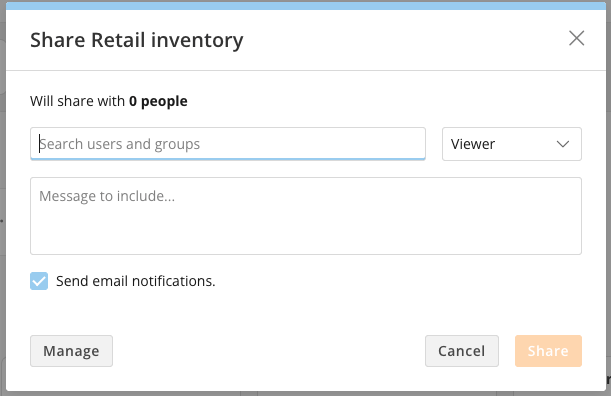
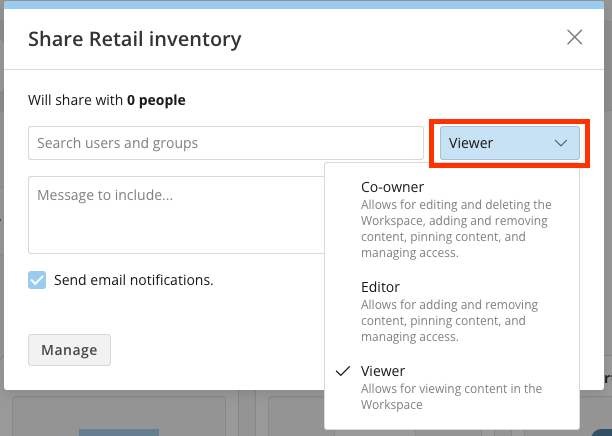
Note: You can share a Workspace with groups as well as individual
users, which is usually the better choice—as people join and leave the group,
their Workspace access follows automatically.
Understand Sharing Grants
Adding someone to a Workspace grants them read access to the content in it, and Domo follows the dependency chain so the content is actually usable:Dashboards
Dashboards
Members get read access to the dashboard, to all cards on it, and to all
DataSets those cards use.
Cards
Cards
Members get read access to the card and to all DataSets the card uses.
DataFlows
DataFlows
Members get read access to the DataFlow and to all of its input and output
DataSets.
Apps (App Studio)
Apps (App Studio)
Members get read access to the app, to the cards in the app, and to the
DataSets those cards use.
AI Agents
AI Agents
Members get read access to the agent and to the resources it depends on: the
DataSets and Documents that form its knowledge, and the Tools, Toolkits, and
Skills it uses.
Note: Workspace membership is a real access path, so it shows up in access
reporting. The People with access count on a DataSet includes users who
reach it through Workspace membership, not just those with a direct share, and
doesn’t double-count anyone who has both.
Request Access to a Workspace
If you open a link to a Workspace you’re not a member of, you can request access from the Workspace owner, the same way you would for an App Studio app.Use Workspaces on Mobile
Workspaces are available in the Domo mobile app, reachable from the app’s menu. You can browse Workspaces, move through folders and subfolders, and open content from your phone, which makes a well-organized Workspace useful for people who mostly consume Domo away from a desk. Mobile is not yet at full parity with the web app: not every content type that can live in a Workspace is available on mobile. Build for the web experience first and treat mobile as the reading surface.Follow Best Practices
Give each Workspace a single, clear owner and at least one Co-owner, so the Workspace continues to have an active owner if someone changes teams. Share with groups rather than individuals wherever your instance has groups that match your teams, since group membership changes automatically update Workspace access. Write descriptions on both the Workspace and its folders. Clear descriptions help prevent duplicate or near-identical Workspaces from being created for the same department. Keep the top level of a Workspace short enough to scan without scrolling, and move detailed content into folders. For example, if your team relies on five dashboards, pin those five and place the remaining content in folders. A Workspace works best as a curated view of current content rather than a long-term archive. Content that hasn’t been opened in six months makes it harder to find useful content; remove it from the Workspace, which leaves the item itself unaffected in Domo.FAQ
Does adding content to a Workspace move or copy it?
Does adding content to a Workspace move or copy it?
Neither. A Workspace references the content. The item stays exactly where it
is in Domo and can appear in any number of Workspaces at once.
If I delete a Workspace, do I delete the content in it?
If I delete a Workspace, do I delete the content in it?
No. Deleting a Workspace removes the Workspace and the access it was granting.
The cards, dashboards, DataSets, and other objects remain in Domo.
Can I put the same item in two Workspaces?
Can I put the same item in two Workspaces?
Yes. This is common and supported—a shared DataSet might reasonably belong to
both the Finance and Operations Workspaces.
How deep can folders be nested?
How deep can folders be nested?
Workspaces support folders and subfolders. Domo does not publish a nesting
limit; in practice, keep the structure shallow enough that content is two or
three clicks away.
Troubleshoot
The Create control is missing, grayed out, or does nothing
The Create control is missing, grayed out, or does nothing
Creating a Workspace is unavailable when your security role doesn’t include
the Create Workspaces grant. Ask your Domo admin to check your role.
Edit Workspaces on its own lets you work in existing Workspaces but not
create new ones.
I can't add content to a Workspace I'm a member of
I can't add content to a Workspace I'm a member of
Adding content requires edit rights on that Workspace—Owner, Co-owner, or
Editor. If you’re a Viewer, ask someone with a higher role to add the content,
or to raise your role.
Add to Workspace is grayed out or returns an error
Add to Workspace is grayed out or returns an error
Adding content requires share permission on that content, not just view
access. If you can’t share the item directly, you can’t add it to a Workspace.
Ask the content owner to share it with you with share rights, or to add it to
the Workspace themselves.
A member can open an app but is asked to request access to cards inside it
A member can open an app but is asked to request access to cards inside it
Access cascades from the specific object you add. Adding an App Studio app
grants access to the cards in it and to their DataSets; adding a single card
from that app grants access only to that card and its DataSets. Start by
confirming which object is actually in the Workspace. If the app itself is in
the Workspace and members are still prompted to request access to cards inside
it, contact Domo Support.
Content I removed is still visible to a member
Content I removed is still visible to a member
Removing content from a Workspace revokes only the access that Workspace was
providing. If the person also has a direct share, group share, or access
through another Workspace containing the same item, they keep it. Check the
item’s sharing settings to see every access path.
I added the same item twice and it behaved oddly
I added the same item twice and it behaved oddly
An item can exist in a Workspace root and in one of its folders at the same
time. Decide on one home for each item and move rather than re-add, so members
don’t have to guess which copy is current.