Intro
In the Workbench application, you can connect to your Domo server; configure settings for creating DataSet Jobs; import and export job files; preview, schedule, validate, and run jobs; etc. This topic discusses the user interface components of Workbench.Interface Overview
The user interface in Workbench 5 is quite simple. A vertical bar on the left side of the screen contains a number of different icons. Each icon provides access to a different tab for creating jobs, seeing job status, configuring security options, etc. Some of these tabs consist of only one pane, while others (such as the More tab shown in the preceding screenshot) contain an additional pane that allows you to navigate between subtabs. You can hide this additional pane for a tab by clicking the
You can use the following table to find out more about the icons in the icon bar and their associated tabs:
Some of these tabs consist of only one pane, while others (such as the More tab shown in the preceding screenshot) contain an additional pane that allows you to navigate between subtabs. You can hide this additional pane for a tab by clicking the
You can use the following table to find out more about the icons in the icon bar and their associated tabs:
| Icon | Name | Description |
|---|---|---|
 | Toggle Menu | Hides/shows the additional navigation pane that appears for certain tabs (such as the Accounts and More tabs). |
 | Home | Opens the Home tab, which shows you the status and success rates for executed jobs. |
 | Accounts | Opens the Accounts tab, in which you can add new accounts, reauthorize or delete accounts, and specify additional account configuration options. |
 | Jobs | Opens the Jobs tab, in which you can add and configure DataSet jobs as well as see information for jobs you have added. |
 | More | Opens the More tab, which provides access to many additional options, such as security settings, a list of registered plugins, import and export options, a log viewer, etc. |
 | Preview Window | Opens the Preview Window tab, which allows you to open previews for any job which you have already previewed from the Jobs tab. A numeral next to the icon indicates that this number of jobs have previews available. |
 | Help | Opens the Help tab, from which you can access various Domo help resources, such as videos, Knowledge Base articles, etc. |
Home Tab
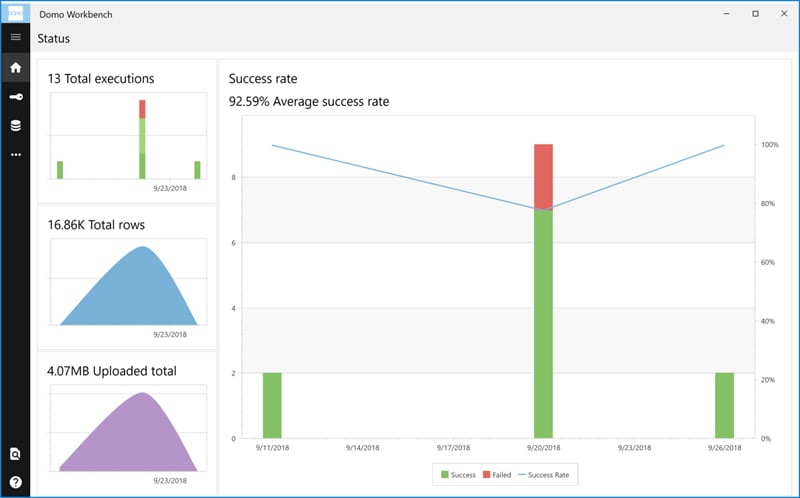
You can access the Home tab by clicking in the icon bar. In this tab, you can view the status for all DataSet jobs you have executed. The tab shows the number of total executions, the number of total rows of data uploaded to Domo, the amount of data uploaded, and the average success rate.
Accounts Tab
You can access the Accounts tab by clicking in the icon bar.
- Add accounts for Domo instances to which you have access by clicking the + button above the accounts list and filling in the requested information.
- View details for different accounts by clicking the desired account name in the list on the left-side pane.
- Change the Job Check Interval for the account (i.e. the time in minutes in which Workbench checks to see if jobs are running).
- Specify whether certificate errors for the account are ignored.
- Reauthorize accounts for which your credentials may have changed.
- Revert back to the previous account settings after you have reauthorized an account (by clicking the
 icon at the top of the screen—only available before you save changes).
 - Delete accounts you no longer need (by clicking the
 icon at the top of the screen).
 - View the agent ID. This is the ID of the Domo user and machine name combination stored in Domo. This is not changeable but may be required by support or engineering teams for troubleshooting.
Jobs Tab
You can access the Jobs tab by clicking in the icon bar.
Jobs List
When you open the Jobs tab, a list of all DataSet jobs you have added appears in the pane on the left side of the window, whether they have been executed or not. Each job in the list has an icon that shows you the status of that job. Icons are as follows:| Icon | Description |
|---|---|
 | Changes have been made to the job configuration that have not been saved. |
 | The job is saved, but no preview has been opened. |
 | The job is saved and a preview has been run. |
 For any job, you can view all of the following information:
- The status of the job (“Ready,” “Running,” “Disabled,” or “Error”).
- The Domo domain (account) the job is associated with. When the job is executed, the resulting DataSet is sent to this Domo domain.
- The name of the job. You can rename a job by double-clicking the row for the job then giving the job a new name in the Overview subtab.
- The DataSet type. The type of DataSet that will be pushed to Domo when this job is executed (Excel, JIRA, etc.). You specify the DataSet type for a job when you create that job. Once you create the job, you cannot go back to change the DataSet type.
- The date and time of the last execution of this job.
- The successful/unsuccessful message from when you last executed the job.
- The next scheduled run for the job (which appears blank if you have not set up scheduling for this job; for more information, see Scheduling a Job in Workbench 5).
New Jobs Pane
When you click the ”+” button in the DataSet Jobs pane, a New Jobs pane appears.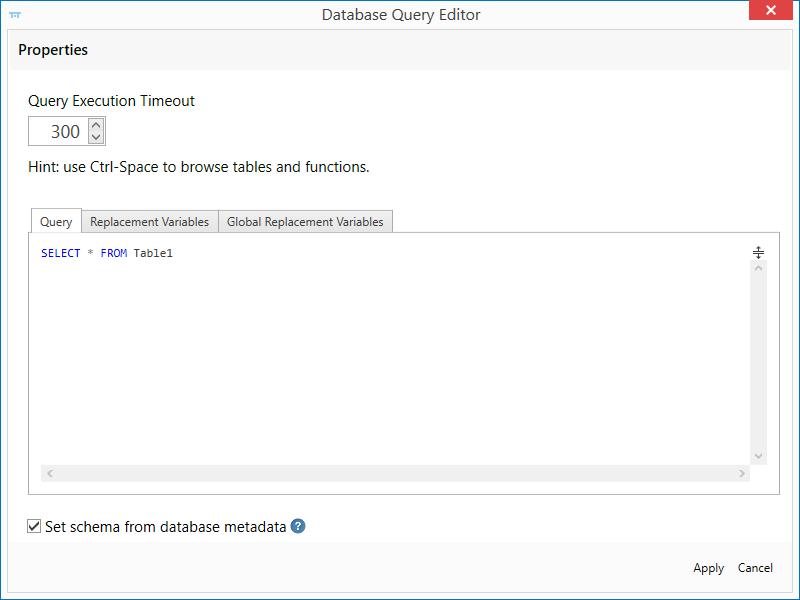 Here you can specify the details for your job, including the following:
Transport Types
Reader Types
Job Configuration Pane
If you double-click a job in the Jobs List pane, a configuration appears with six subtabs: Overview, Configure, Schedule, Schema, Notifications, and History. These subtabs provider various options for configuring your data before sending it to Domo. In all subtabs, the following icons appear in the top right corner: opens a preview of the currently selected job. After you have opened a preview for a job, you can quickly see that preview again by clicking in the icon bar on left side of Workbench then selecting the desired job in the list in the left-hand pane.
 saves the current configuration for the selected job.
- reverts back to the previous configuration for the currently selected job.
 executes the currently selected job (i.e. pushes the data to Domo).
- deletes the currently selected job.
Overview Subtab
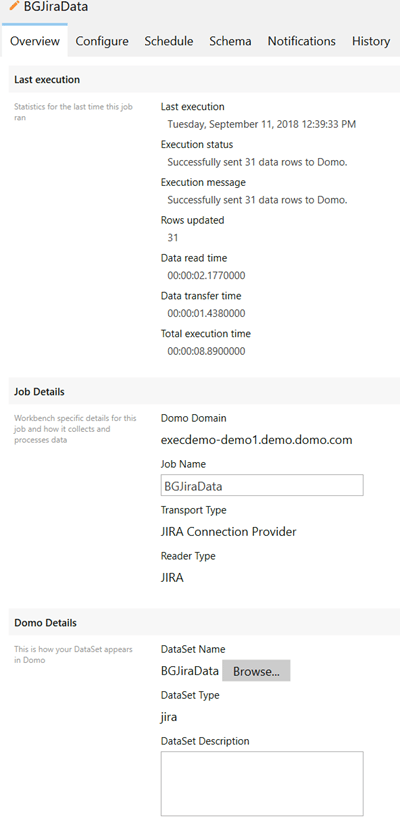
In the Overview subtab for a DataSet job, you can see all of the following data:- Statistics related to the last job execution, such as date and time, status, number of rows updated, etc.
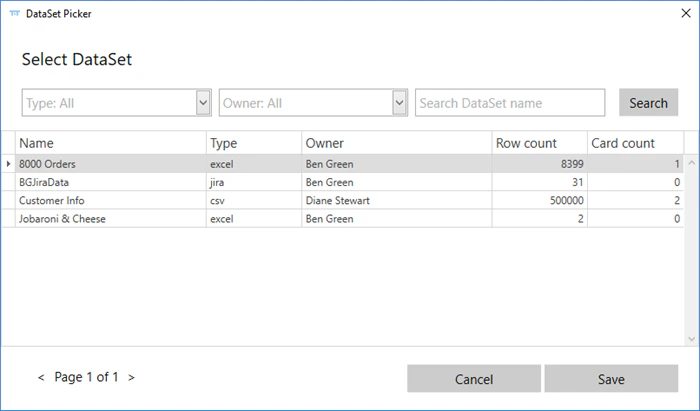
- Details specified for the job when it was initially created, such as the associated domain, job name, transport and reader type, DataSet description, etc. Of these specifications, the only ones you can change in this screen are the name of the job, the DataSet description, and the DataSet to which you are pushing data (as described in the next paragraph). If you want to change the domain, transport/reader type, or DataSet type, you must create a new job with these changes.
Configuration Subtab
In the Configuration subtab for a DataSet job, you can configure various options for your job.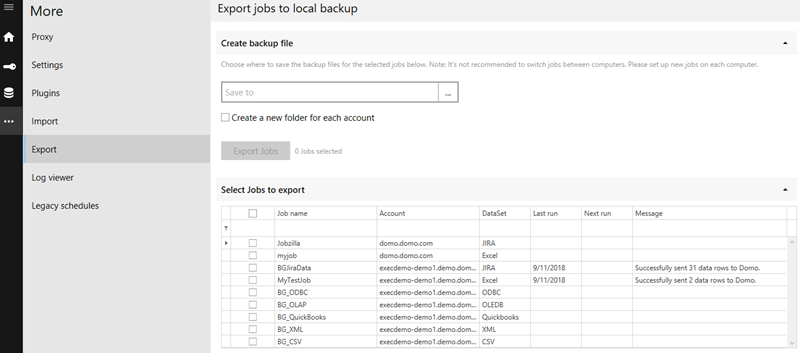
Scheduling Subtab
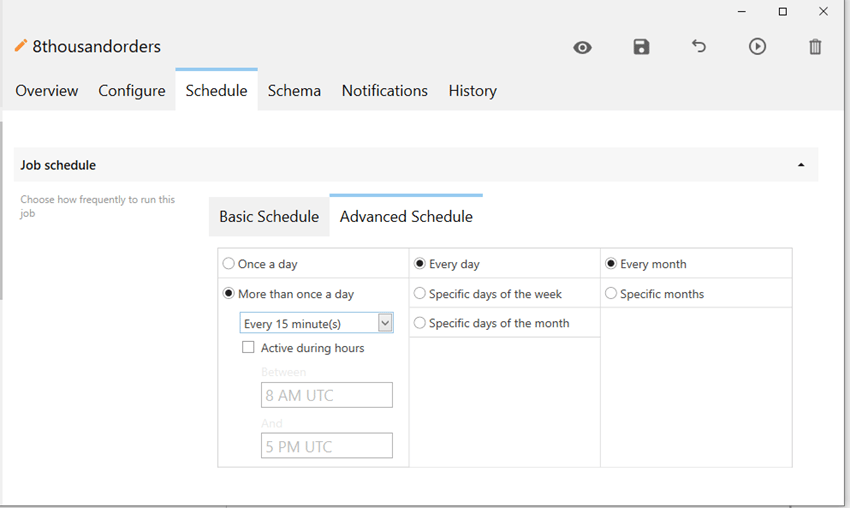
In the Scheduling subtab for a DataSet job, you can choose how frequently to run a job.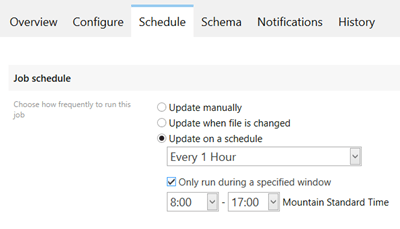
- Update manually. The job does not execute on a schedule; you must run the job yourself from Workbench.
- Update when file is changed. The DataSet job runs every time the file is updated. Not available for database data sources.
- Update on a schedule. The job runs on a schedule you configure. Options range from Every 15 Minutes to Every Month.
- Only run during a specified window. The job runs on your specified schedule but only during a certain timeframe within that schedule. For example, you could instruct the DataSet to run once an hour but only between the hours of 9:00 a.m. and 5:00 p.m.
Schema Subtab
In the Schema subtab for a DataSet job, you can make changes to your schema configuration before uploading your data to Domo, such as changing column names and data types, including or excluding certain columns, etc.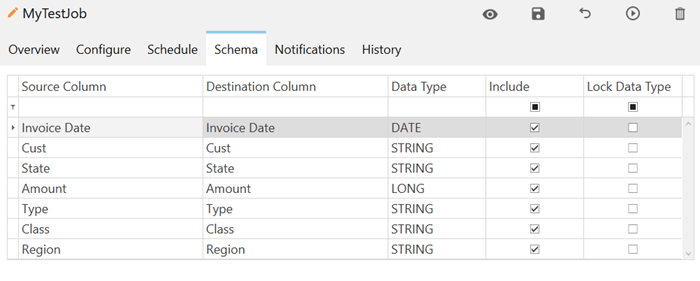
Notifications Subtab
In the Notifications subtab for a DataSet job, you can specify who in your Domo instance is notified when jobs are completed successfully and/or fail. For any user in your instance, you can specify whether he/she is notified upon job success, failure, or both. For more information about notifications, see Setting Notifications in Workbench 5.
History Subtab
In the History subtab for a DataSet job, you can click Open on the web to view the History tab for the DataSet in the Domo instance associated with the job. For more information about this tab in Domo, see Viewing DataFlow Details. You can also view local logs for this job by clicking Open log viewer.More Tab
You can access the More tab by clicking in the icon bar. This tab is broken down into a number of subtabs, as follows:
All of these subtabs are described in more detail in continuation.
Proxy Subtab
In the Proxy subtab, you can specify settings for more securely connecting to Domo using a proxy server.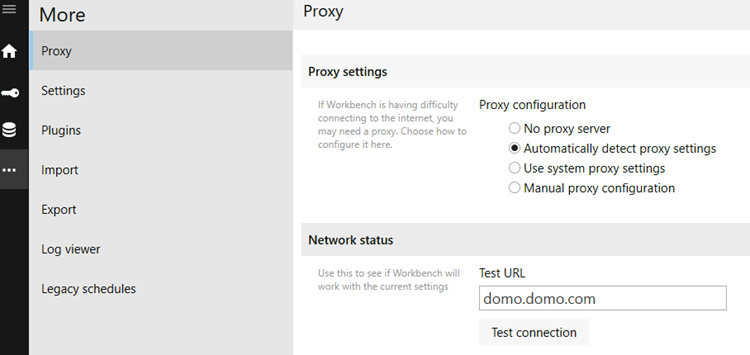
Note: When you initially connect to Domo via Workbench, Workbench leverages your Windows system proxy settings; you cannot enter your proxy settings manually at this time. However, after you connect to Domo for the first time, you can manually configure the proxy settings in the Proxy tab.
After you enter proxy credentials, you can test your connection by entering a test Domo URL and clicking Test Proxy. The color of the icon next to this button indicates whether the proxy settings have been validated.
Settings Subtab
In the Settings subtab, you can configure settings for managing who can run and edit jobs on this machine, optimizing system performance, and installing automatic updates.
Plugins Subtab
In the Plugins tab, you can view all of the plugins in Workbench 5, with their names, publishers, version numbers, descriptions, and assembly names. You can also add a plugin to your registered plugins list by entering a search path.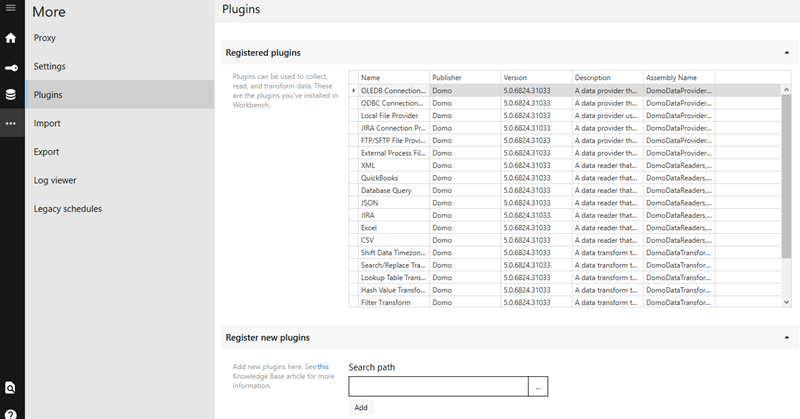
Import Subtab
In the Import tab, you can import jobs you previously exported from Workbench (in the Export tab). In the top menu, you select the Workbench account you want the imported jobs to be associated with. You can then locate the files on your machine that you want to import by clicking Browse and navigating to the files. Files that you select appear in the Jobs to import list at the bottom of the pane. Once your list is ready, click Import to pull the files into Workbench.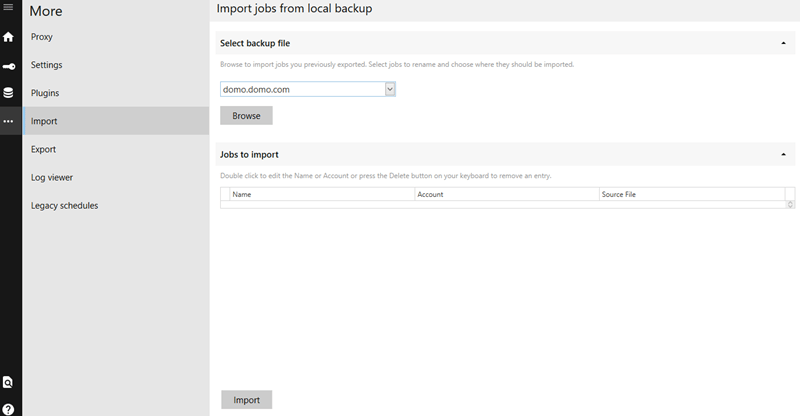
Export Subtab
In the Export tab, you can export jobs in JSON format. You first choose the folder you want to save your jobs too. If you want a different save folder to be created for each account (Domo instance), you can indicate that here. You then check the boxes for all the jobs you want to export, then click Export Jobs.Log Viewer Subtab
In the Log Viewer tab, you can open the logs for your DataSet jobs by clicking Open log viewer. Once in the log viewer, you can filter the logs by Domo domain, job ID, and start/end date. You can choose whether or not to include service logs by checking or unchecking the Include Service Logs box. You can also package logs as a zip file by clicking Zip Logs.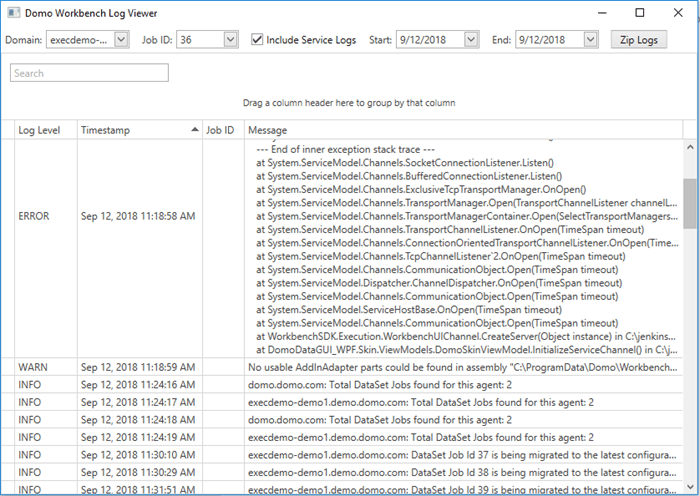
Legacy Schedules Subtab
Because legacy schedules are not supported in Workbench 5, you’ll need to manage scripts and schedules if you want to use them. You can do this using the Workbench CLI tool. The Legacy Schedules tab provides access to information about this tool.Preview Window Tab
You can open the Preview Window tab by clicking in the icon bar. This tab allows you to open previews for any job which you have already previewed from the Jobs tab. A numeral next to the icon indicates that this number of jobs have previews available (for example, if the icon appeared as
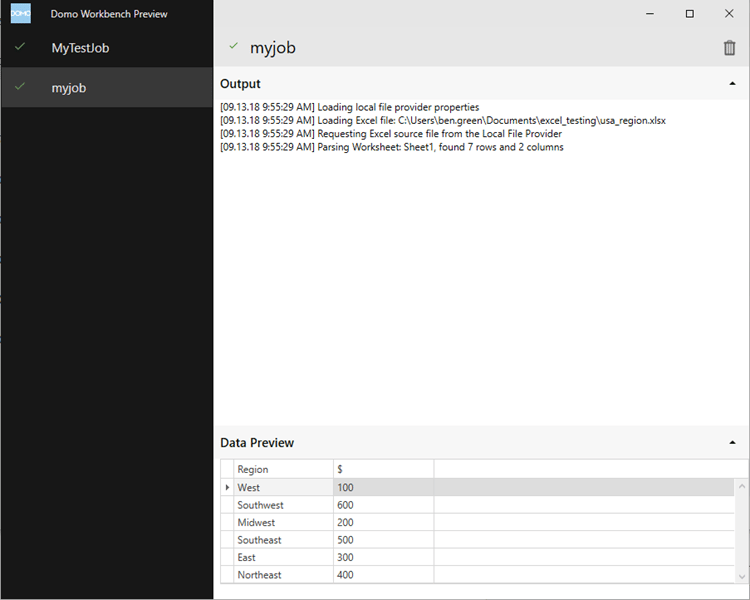
When you click on the icon, two panes appear. The listing pane on the left lets you choose the job you want to preview. The pane on the right is divided into two sections—an Output section that provides log data for the preview, and a Data Preview section that shows the columns for your data source.
Help Tab
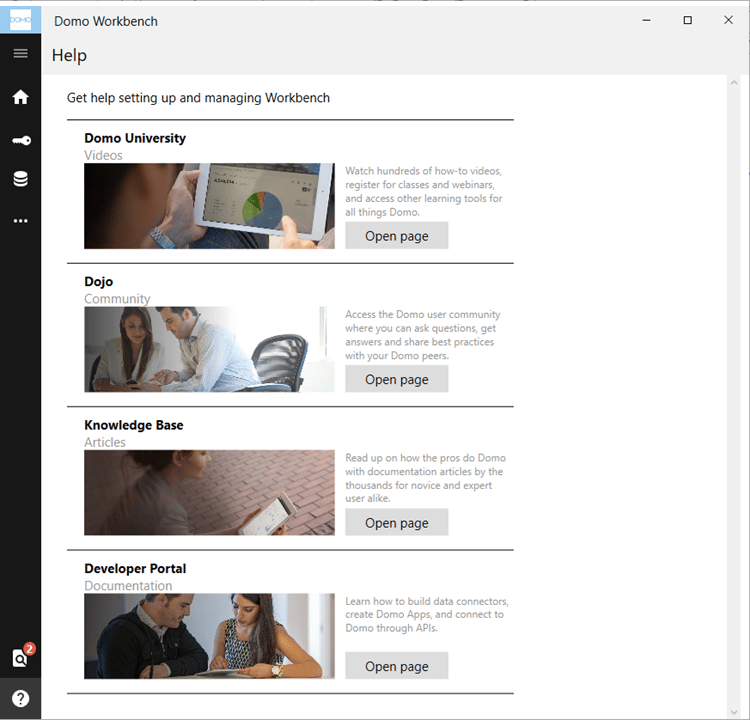
You can open the Help tab by clicking in the icon bar. This opens the Help tab, from which you can access various Domo help resources, such as videos, Knowledge Base articles, etc.
Source and Processing Options
In the Configure subtab for a DataSet job (which you access by double-clicking on a job in the listing in the Jobs tab), you configure the data source (i.e. where the file is coming from) and the processing options (i.e. properties for the selected data source).Source Options
Configure the Source for a DataSet job to specify where the data for that job is coming from.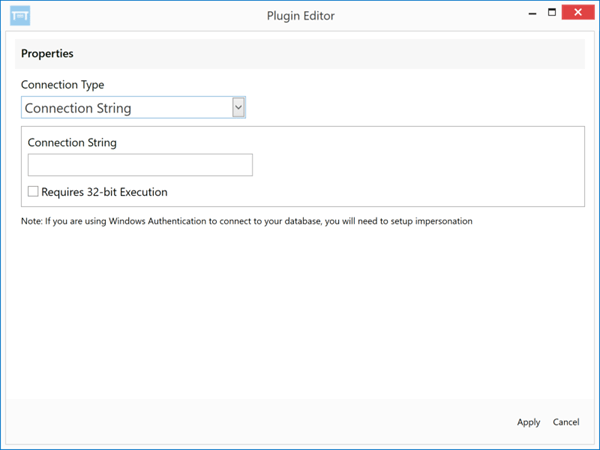
Local File Provider
Use the Local File Provider transport type to pull Excel, CSV, QuickBooks, JSON, and XML data sources into Domo from a local or network location. When you select this option when creating a DataSet job, the Source dialog in the Configure subtab lets you choose the file path for the local file. The following screenshot shows the options available when this method is selected:
SFTP File Provider
Use the SFTP transport type to pull Excel, CSV, QuickBooks, JSON, and XML data sources into Domo via FTP, SFTP (SSH-SFTP), or FTPS (FTP-SSL). When you select this option as your transport type when creating a DataSet job, the Source dialog in the Configure subtab provides options for configuring the server and SSL Certificate settings. The following screenshot shows the options available when this method is selected: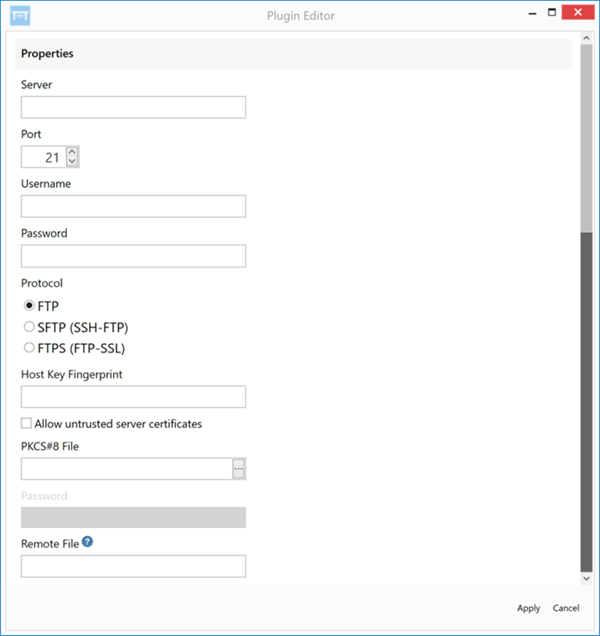
External Process File Provider
Use the External Process File Provider transport method when you are using a third-party application to pull Excel, CSV, QuickBooks, JSON, and XML data into Domo using a script. When you select this option as your transport type when creating a DataSet job, the Source dialog in the Configure subtab lets you select the executable file for your application, specify arguments, and enter a file path for the output. For CSV files, you can also set a Direct Upload option. Virtually any kind of executable file can be converted into a data source in Workbench. For example, you could use this method to convert a MySQL database file to an Excel file. You could then specify options for the Excel file and send it to Domo. The following screenshot shows the options available when this method is selected: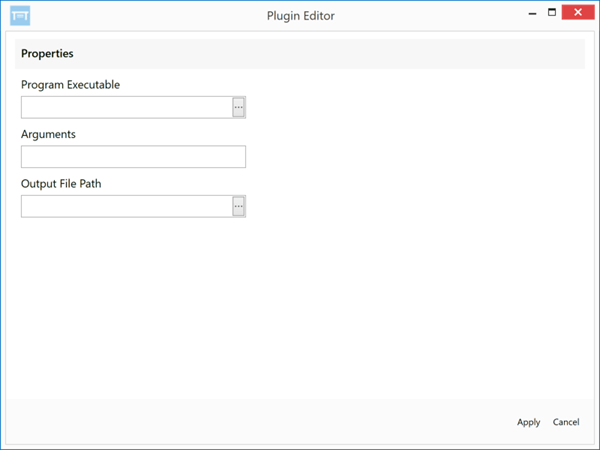
OLEDB Connection Provider
Use the OLEDB****Connection Provider transport method when you want to send data to Domo using an OLEDB (OLAP) connection. When you select this option as your transport type when creating a DataSet job, the Source dialog in the Configure subtab provides options to help you connect to an OLAP data source. The following screenshot shows the options available when this method is selected: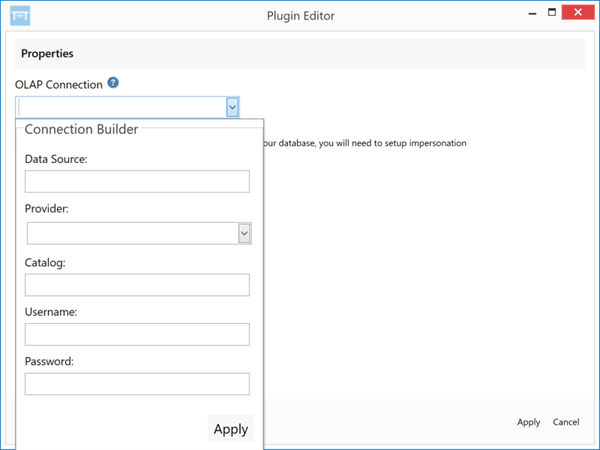
For more information about connecting to OLAP data, see Connecting to an OLAP Cube.
ODBC Connection Provider
Use the ODBC****Connection Provider transport method when you want to send data to Domo using an ODBC connection. When you select this option as your transport type when creating a DataSet job, the Source dialog in the Configure subtab provides options to help you connect to an ODBC data source. There are three different ways to connect to ODBC data. You can select a system DSN, enter details for your connection, or enter a single connection string. You choose the desired connection option in the Connection Type menu.System DSN
With the System DSN option, you select the DSN to use for the desired DataSet from all of the DSNs available in your system. You can indicate whether credentials are required.Note: When uploading data from an ODBC DataSet, you must specify an existing Data Source Name (DSN). You can create a DSN using the Windows ODBC Data Source Administrator. (You can access the the Windows ODBC Data Source Administrator by entering “ODBC” in the Start Menu search, then selecting “Data Sources (ODBC)”.) For more information about creating a DSN, refer to the Windows ODBC Help (by searching for “ODBC” in Windows Help and Support) or view the training video in Workbench 5. For information about configuring a MySQL driver, see Workbench 5 FAQs.
For more information, see Connecting to ODBC data.
Connection Builder
With the Connection Builder option, you enter the details for your ODBC connection, such as login credentials, driver, server URL, etc. The following screenshot shows the options available when Connection Builder is selected as the Connection Type: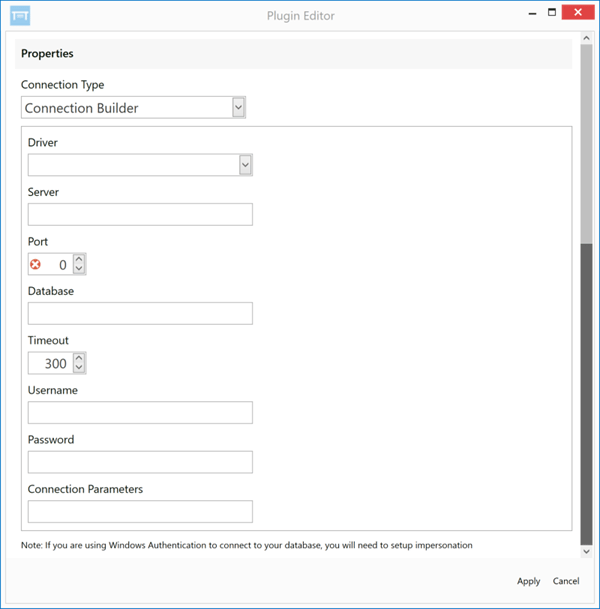
For more information, see Connecting to ODBC data.
Connection String
With the Connection String option, you enter a single string for your ODBC connection. The following screenshot shows the options available when Connection String is selected as the Connection Type:
For more information, see Connecting to ODBC data.
JIRA Connection Provider
Use the JIRA****Connection Provider transport method when you want to send JIRA or JSON data to Domo. When you select this option as your transport type when creating a DataSet job, the Source dialog in the Configure subtab provides options for entering your JIRA credentials as well as a JQL query. The following screenshot shows the options available when this method is selected: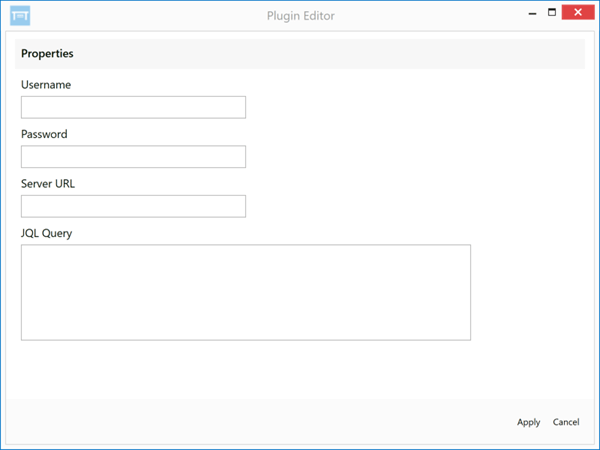
For more information, see Connecting to JSON Data in Workbench 5.
Processing Options
Configure the Processing options for a DataSet job to specify properties for your data source before it is sent to Domo.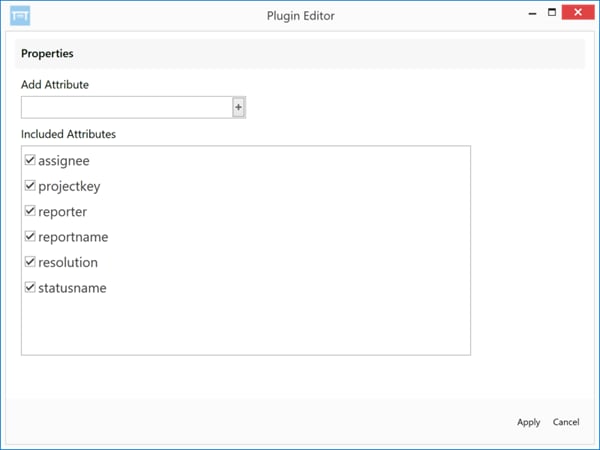
CSV
When you select CSV as your reader type when creating a DataSet job, the Processing dialog in the Configure subtab provides options for specifying the delimiter and escape sequence characters and configuring advanced settings. Notes:- The name and description for a DataSet in Domo can be different than the name and description in Workbench if someone edits the name and description in Domo. (DataSets do not depend on the names and descriptions matching for data uploads to occur properly.)
- A CSV file must
- be a text file
- have data delimited by a single character
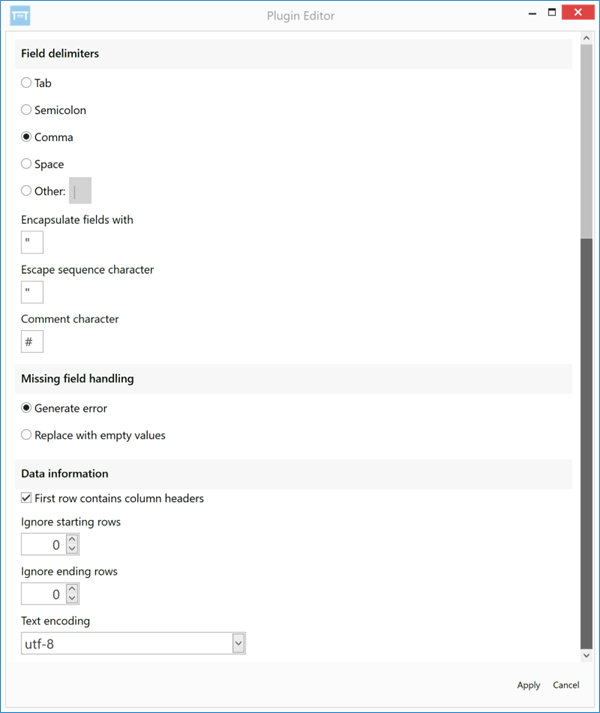
For more information about connecting to CSV files, see Connecting to CSV data.
Excel
When you select Excel as your reader type when creating a DataSet job, the Processing dialog in the Configure subtab provides options for specifying the range of data you want to send to Domo.Note: A Microsoft Excel spreadsheet file must be in a supported file format: .xlsx,.xls,.xlsm
Cell Range
When Cell Range is selected in the Selection Range menu, you can specify the Excel sheet from which you want to pull data, along with the starting cell, ending row, and ending column. The following screenshot shows the options available when this has been selected: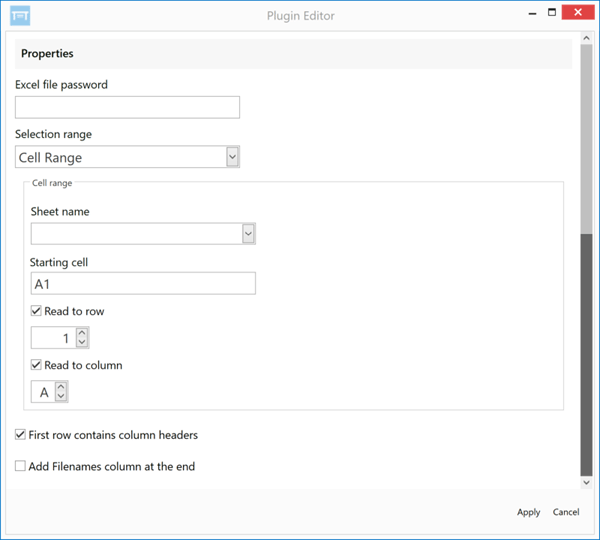
Named Range
When Named Range is selected in the Selection Range menu, you can select a named range from a list. If you have not created any named ranges for this file in Excel, no options appear in this menu. The following screenshot shows the options available when this has been selected: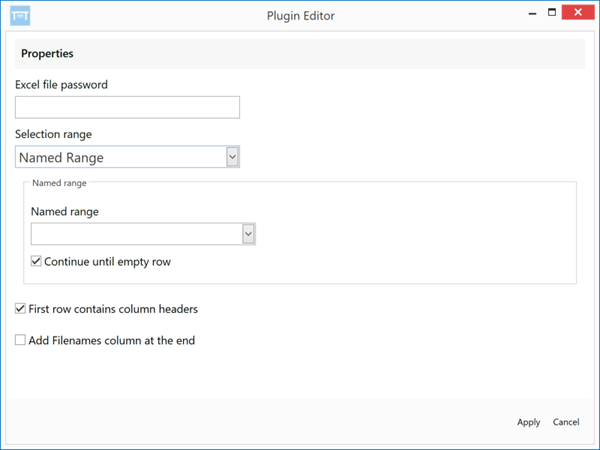
Dynamic Range
When Dynamic Range is selected in the Selection Range menu, you can skip a specified number of lines at the end of the Excel sheet. The following screenshot shows the options available when this has been selected: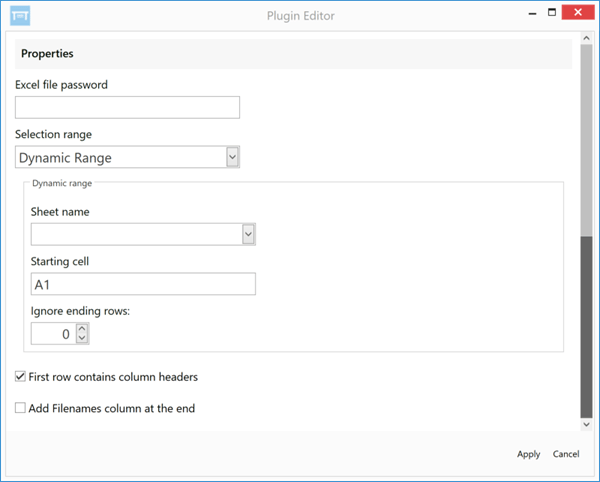
For more information about connecting to Excel data, see Connecting to Excel data.
XML
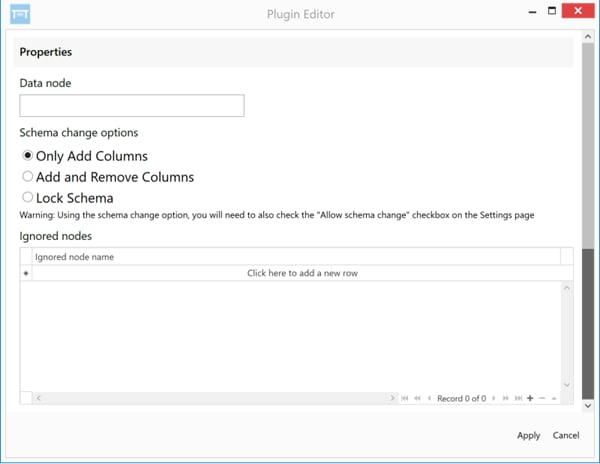
When you select XML as your reader type when creating a DataSet job, the Processing dialog in the Configure subtab provides options for specifying the desired data node and also indicate nodes that should be ignored. The following screenshot shows the options available when this has been selected:
For more information about connecting to XML data, see Connecting to XML Data.
JSON
When you select JSON as your reader type when creating a DataSet job, you can specify the desired data node, the delimiter, and flattening options. The following screenshot shows the options available when this has been selected: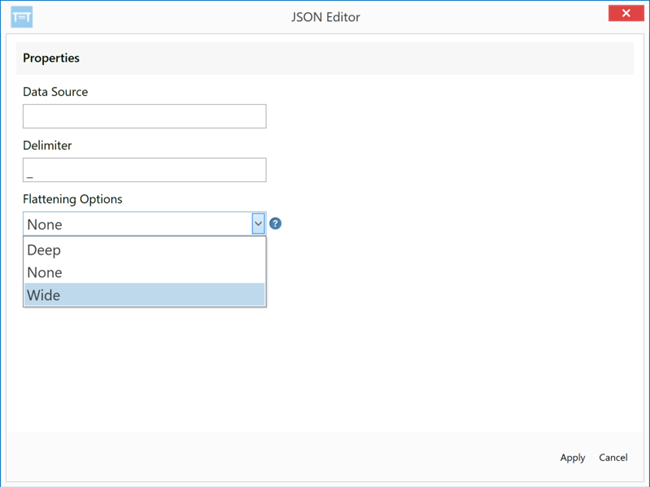
Database Query (OLAP and ODBC)
When you select Database Query as your reader type when creating a DataSet job, the Processing dialog in the Configure subtab provides options for configuring queries and replacement variables. The following screenshot shows the options available when this has been selected:
For more information about connecting to databases, see Connecting to ODBC Data.
QuickBooks
When you select QuickBooks as your reader type when creating a DataSet job, the Processing dialog in the Configure subtab allows you to choose from any of a variety of different QuickBooks reports. You can also instruct Workbench to stop QuickBooks if connection errors are encountered.Note: In order to run QuickBooks jobs, you must authorize Workbench to connect to QuickBooks by clicking the Authorize button in the top right corner of the Processing dialog then selecting your company file.
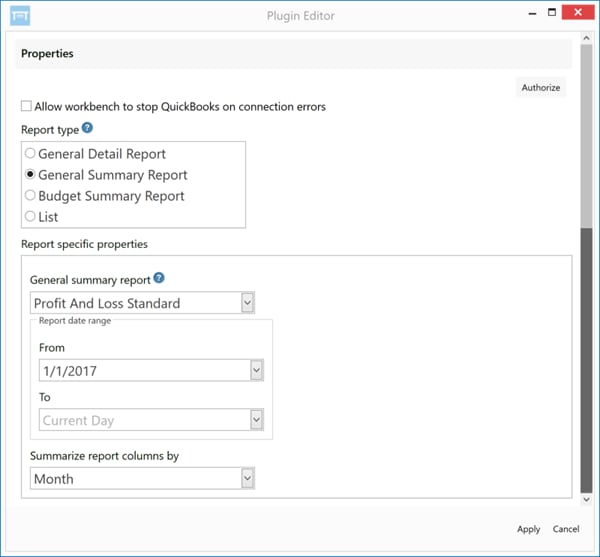
Primary Report Types
For more information about connecting to QuickBooks data, see Connecting to QuickBooks Data.
JIRA
When you select QuickBooks as your reader type when creating a DataSet job, the Processing dialog in the Configure subtab lets you unselect attributes from the data source that you do not want to be included in the DataSet. You can also add new attributes. The following screenshot shows the options available when this has been selected:Transforms
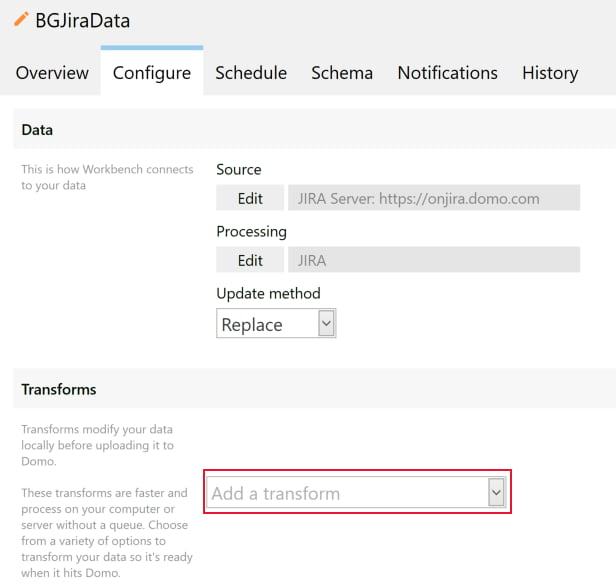
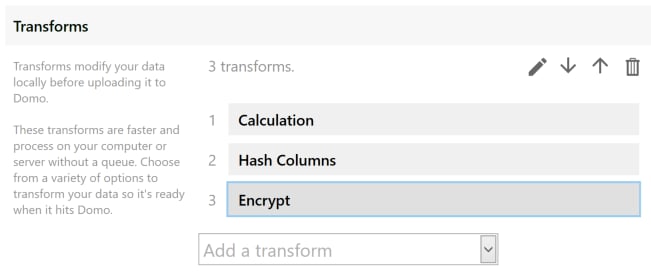
You can add any of a number of transforms to a DataSet job in Workbench. Transforms let you modify your data locally in Workbench before you upload it to Domo. There are many different transforms available, including transforms for creating new columns based on calculations, joining columns, encrypting data, and more. You add transforms by clicking Add a transform in the Configure subtab for a DataSet job (which you access by double-clicking on a job in the listing in the Jobs tab) then specifying the necessary information. lets you edit a selected transform.
 moves the selected transform down in the list.
 moves the selected transform up in the list.
- deletes the selected transform.
- Creating Columns in Workbench 5 Using Calculations
- Setting the Time Zone for a Workbench 5 Job
- Encrypting and Decrypting Workbench 5 Data
- Setting a Custom Date Format on a Column in Workbench 5
- Filtering Columns in Workbench 5
- Replacing a Column Value in Workbench 5
- Combining DataSets in Workbench 5
Calculated Field Transform
With the Calculated Field transform, you can you specify a calculation to use to derive a value in a new column based on a value in another column. Open the Calculation Builder for a DataSet by clicking Add a transform in the Configuration subtab and selecting Calculated Field Transform. In the Calculation Builder, you can specify a name for the calculation then build your calculation by applying functions to columns in your data source as necessary. Two tabs appear in the Calculation Builder—** Available columns**, which lets you choose any column in your data source to base a calculation off of, and Available functions, which lets you choose functions from any of five different categories.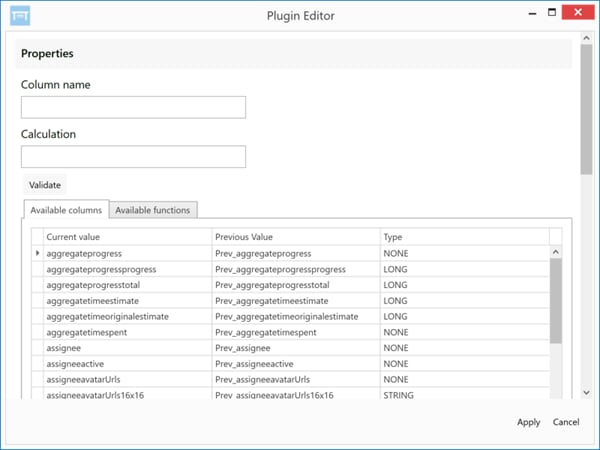
Custom Date Format
You can use the Custom Date Format transform to change the date format for a given column. Open the options dialog for this transform for a DataSet by clicking Add a transform in the Configuration subtab and selecting Custom Date Format Transform.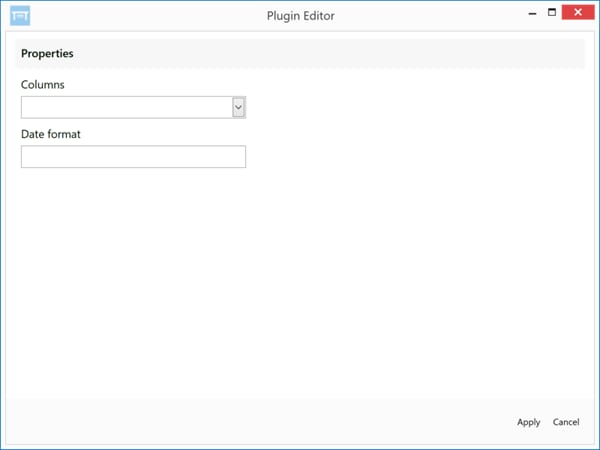
Filter
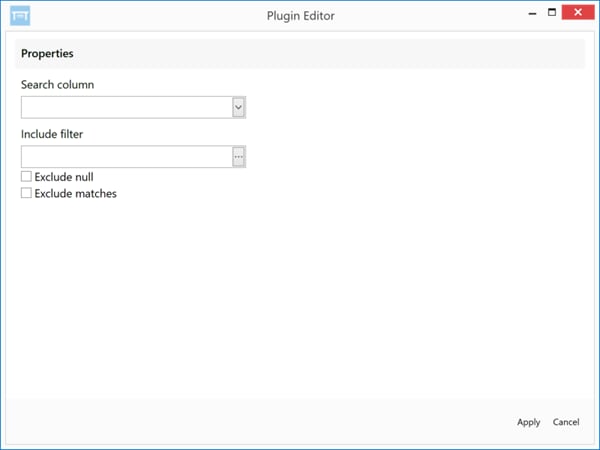
You can use the Filter transform to apply filters to a selected column. You can choose to have Workbench return matches or non-matches for the specified filter query. You can also include or exclude blank cells in your filtered data. Open the options dialog for this transform for a DataSet by clicking Add a transform in the Configuration subtab and selecting Filter Transform.Lookup Table
You can combine data sources in Workbench by using Lookup Tables. A “Lookup Table” is a DataSet you combine with a primary DataSet. The Lookup Table DataSet and primary DataSet must both contain one column with unique matching values (“key columns”). Once you match key columns, a new DataSet is created by joining all columns from both DataSets. Combining DataSets in this way is equivalent to using a LEFT JOIN in SQL. Open the options dialog for this transform for a DataSet by clicking Add a transform in the Configuration subtab and selecting Lookup Table Transform.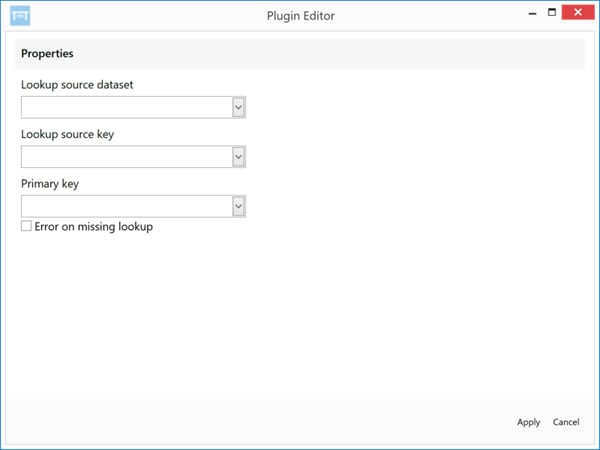
Shift Date Timezone
With the Shift Date Timezone transform, you can set the time zone for the data in a data source by selecting your desired time zone from a menu. Open the options dialog for this transform for a DataSet by clicking Add a transform in the Configuration subtab and selecting Shift Date Timezone Transform.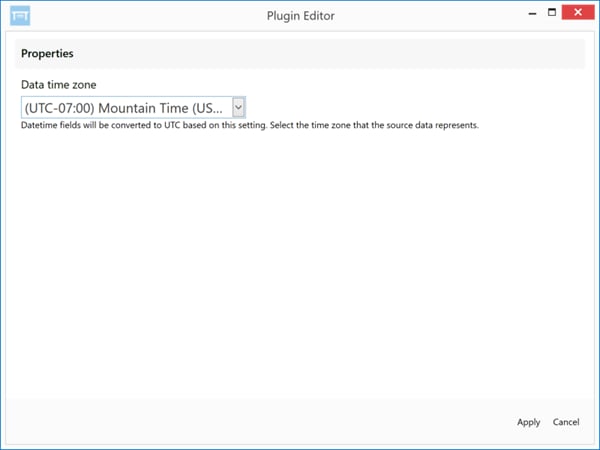
Encrypt
You can use the Encrypt transform to encrypt one or more columns of data in your data source. After the DataSet has been pulled into Domo, it can only be decrypted in a Sumo table, by users who have been given special access in the User Access listing for the DataSet job in Workbench. For more information about Sumo, see Understanding Sumo cards. Open the options dialog for this transform for a DataSet by clicking Add a transform in the Configuration subtab and selecting Encrypt Transform.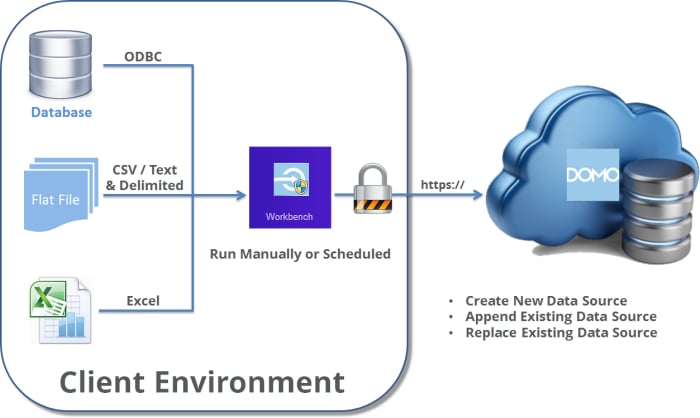
Search & Replace
You can use the Search & Replace transform to replace a specified value in a column with another value. You can also specify a default value to appear in cells in which your search value does not appear. For search and replace values you can open a regular expression builder that includes a number of categories of regular expression constructs. Open the options dialog for this transform for a DataSet by clicking Add a transform in the Configuration subtab and selecting Search/Replace Transform.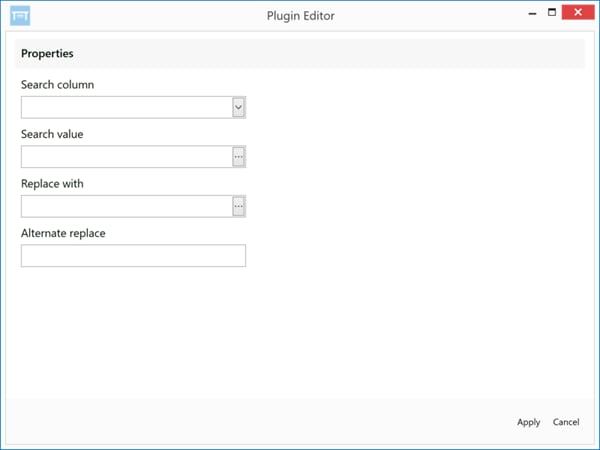
Hash Value
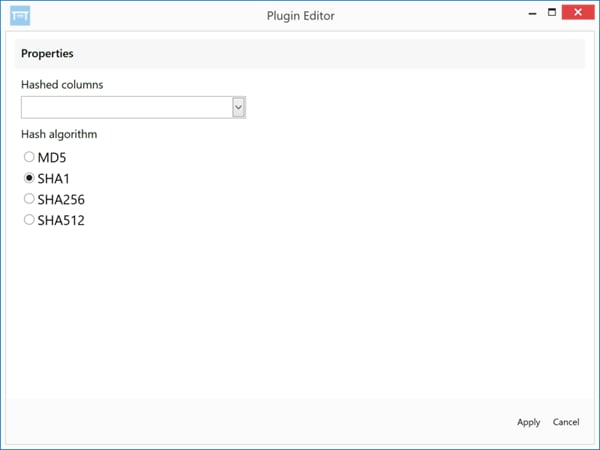
You can use the Hash Value transform to encrypt data in a column using hash values. You can choose from any of four different hash algorithms. Open the options dialog for this transform for a DataSet by clicking Add a transform in the Configuration subtab and selecting Hash Value Transform.