

Intro
Used by millions worldwide, Jira is a tool used for bug tracking, issue tracking, and project management. The data stored within Jira can provide mission-critical information on your current production and future roadblocks. With the Domo Jira OnPrem OAuth Connector, you can import and extract data from Jira, including issue tracking, completed tickets per team, ticket resolution time, and project management metrics, using either custom or predefined queries. You can provide analytical detail into your organization’s project performance and key metrics, keeping your organization informed of critical issues across the whole portfolio of projects. You connect to your Jira OnPrem OAuth account in the Data Center. This topic discusses the fields and menus specific to the Jira OnPrem OAuth connector user interface. To add DataSets, set update schedules, and edit DataSet information, see Adding a DataSet Using a Connector.Prerequisites
To connect to your Jira OnPrem OAuth account and create a DataSet, you need:- JIRA host name
- An OAuth configuration
Note: To configure an incoming link for creating an enterprise OAuth app, see the Atlassian documentation: Configure an Incoming Link.
Configure OAuth
Configure an Incoming Link
To create an incoming link:- Navigate to Administration > Applications > Application links.
- Select Create link.
- Select External application, and then select Incoming as the direction.
-
Complete the details as described in the sections below.
Note: For the Redirect URL field, enter
https://oauth.domo.com/api/data/v1/oauth/providers/jira-on-prem-oauth/exchange. For the Permission field, choose ADMIN from the drop-down list.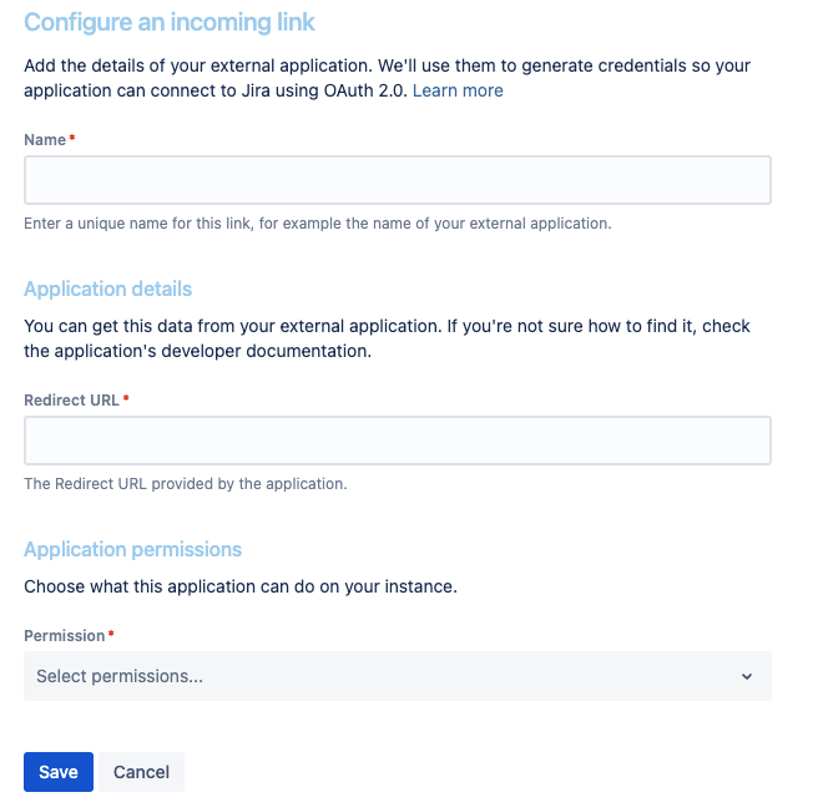
View OAuth Credentials for an Existing Link
If you lose your OAuth credentials, you can access them at any time from the application link you created. To view the OAuth credentials:- Navigate to Administration > Application links.
- Find the application link, and select More actions > View credentials.
Create OAuth Configuration in the Domo Instance
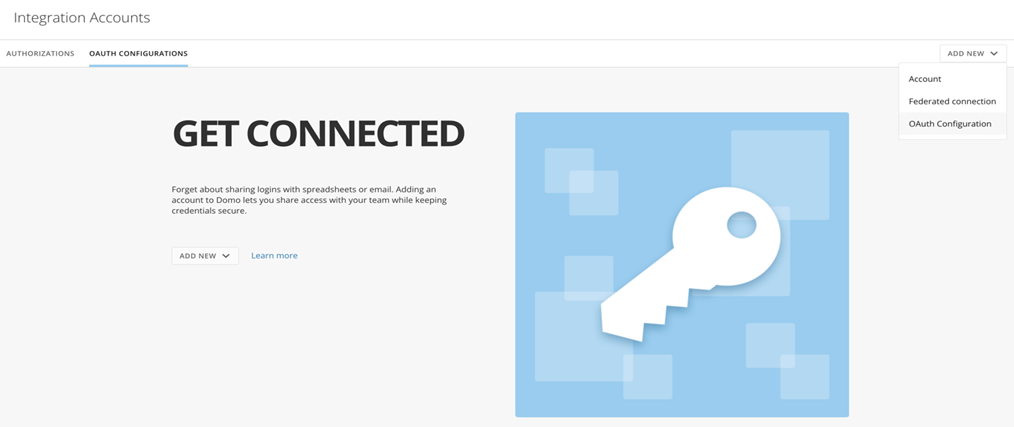
To create an OAuth configuration:- Log in to the customer’s Domo instance.
- Navigate to
https://{customerdomain}.domo.com/datacenter/accounts. - Select Add New OAuth Configuration.
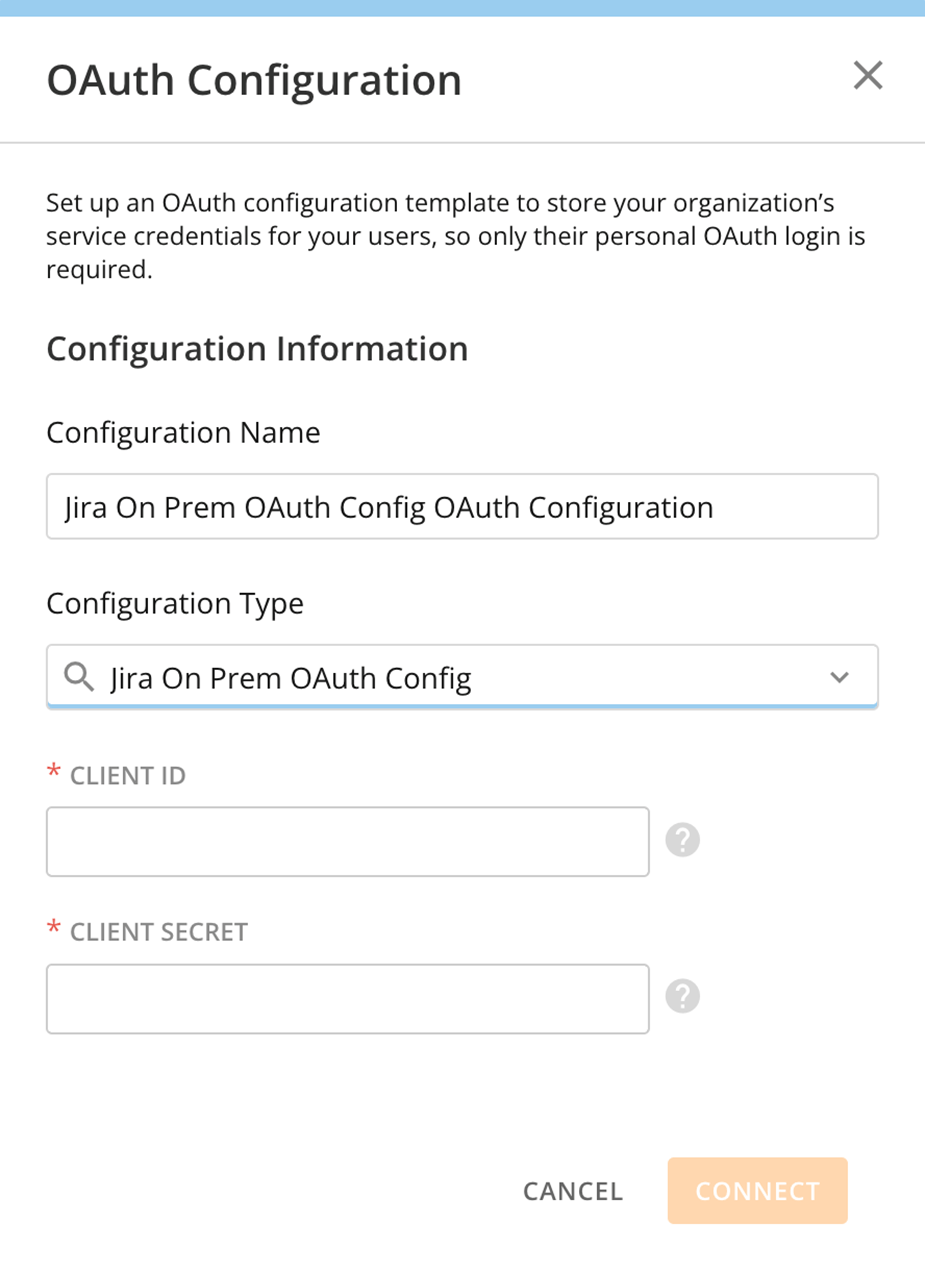
- Select Jira On Prem OAuth Config as the configuration type.
- Enter the client ID and secret generated through an incoming link, as described above.
Connect to Your Jira OnPrem OAuth Account
This section enumerates the options in the Credentials and Details panes on the Jira OnPrem OAuth Connector page. The components of the other panes on this page, Scheduling and Name & Describe Your DataSet, are universal across most connector types and are discussed in detail in Adding a DataSet Using a Connector.Credentials Pane
This pane contains fields for entering credentials to connect to your Jira OnPrem OAuth account. The following table describes each field:
Once you have entered valid Jira OnPrem OAuth credentials, you can use the same account at any time to create a new Jira OnPrem OAuth DataSet. You can manage connector accounts in the Accounts tab in the Data Center. For more information about this tab, see Manage Connector Accounts.