Intro
You can create customized and secure data experiences for your Domo users by configuring Personalized Data Permissions (PDP) policies for DataSets. These policies allow you to filter data in DataSets so that people and groups can only access data applicable to them when viewing cards and DataFlows. There are two kinds of PDP policies—row policies and column policies:- Row policies allow you to remove rows from the data that people/groups can interact with.
- Column policies/masking allow you to hide some or all of the data in a column to help secure personally identifiable information (PII) and other sensitive values.
- Simple PDP provides a straightforward approach to data access control, allowing Admins to assign permissions based on predefined groups, and is more suited towards smaller DataSets or organizations with strict data access needs.
- Dynamic PDP provides a more flexible solution, enabling real-time permissions adjustment based on changing user attributes. Dynamic PDP is more beneficial for larger organizations or those with evolving data access requirements.
Learn about Dynamic PDP below.
Get Started with PDP
You can use both row and column policies to protect data with PDP. For example, if your card is powered by a DataSet with data for two regions in the United States—West and East—and you only want to give people within the West region access to data for that region (and vice versa), you can use row policies. Create two separate row policies—“West” and “East”—and enable them. When the policies are active, people in each region see only the data for their region and no data for the other region. You can then use column policies to mask the employee names and IDs for everyone besides admins for each region.PDP Around Domo
When you create a PDP row policy for a DataSet, the policy applies to other features throughout Domo, like alerts and DataFlows. This means that members of policies only have access to data assigned to them for any item powered by that DataSet. Learn more about PDP and DataFlows/DataFusion below. Follow this link to learn more about PDP and Alerts.Access the PDP Interface
Follow these steps to access and make changes to PDP for a DataSet.- Navigate to the Data Center. In the DataSets section, in the list of DataSets, search for the DataSet to which you want to add PDP.
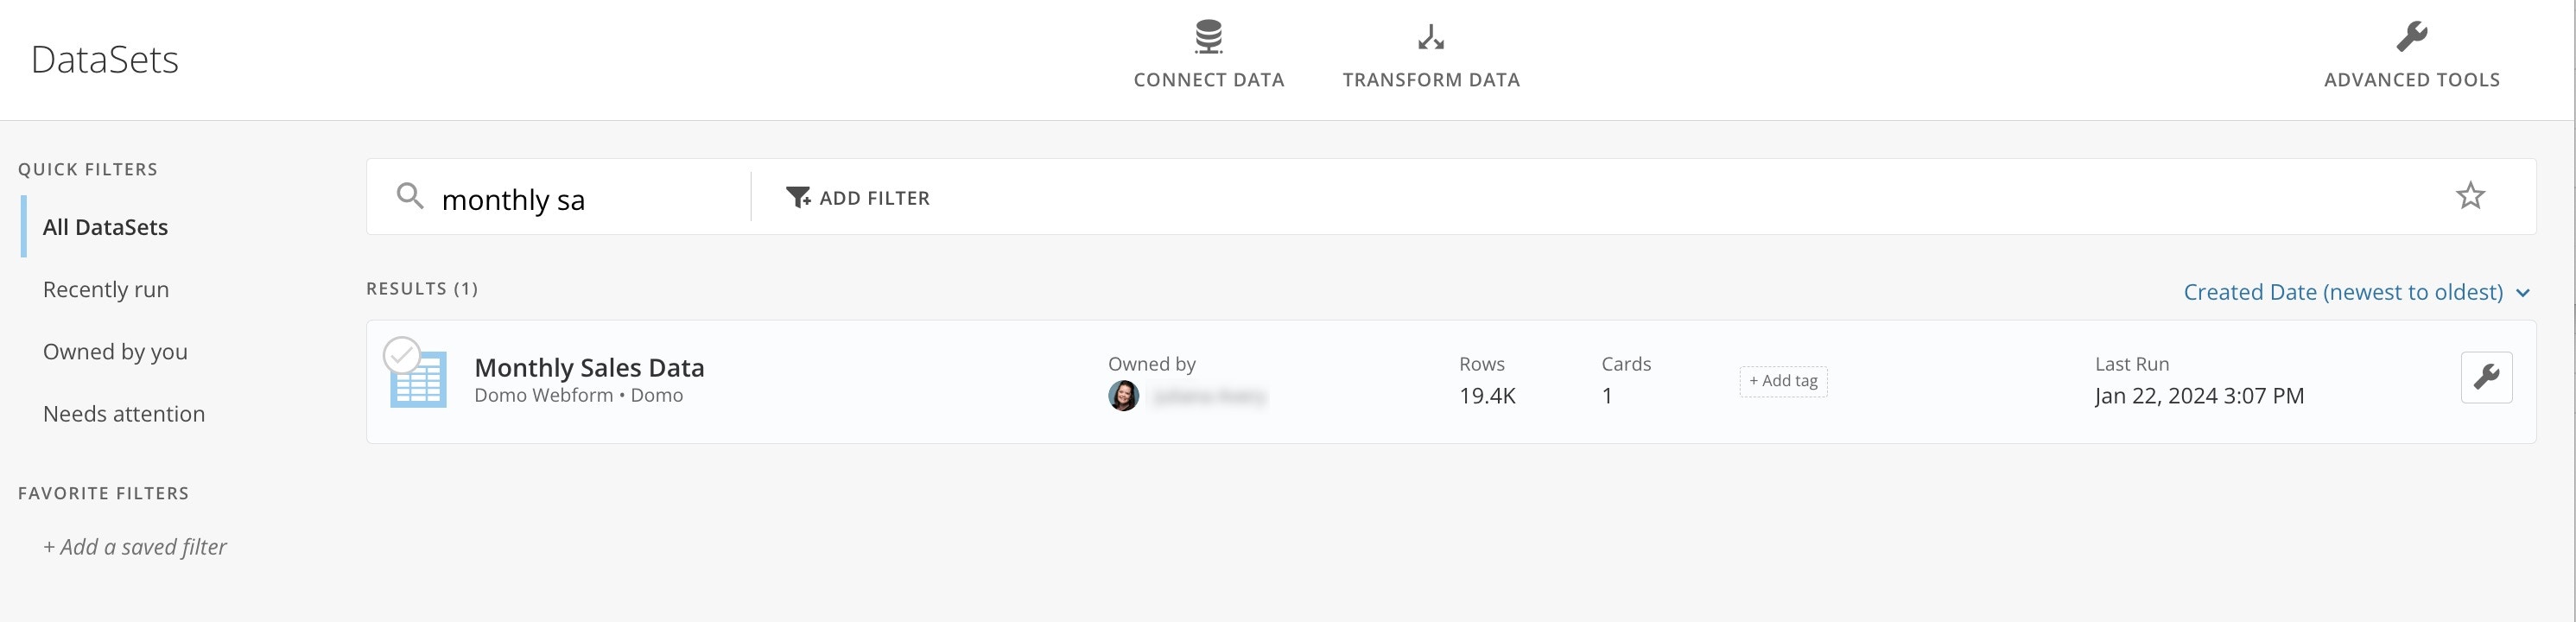
- Select the DataSet to open its details page.
- Go to the PDP tab.
Inside the PDP tab, there are two tabs: Row Policies and Column Policies.
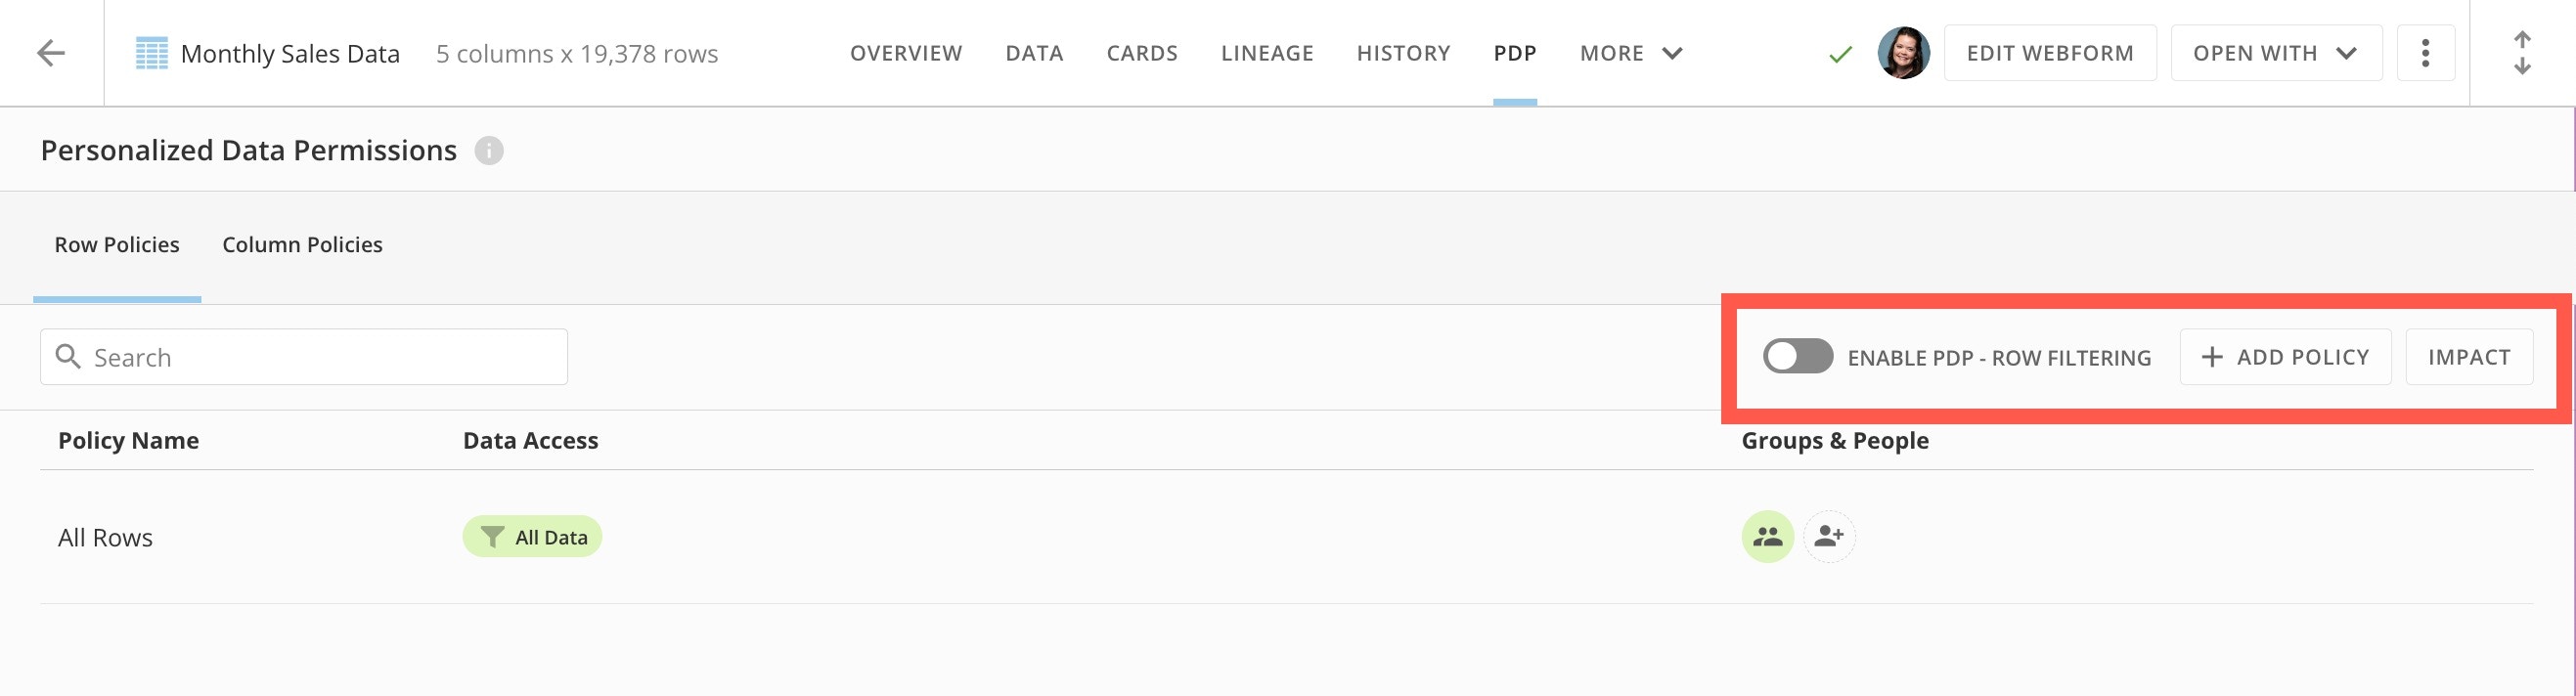
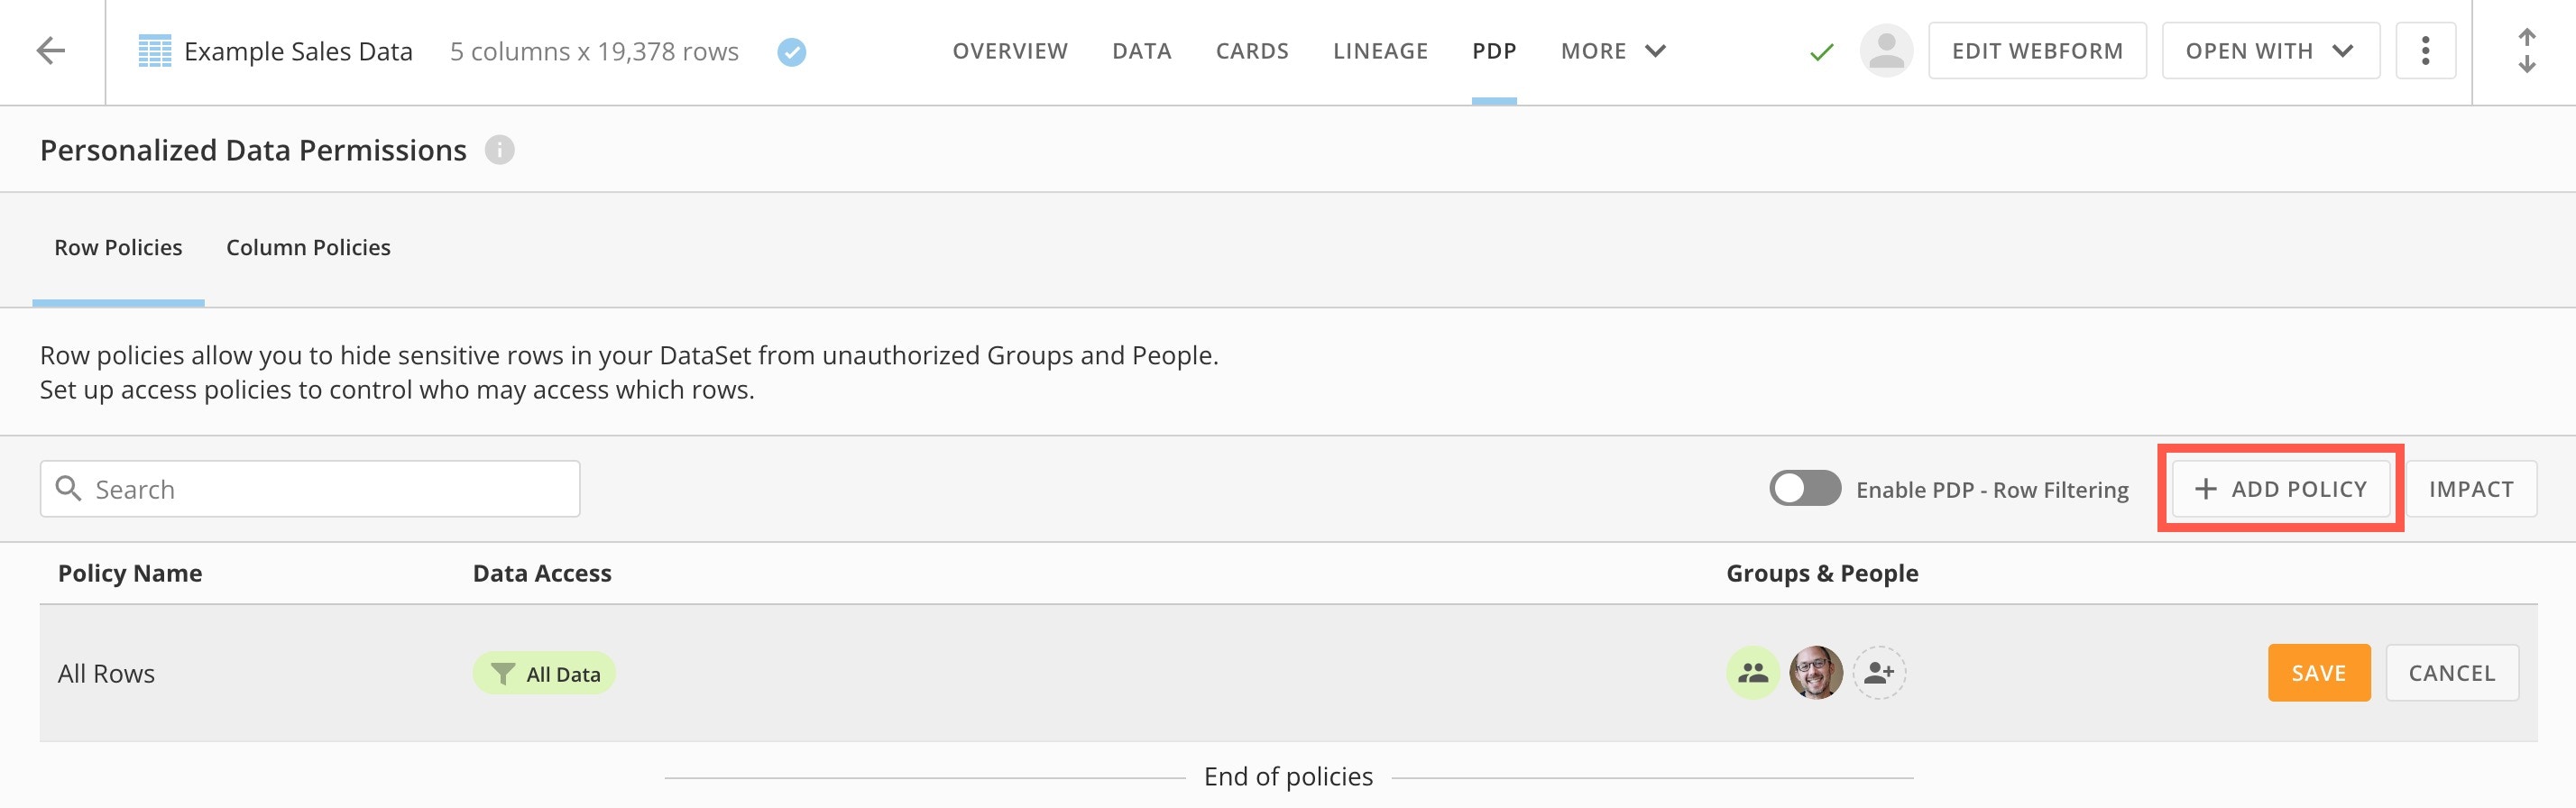
 In each tab, you can view a searchable list of existing policies of that type; you can also enable PDP for that policy type, add a policy of that type, and view the impact of PDP on the DataSet.
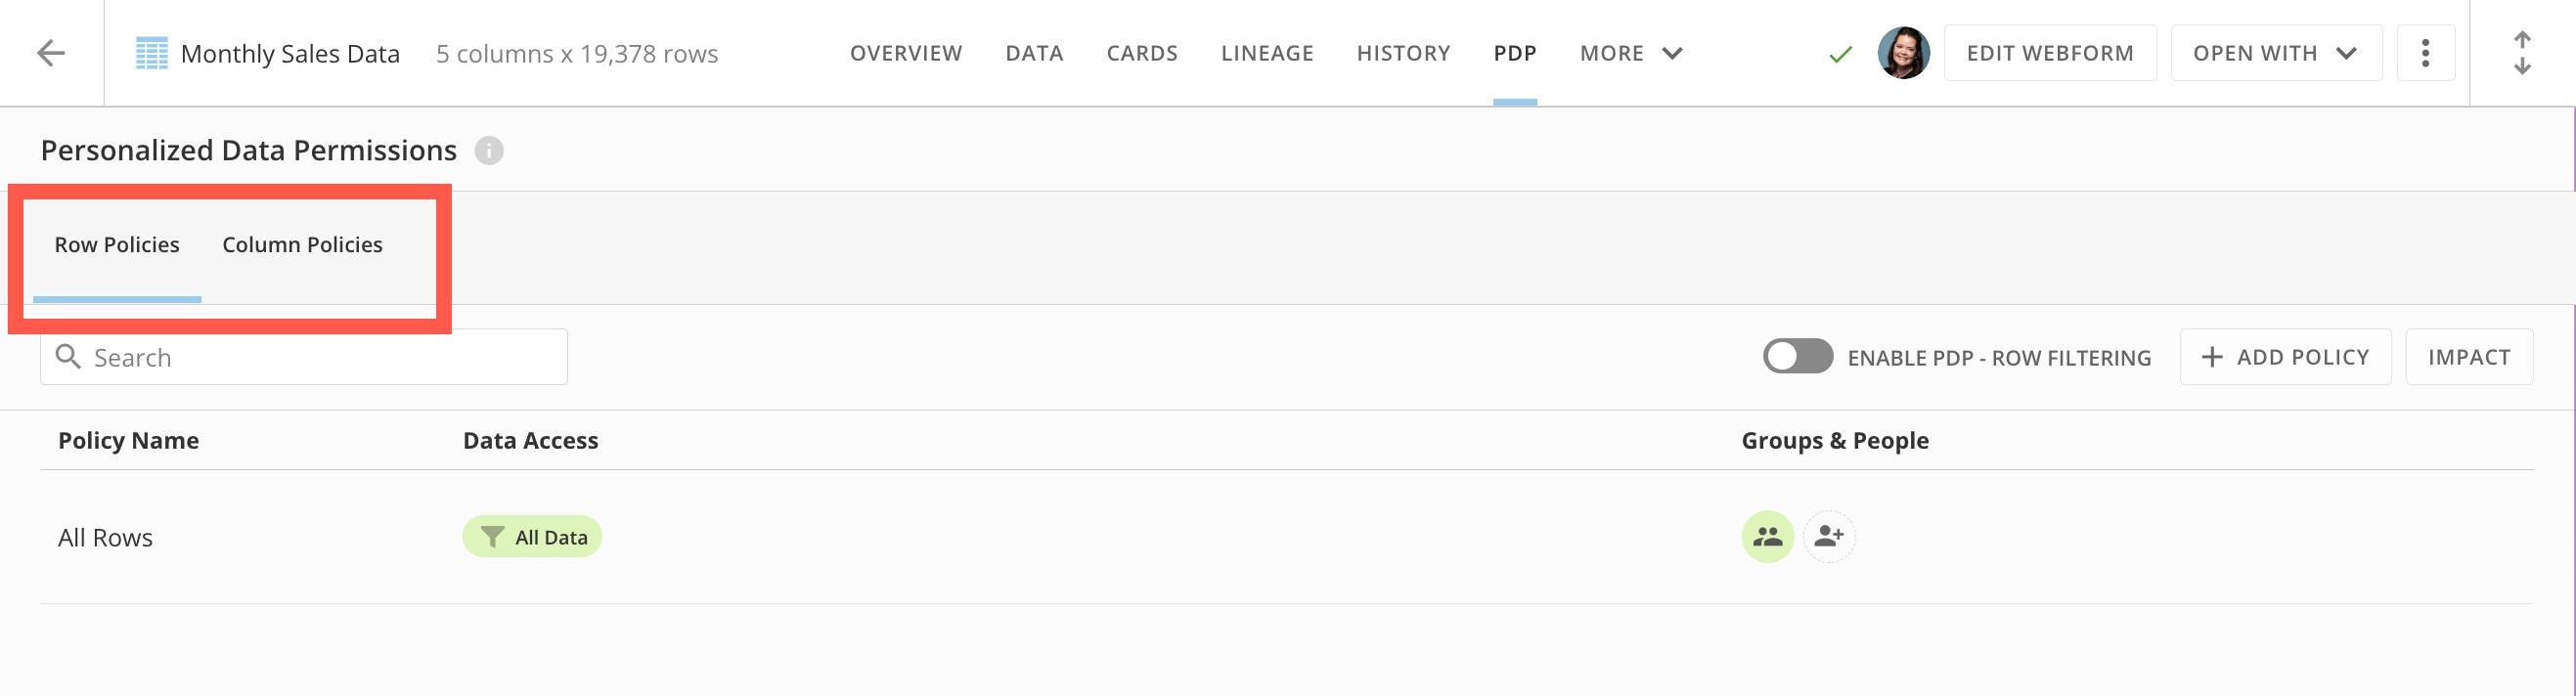
Enable PDP
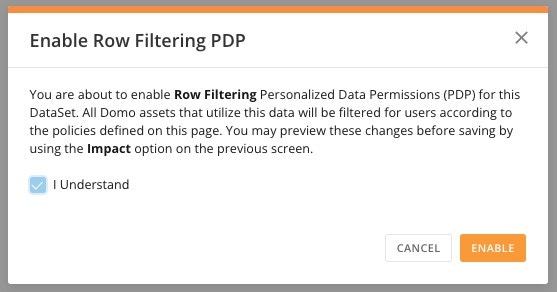
You must enable each type of PDP to activate existing policies. You can create and save PDP policies of either type to your DataSet, but they don’t take effect until you enable PDP. For example, if you add and save a row policy to the DataSet but do not toggle the Enable PDP — Row Filtering switch, the system does not recognize the row policy. To enable PDP for either type, go to the appropriate tab in the PDP interface and toggle the switch to Enable PDP for row filtering or column masking.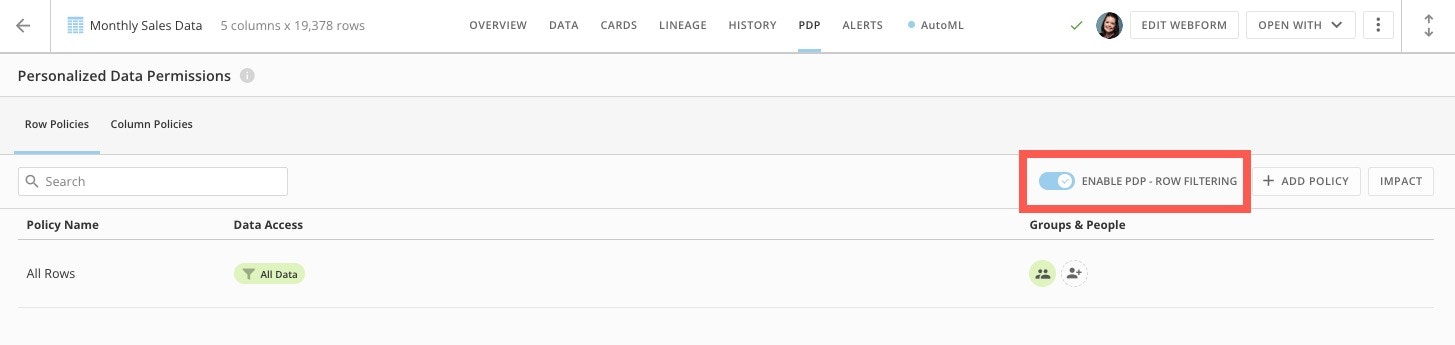
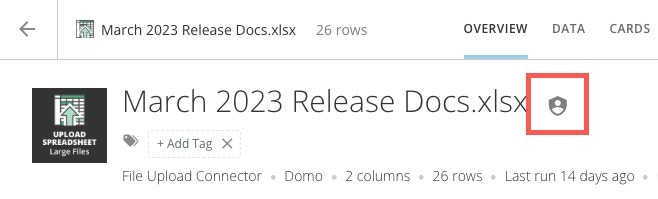
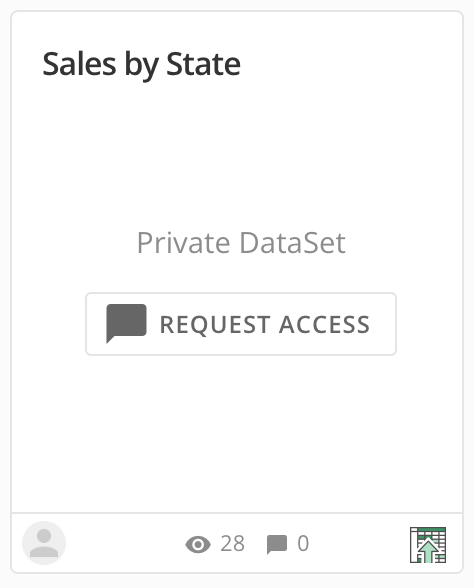
Note: Each item in Domo where PDP is in effect displays a badge. If you see a badge, you might not be able to view all of the available data, depending on your permissions. In these examples, you can see the badge on a card and DataSet with active PDP policies.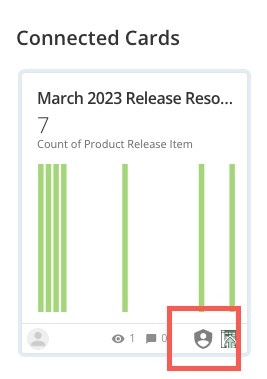
Disable PDP
To disable row filtering or column masking PDP for a DataSet, toggle the switch in the correct tab again. Check the box to confirm that you understand the impact of disabling PDP and that all users with access to the DataSet will have access to all data in the DataSet, then select Disable.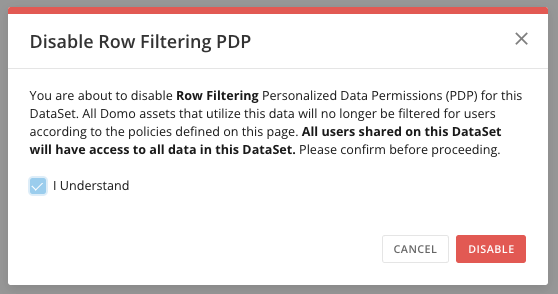
Review PDP Impact
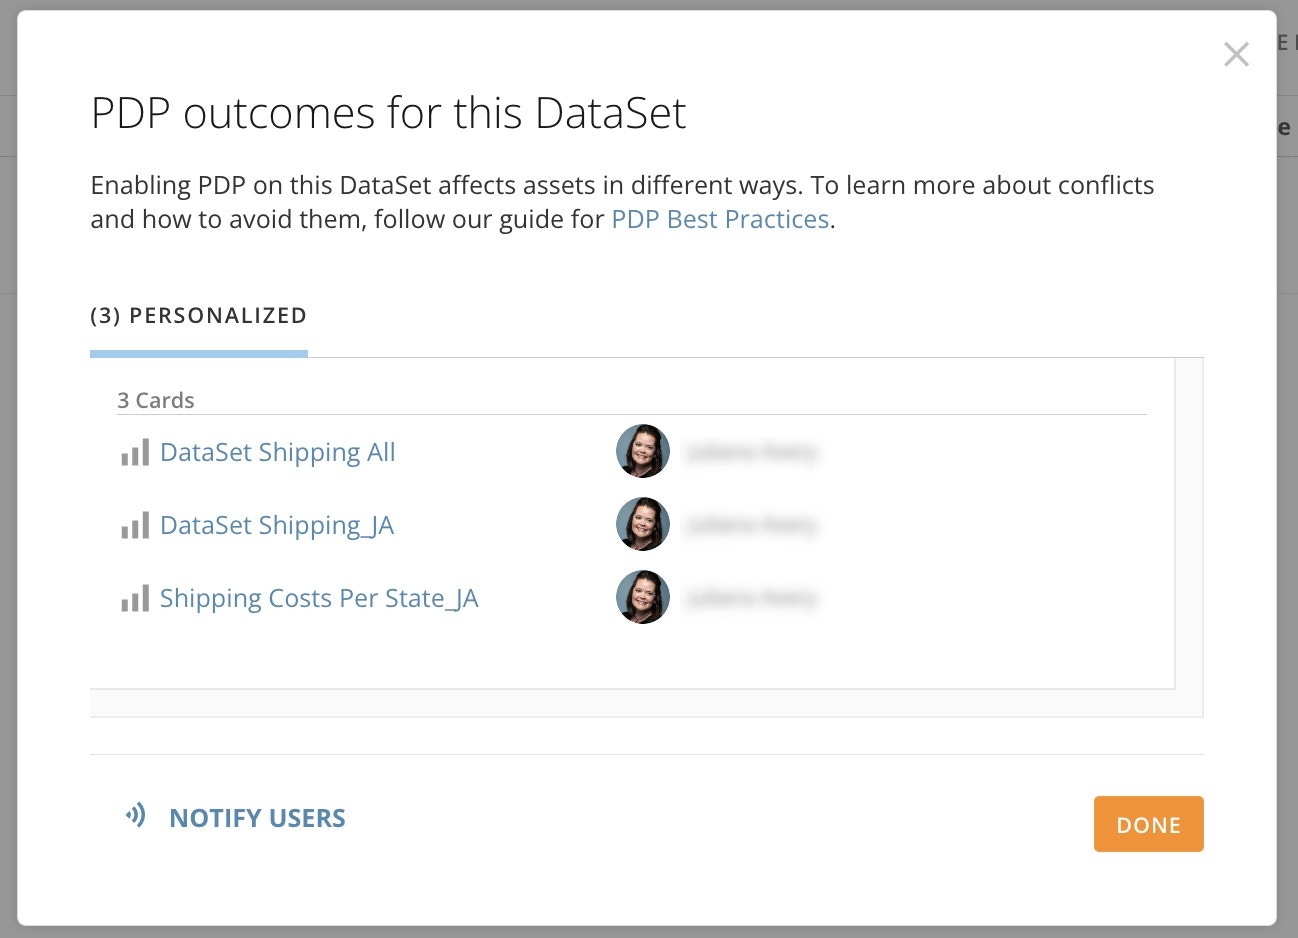
In either the Row Policies/Column Policies tab, select Impact to open the outcomes modal.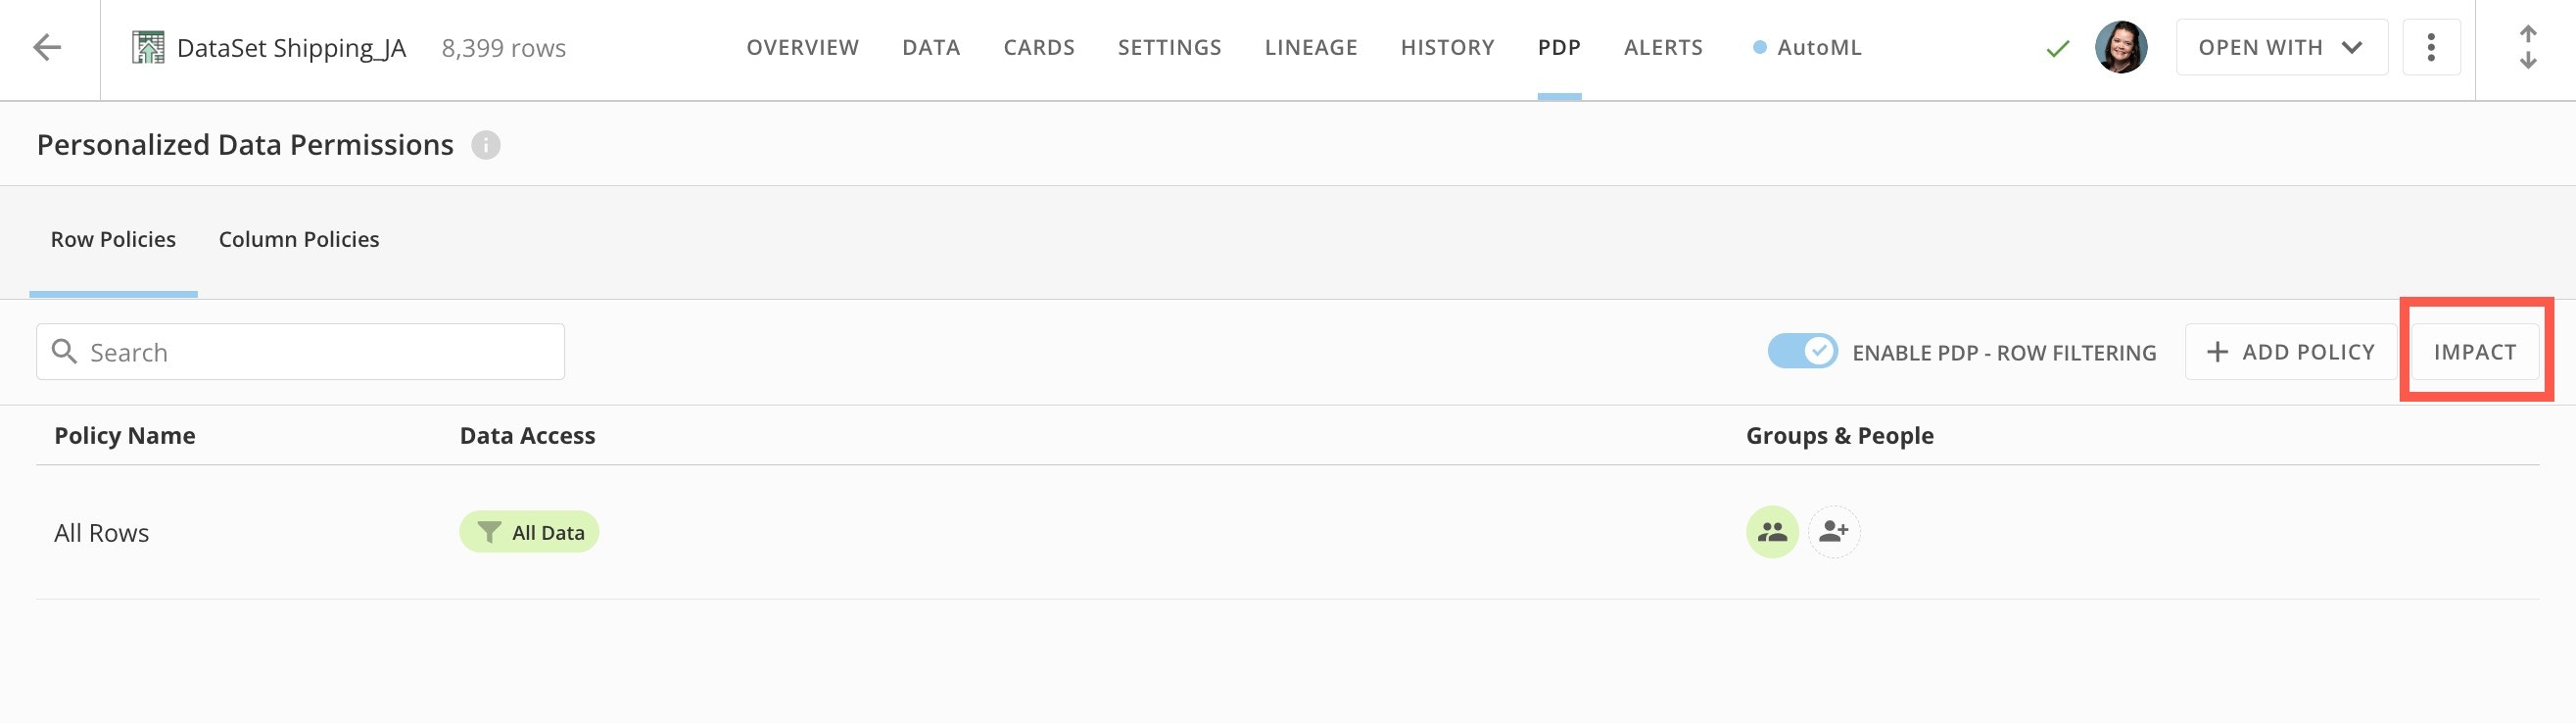
- The Attention tab displays any DataFlows that will break if PDP is added. You can expand a DataFlow to see all included items. Select Fix It to add the owner of those assets to the All Rows policy. This prevents the DataFlow from breaking.

- The Personalized tab displays any cards that will be affected.
Notify Users
In the outcomes modal, you can select Notify Users to send a single email to the owners of all affected assets to notify them that you are updating PDP for this DataSet. When finished, select Done to close the modal.Row Policies
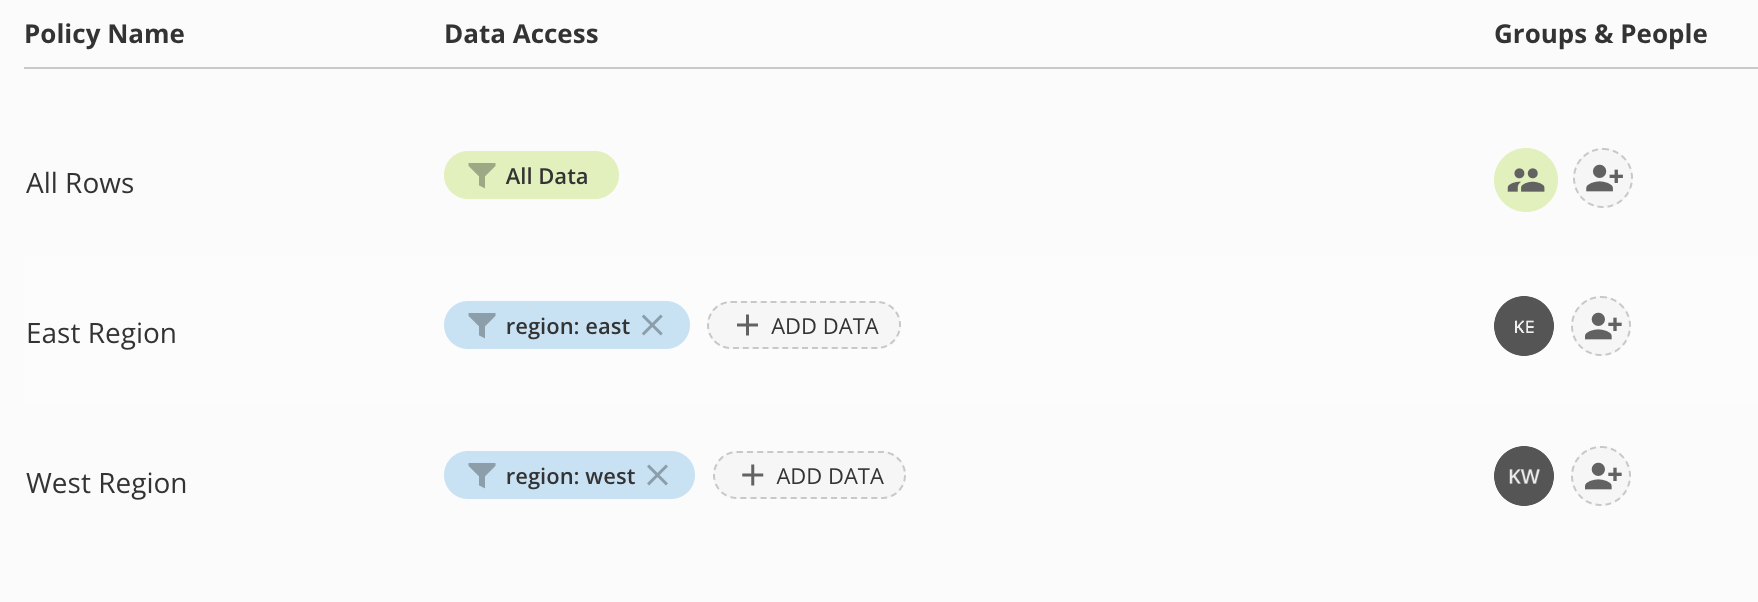
In the Rows Policies tab, you can create PDP policies based on rows in your DataSet. The Row Policies tab displays a list of all existing row policies for this DataSet. All DataSets have a default All Rows policy to give non-owners/admins access to view all data and use it to build cards and DataFlows.All Rows Policy
DataSet owners and admins have access to all data in a DataSet. The All Rows policy allows you to give other users and groups the same level of access. All DataSets have an existing All Rows policy. Follow these steps to add members to the All Rows policy:- Access the Row Policies tab of the PDP interface.
In the policies list, identify the All Rows policy. - For the All Rows policy, select Add groups & people.
The Add groups & people modal displays.

- In the modal, search for and select the person or group name to add them to the policy.
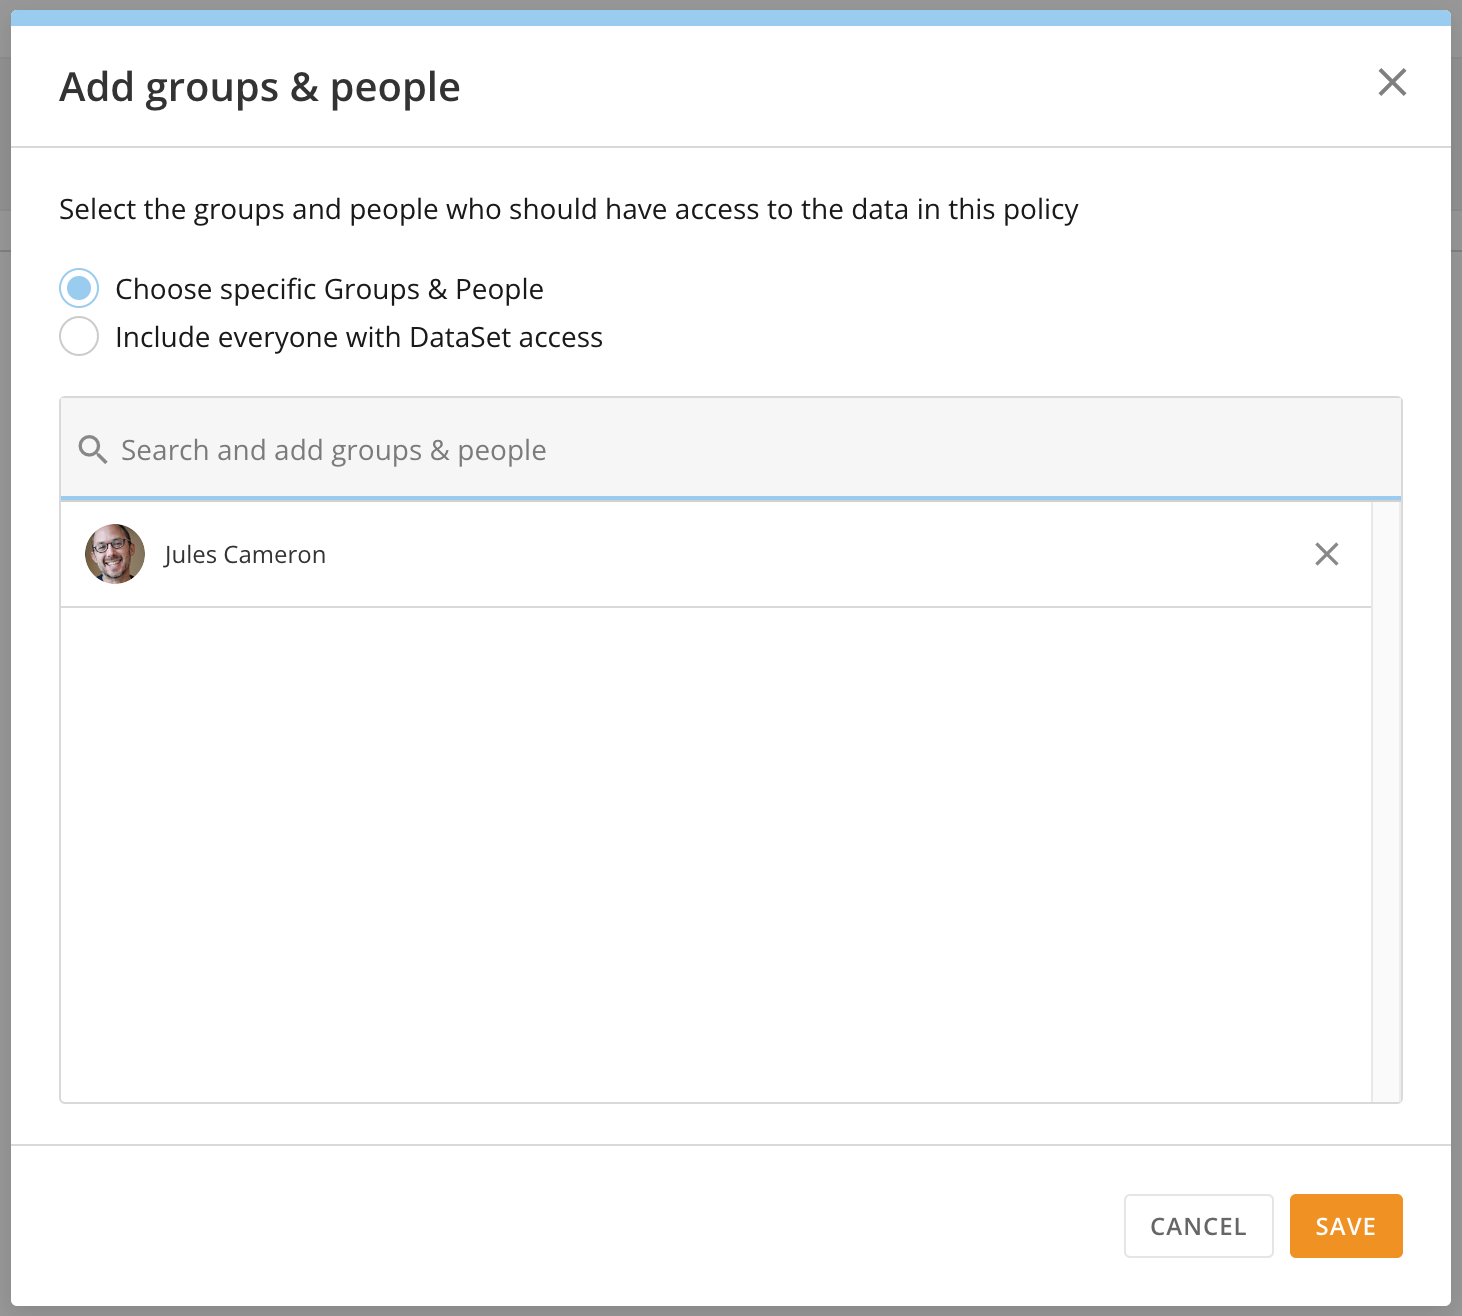
- Select Save to keep your changes and close the modal.
Manage All Rows with a DataFlow
Note: If you want to give people/groups view access to all of the data in
a DataSet, but you don’t want them to build DataFlows from the data, you can’t
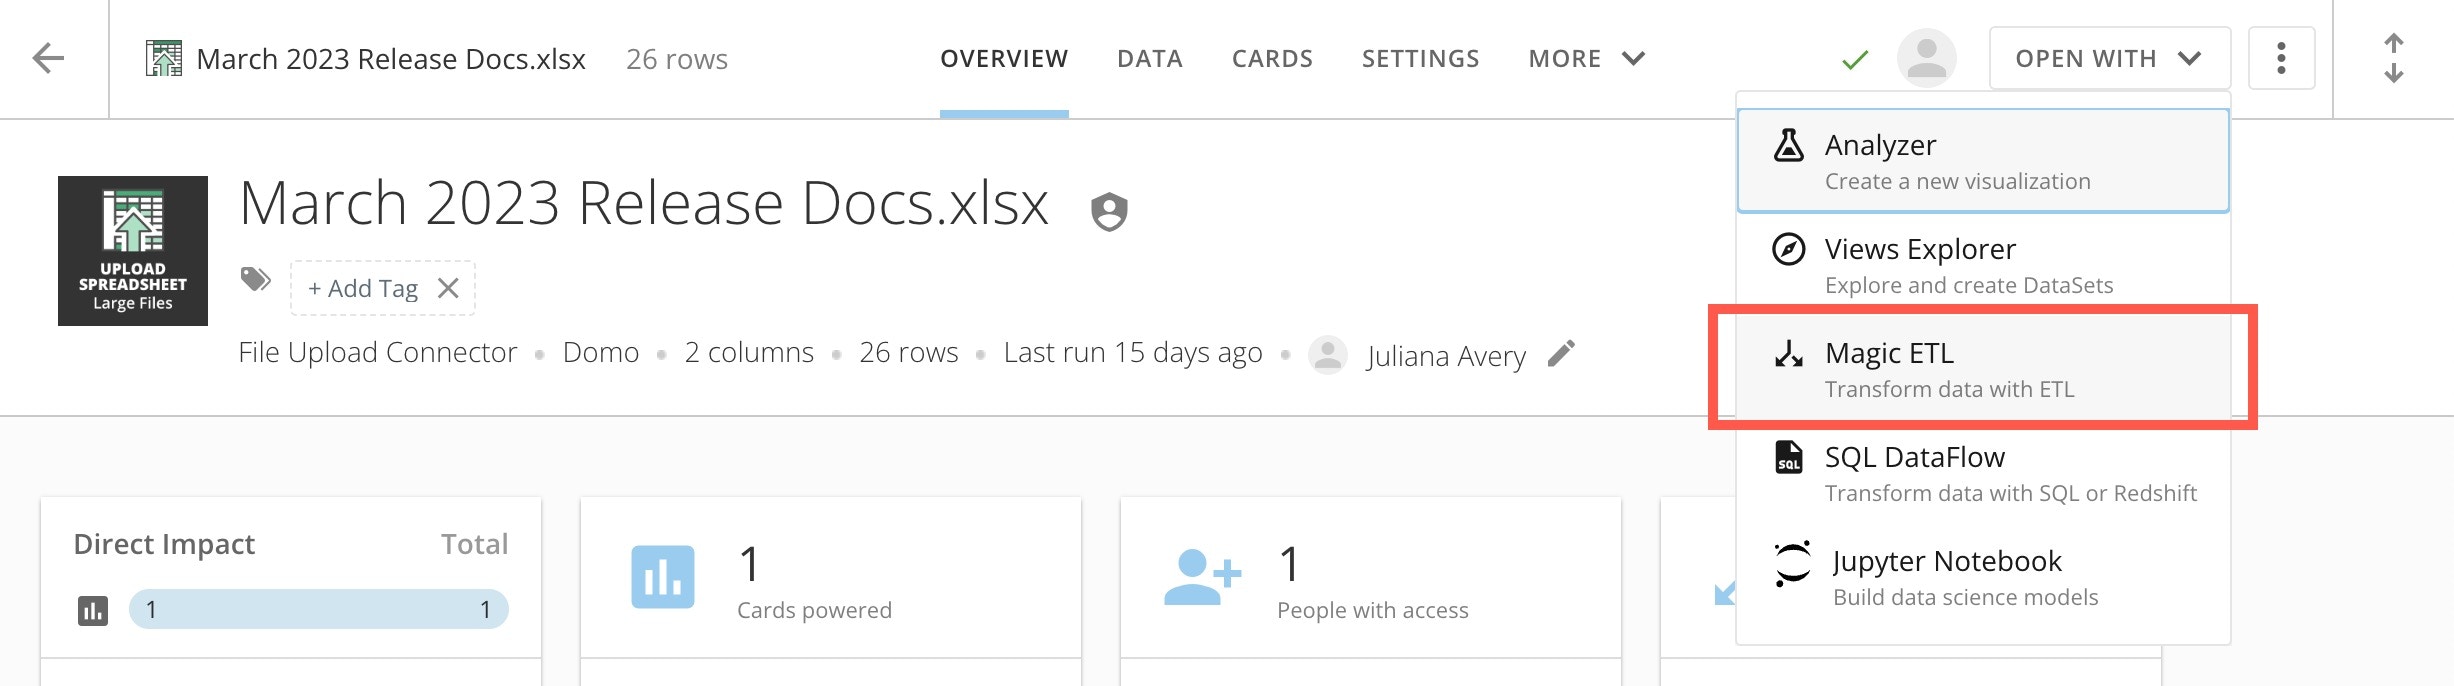
use the All Rows policy. Instead, you can use a Magic ETL DataFlow. Follow the
steps below.
-
From the details page of the DataSet, select Open With > Magic ETL.
The DataSet displays on the Magic ETL canvas as the input DataSet.
-
In the sidebar, expand the Utility tiles. Drag an Add Constants tile to the canvas and connect it to the input DataSet to expand the tile editor below the canvas.
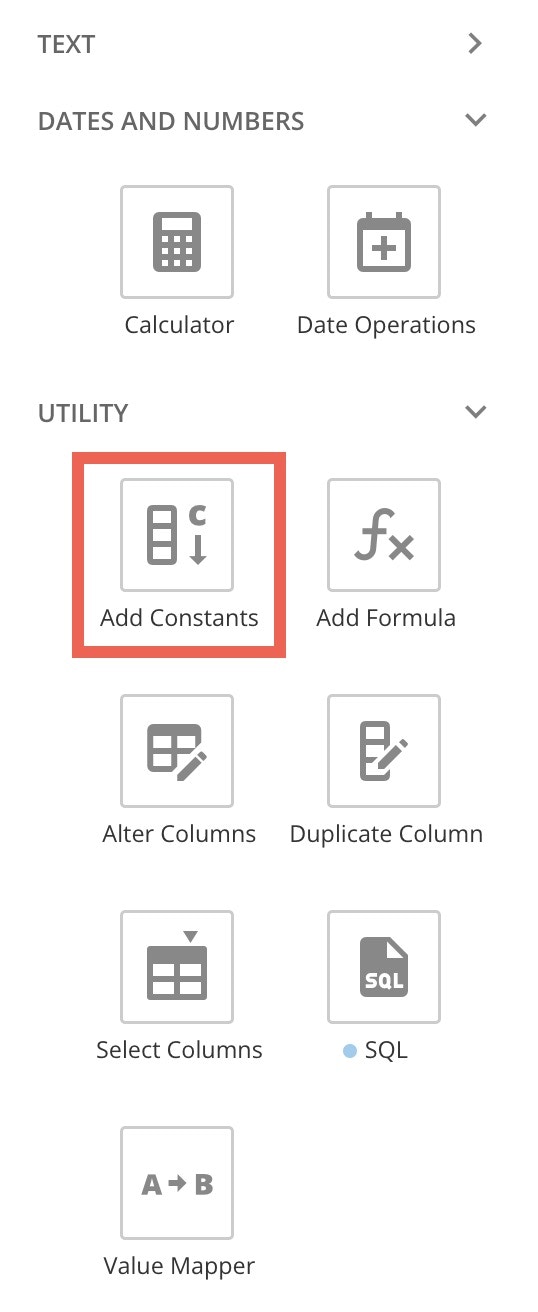
- In step 1 of the tile editor, enter `Access to All Rows` as the name.
- In the step 2 dropdown, choose Text.
-
In step 3, enter `Yes` as the constant value.
- Create an output DataSet and connect it to the Add Constants tile.
- Name the output DataSet.
- Name your DataFlow and save it. You must add PDP to the output DataSet of the DataFlow. Learn about PDP and DataFlows below.
- In the Data Center, navigate to the output DataSet details. Go to the PDP tab.
- Select + Add Policy to add a new row.
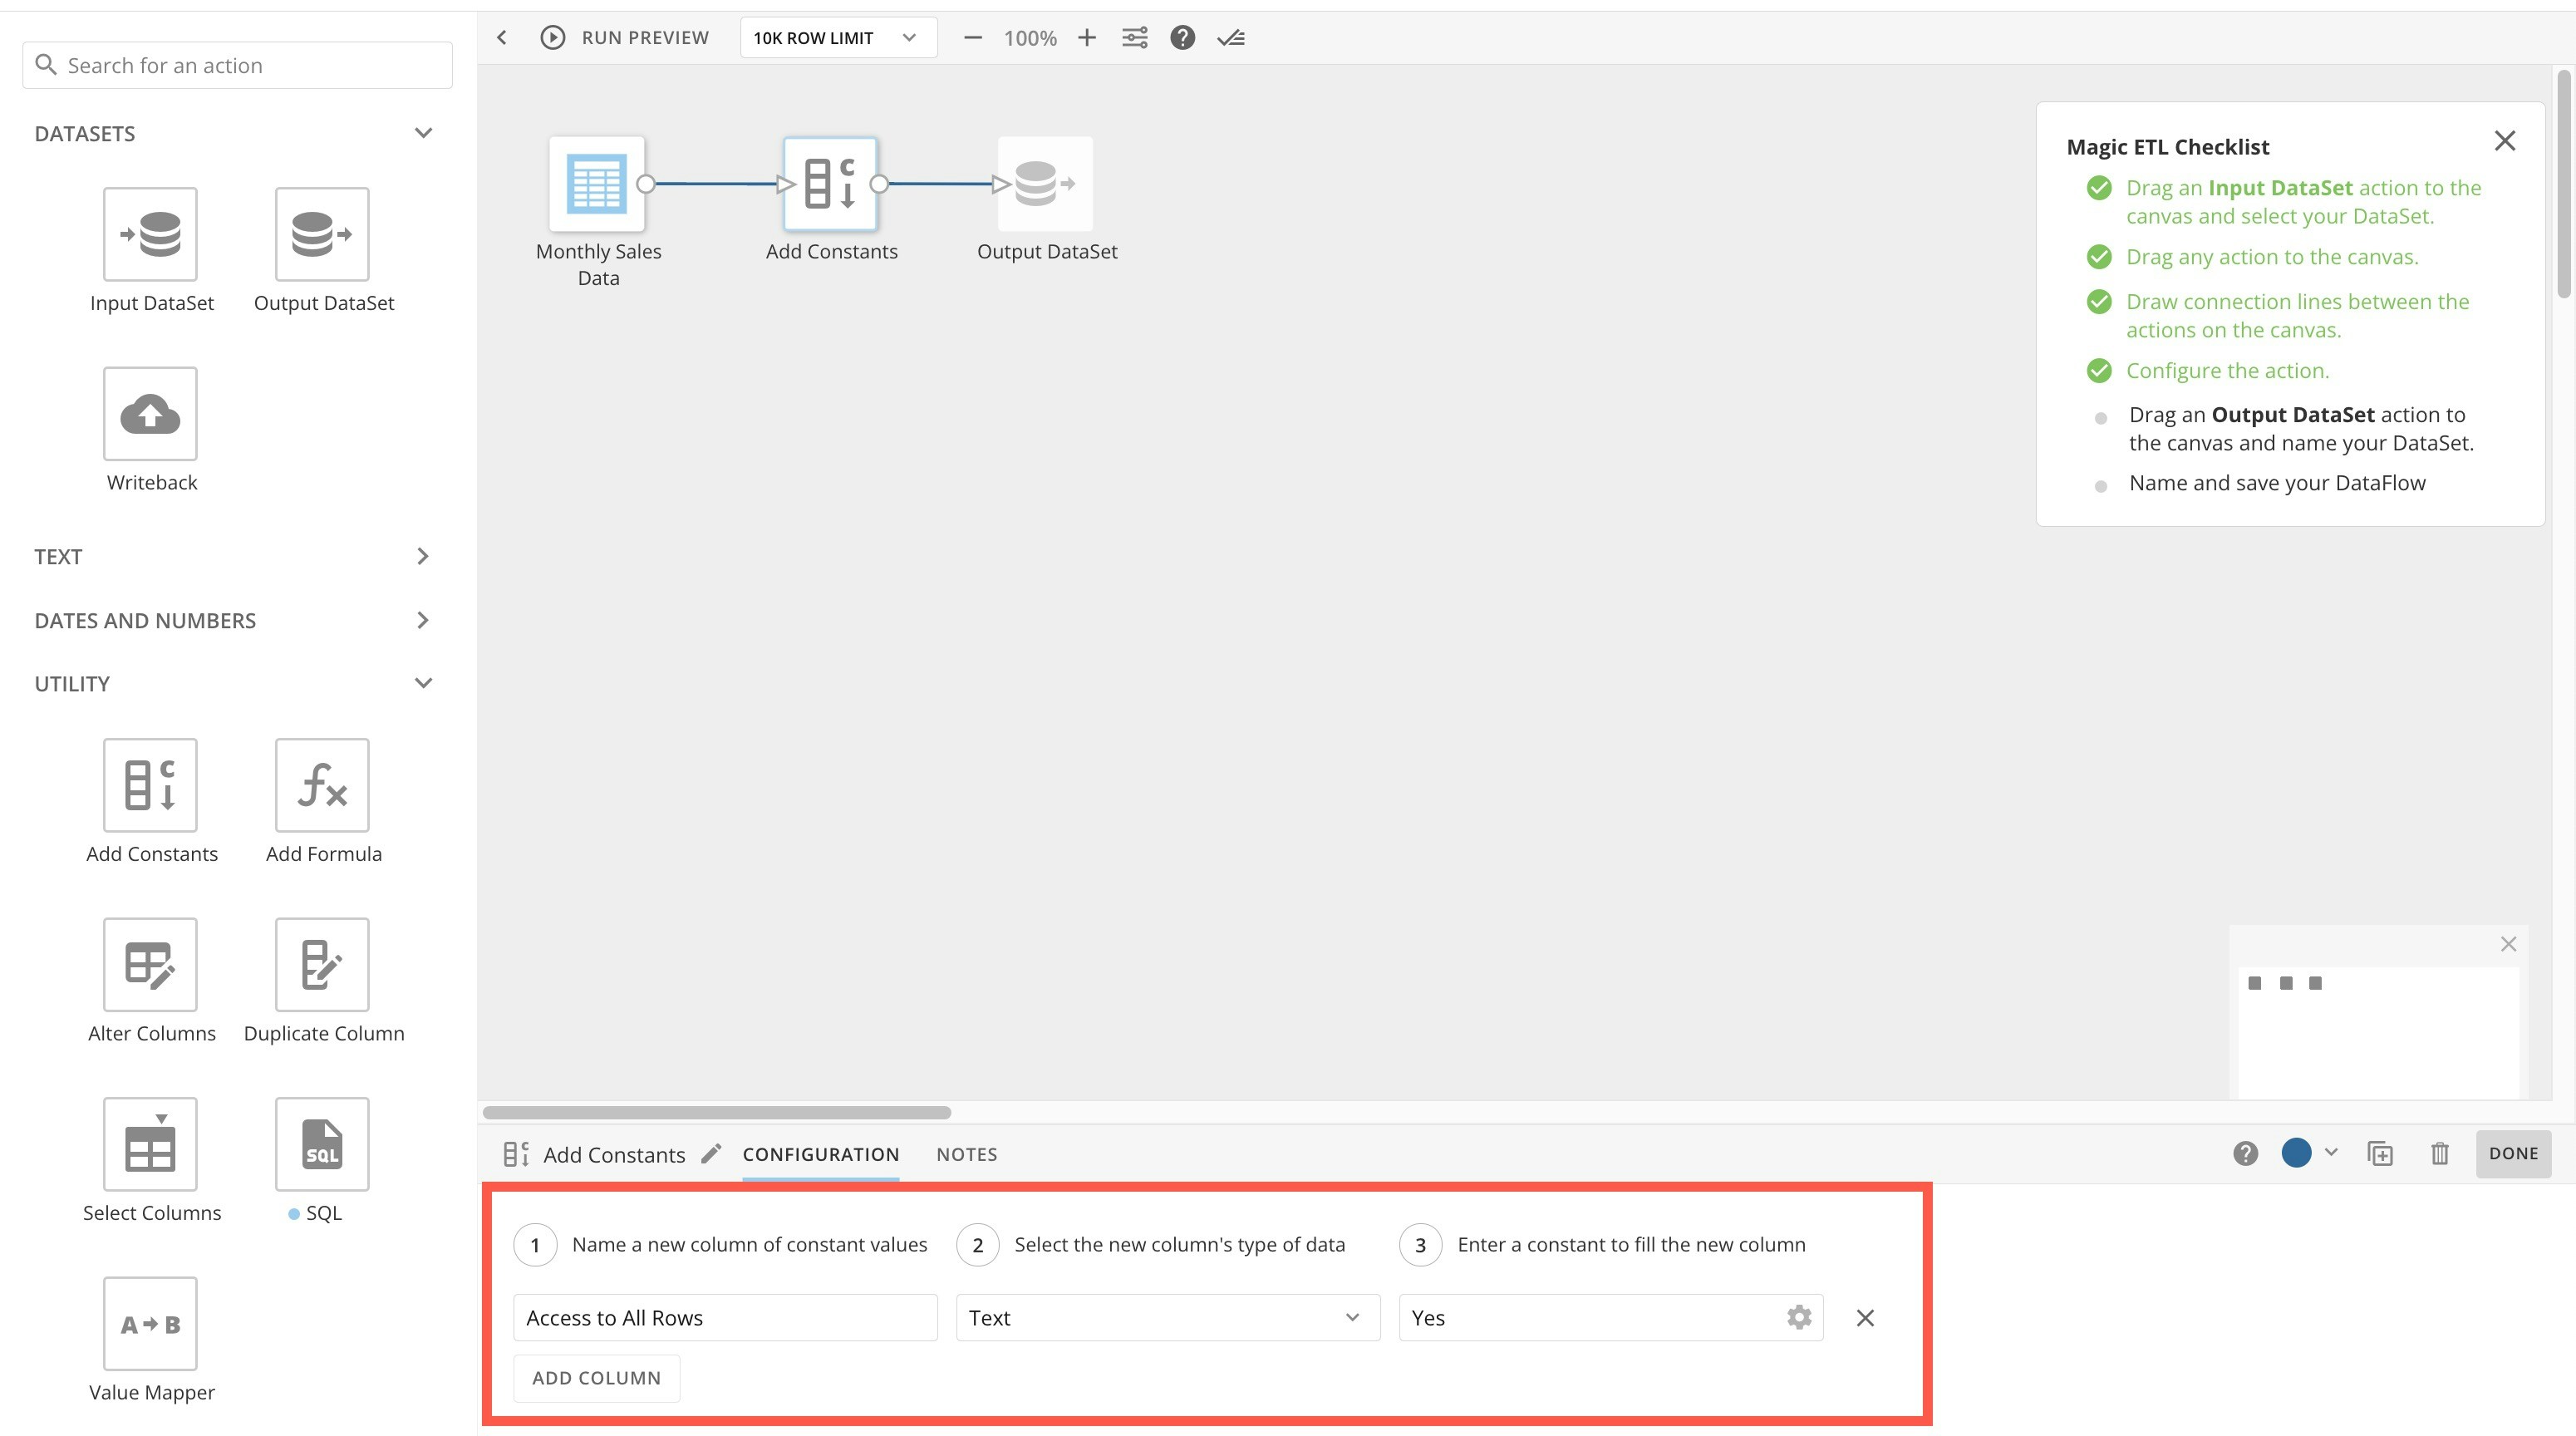
- Name the policy and select + Add Data to open the Add data access modal.
- In the Column Name dropdown, select Access to All Rows.
-
In the search bar, enter and select “Yes.”
- Select Save to close the modal.
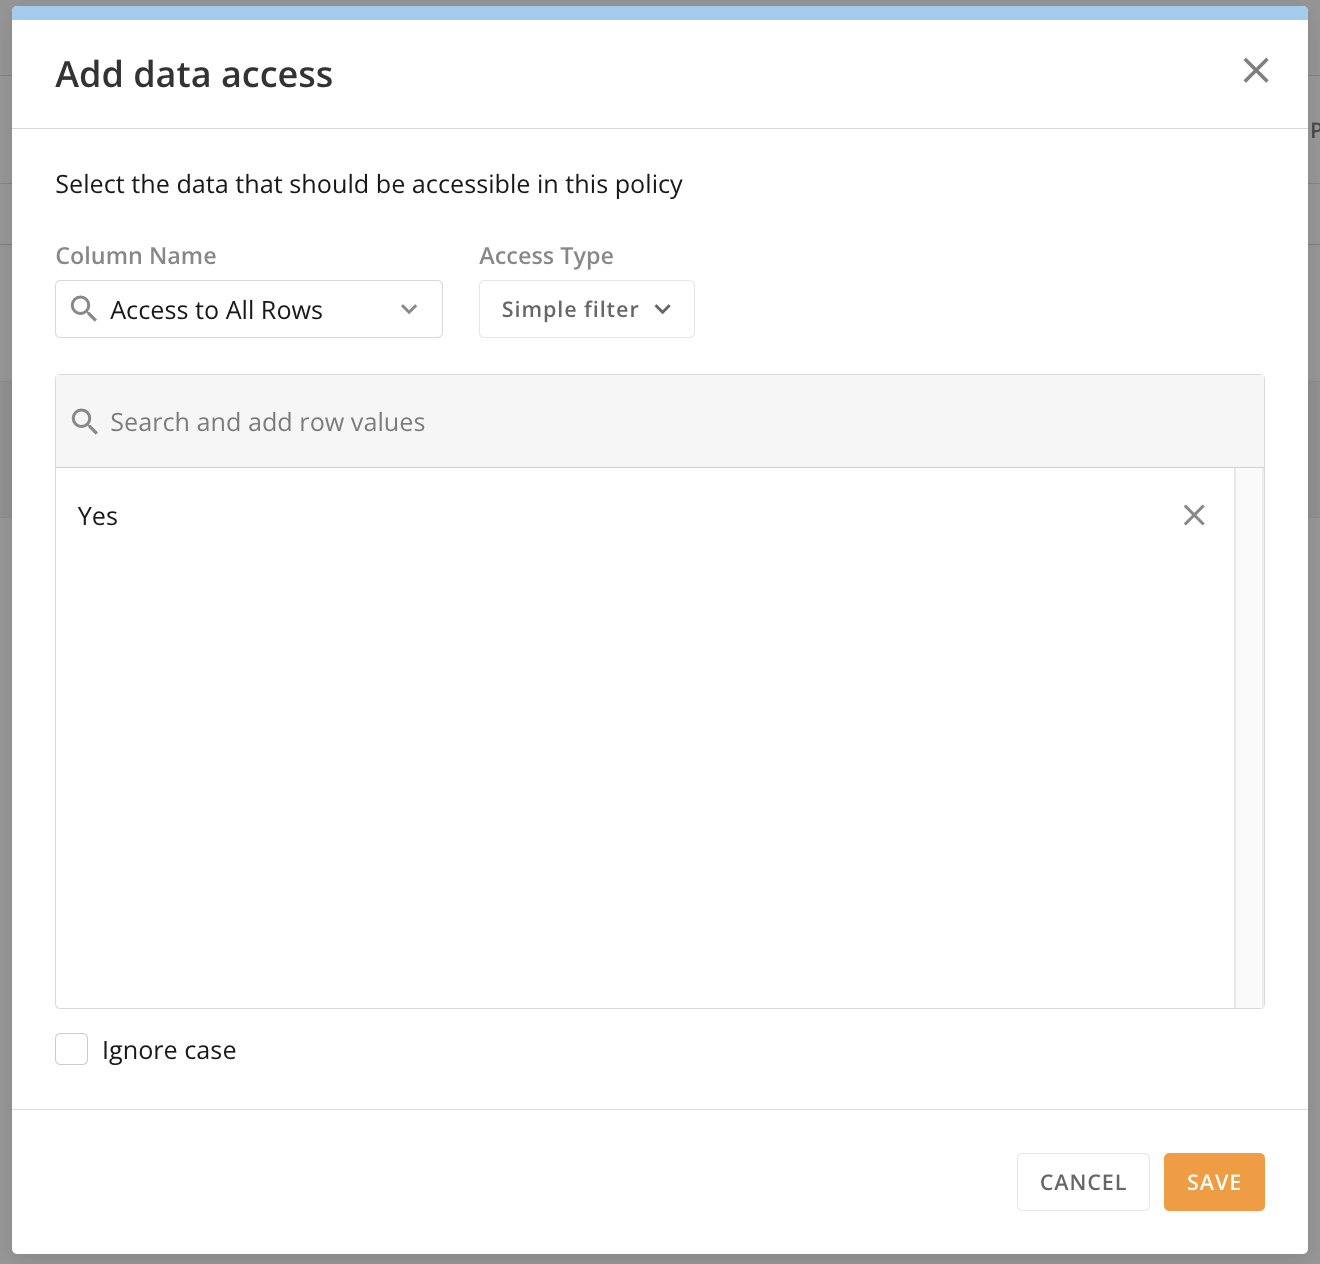
- Use the Add groups & people option to this policy and select Save when finished.
-
In the policy row, select Save.
Row Policy Filter Types
When you create a PDP row policy, you must choose at least one of the following filters. You can choose more than one and create a multi-filtered policy, but you can only configure one filter at a time.-
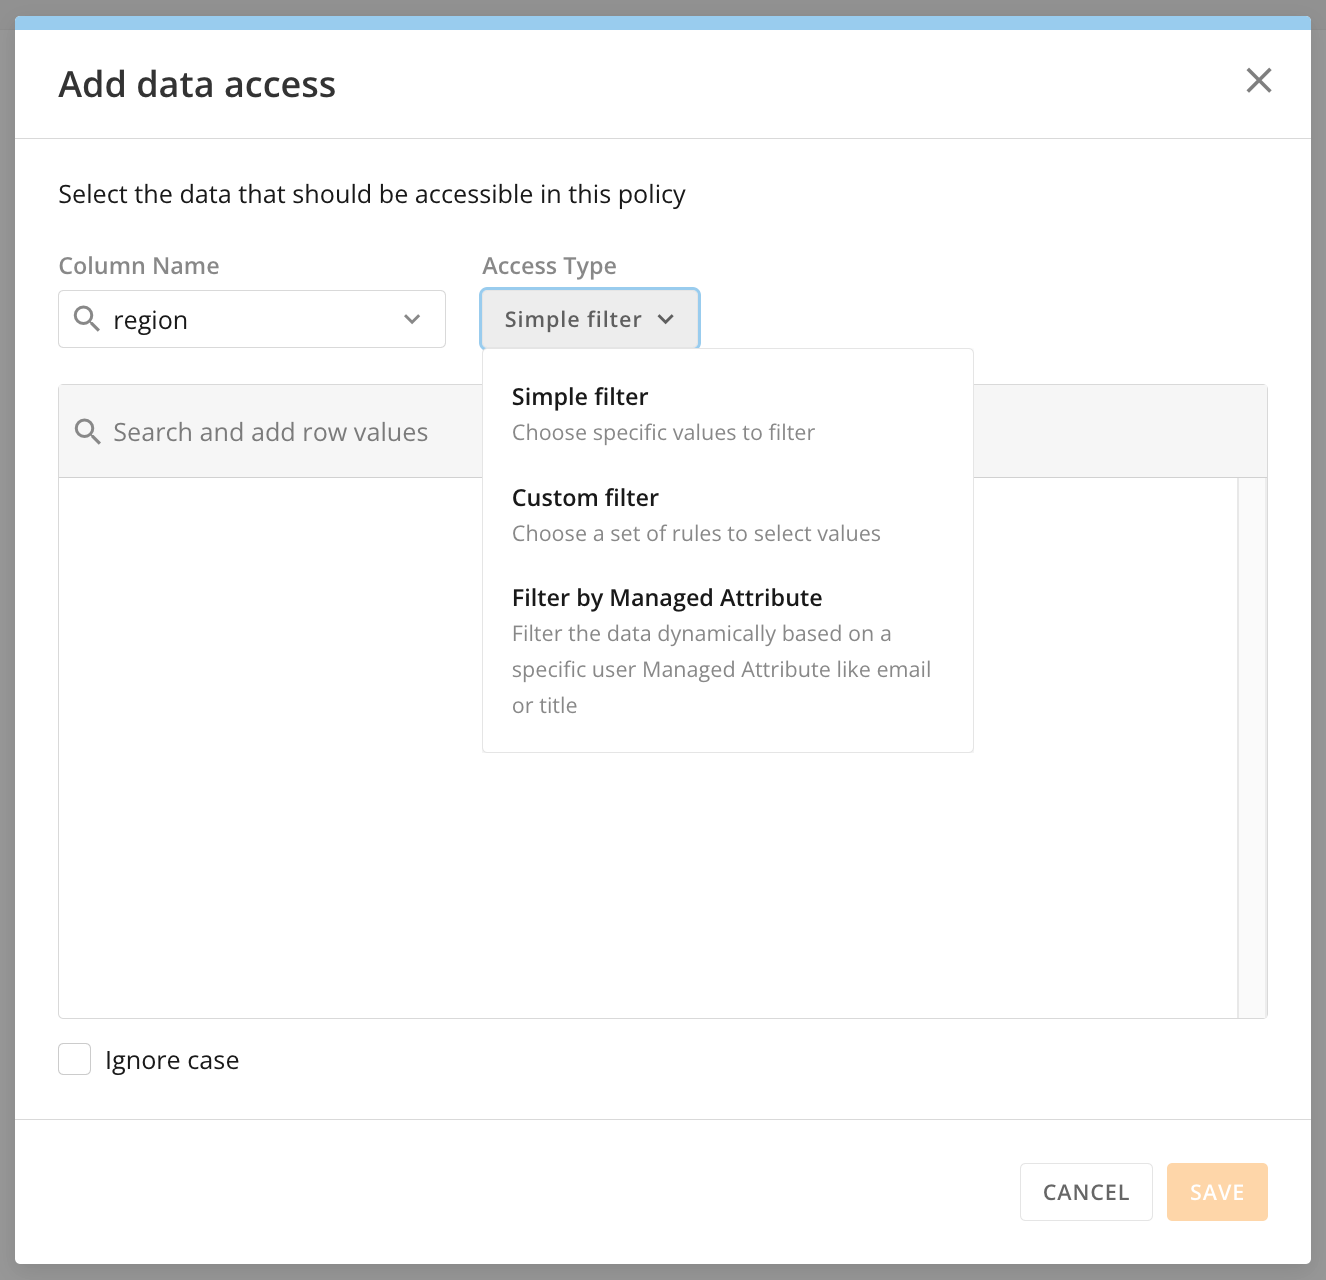
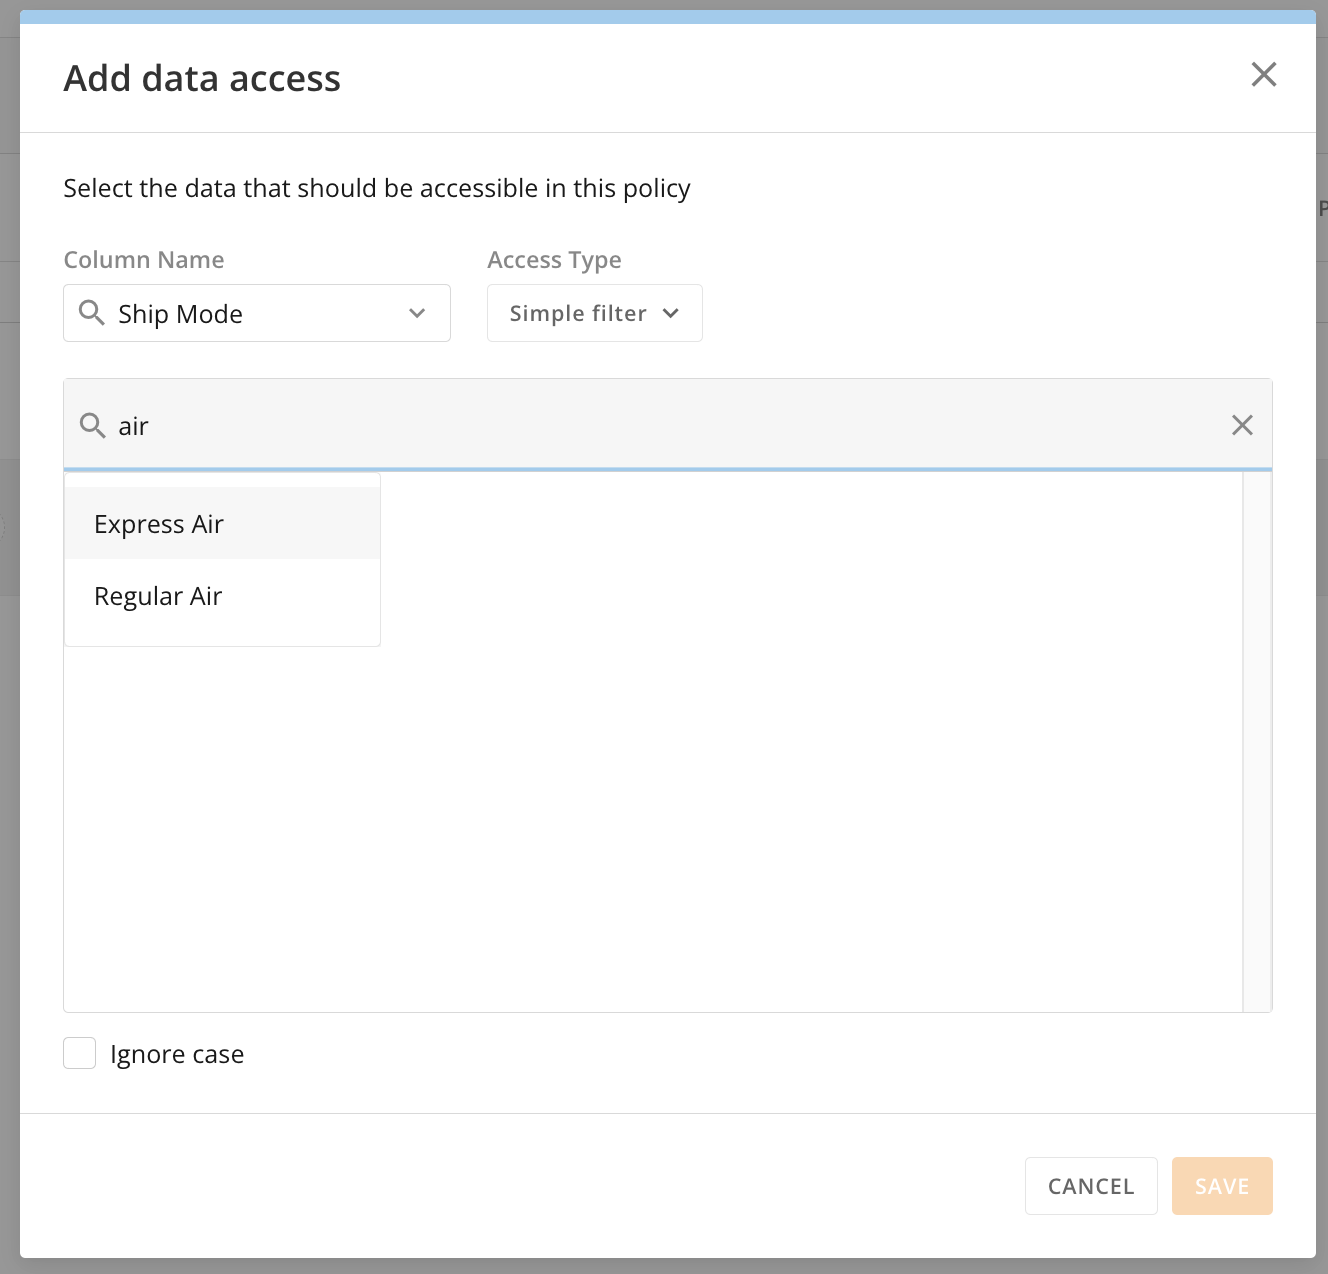
Simple filter — This filter allows you to build your policy based on a specific column value.
Example: Create one policy for the West region and a separate one for the East region. The DataSet must have a `region` column with values of `West` and `East.` -
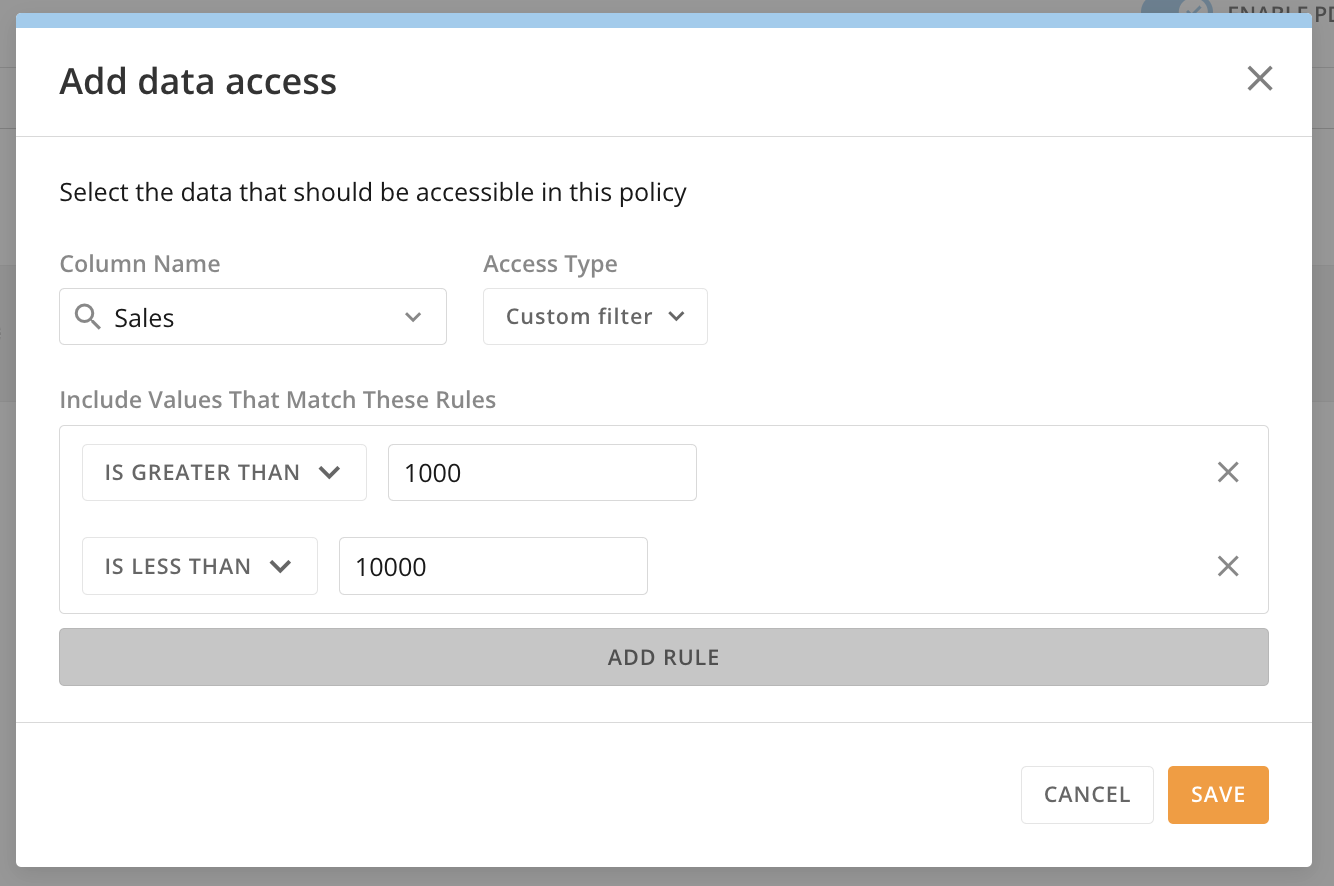
Custom filter — This filter allows you to customize a filter for your policy using one or more rules. This filter is a good choice when a person/group should only see data within a certain date range or above/below a certain threshold.
For a custom filter, you must configure rules. The available rules include:- is greater than
- is less than
- is greater than or equal to
- is less than or equal to
- is between
- Begins with (This rule allows you to filter on text strings.)
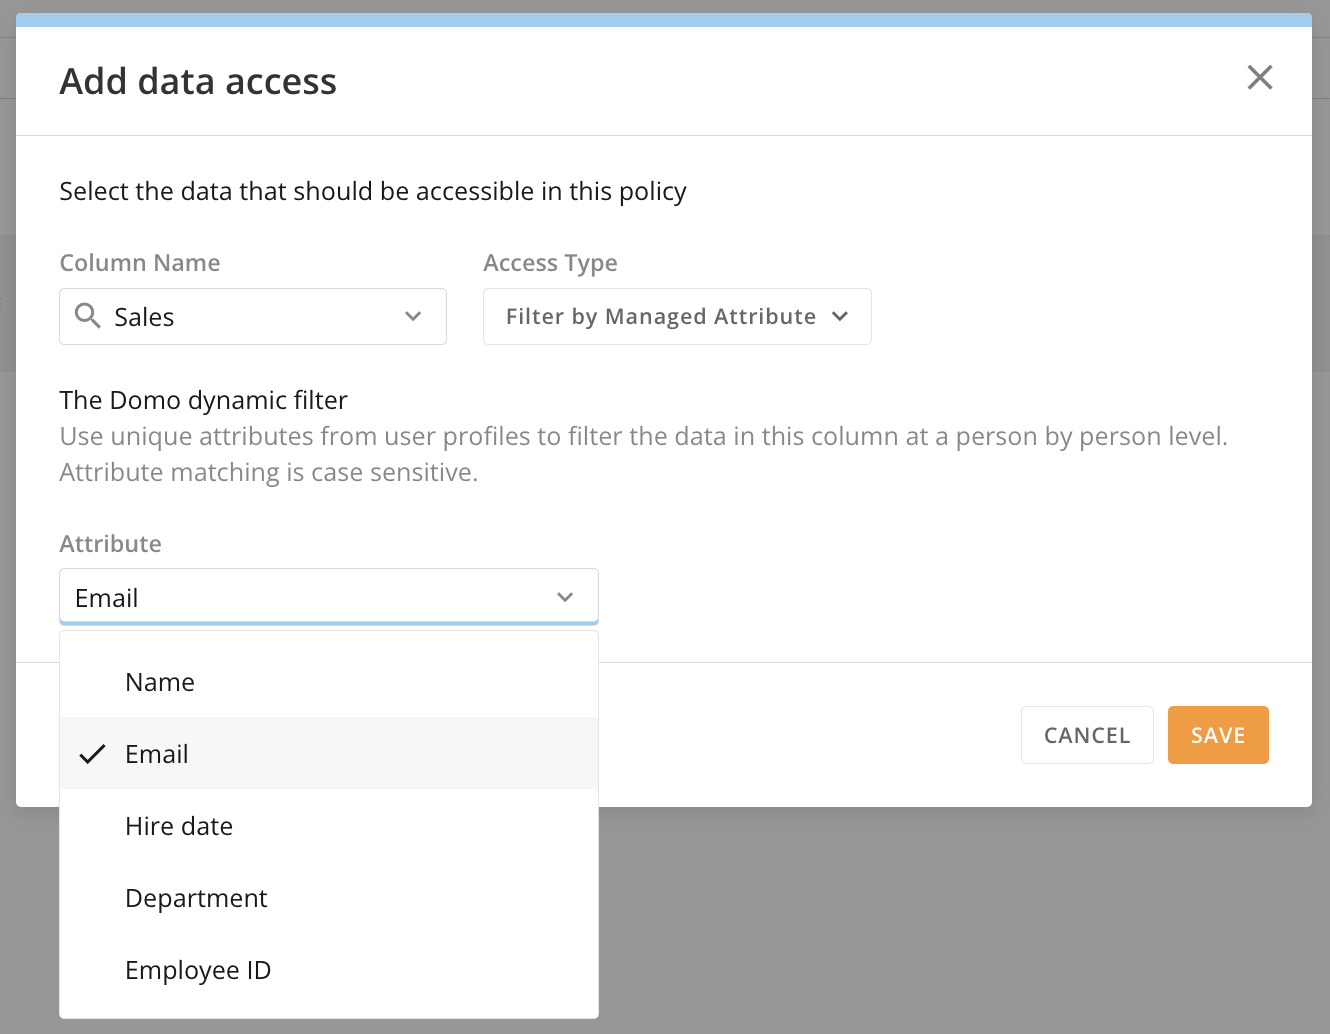
- Filter by Managed Attribute — This filter allows you to filter data dynamically based on managed attributes in your instance such as name, email, or employee number. To learn about attributes and how to create managed attributes, see our Attributes article.
Create a Row Policy
You can add multiple policies to a DataSet, but you must create them one at a time by following the steps below.- Access the Row Policies tab of the PDP interface.
-
Select + Add Policy to add a row to the policy list.
-
In the new row, enter a descriptive name for the policy.
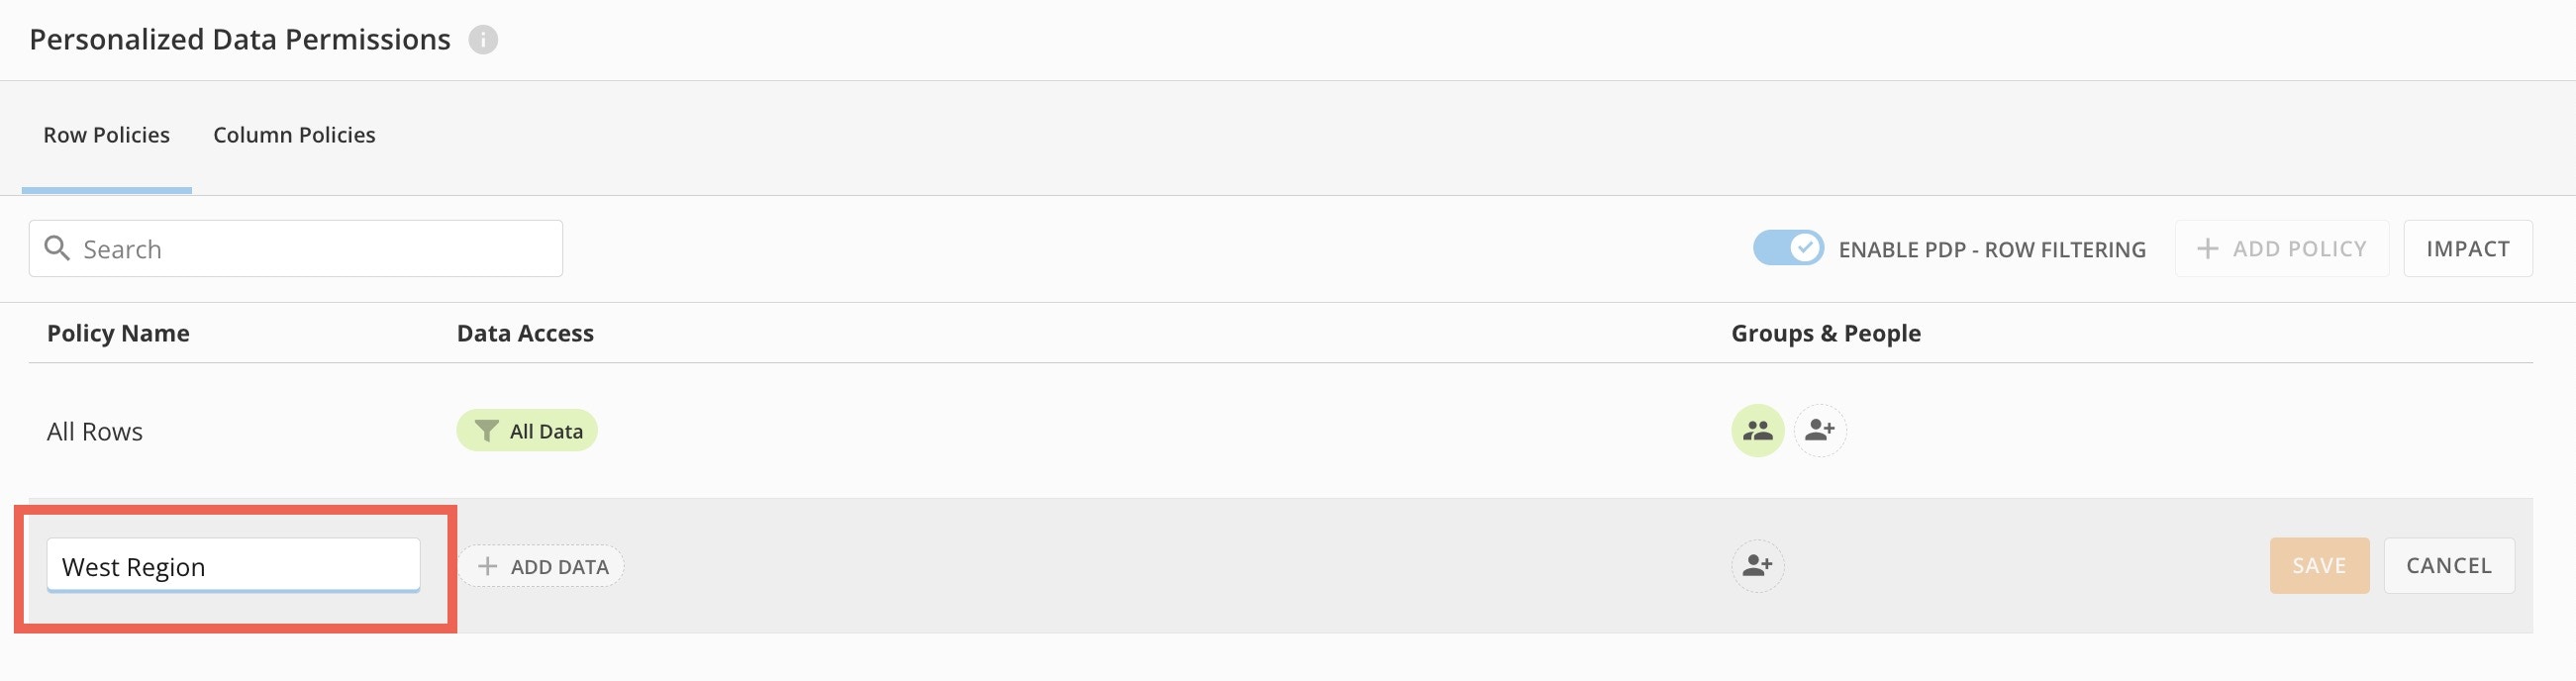
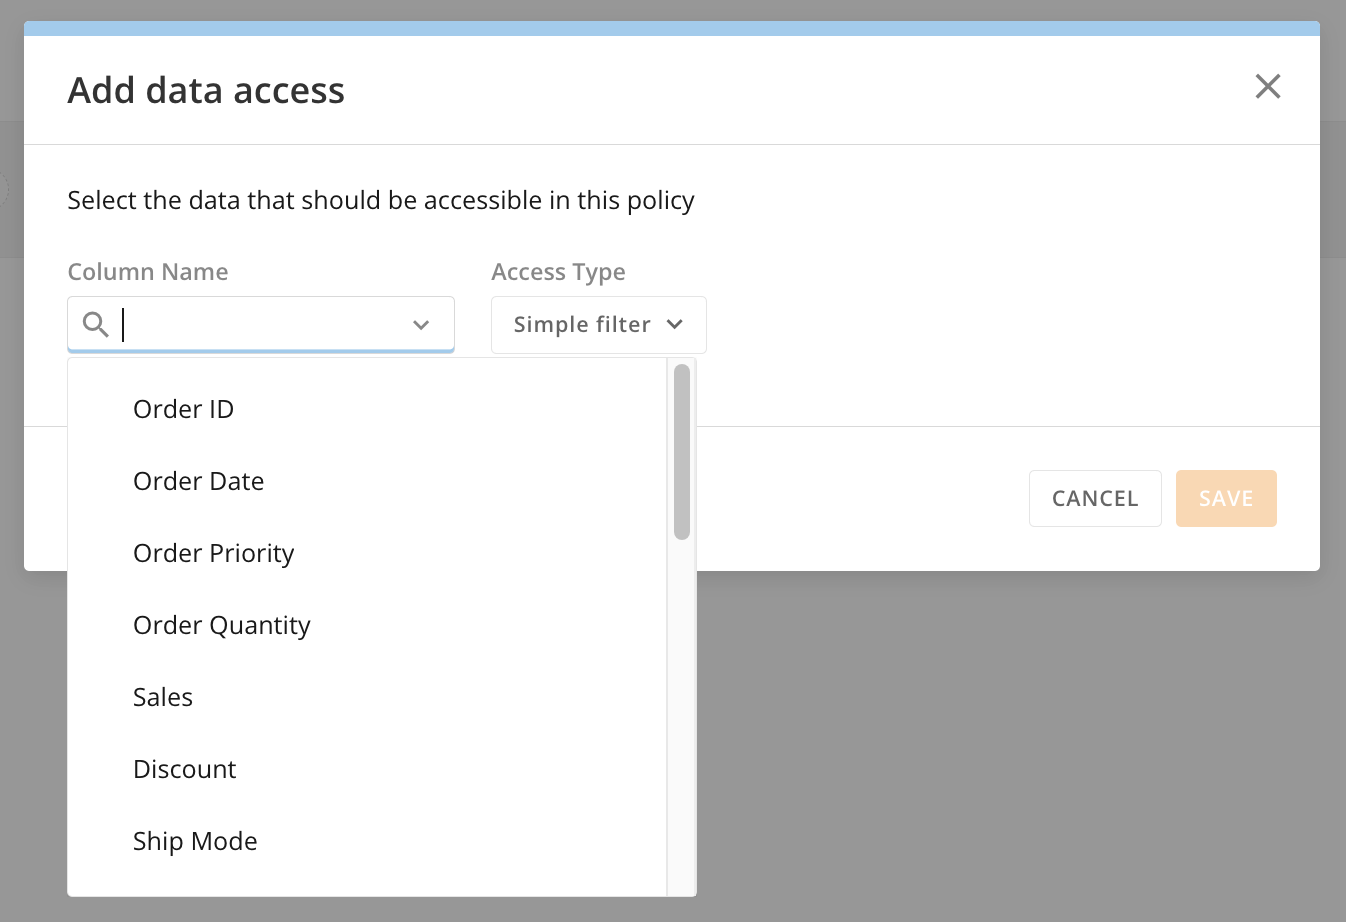
- In the new row, select + Add Data to open the Add data access modal.
-
From the modal’s Column Name dropdown, select the column in the DataSet to filter by.
-
From the Access Type dropdown, choose which filter type to use.
-
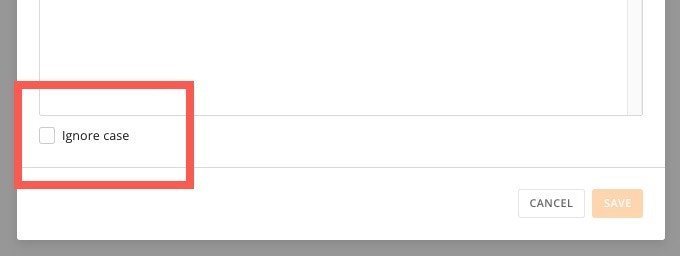
(Optional) Check the box labeled Ignore case to disable uppercase/lowercase sensitivity for your filter.
-
Follow the steps below based on your filter type:
A. Simple filter 1. In the Search and add row values field, search for and select the row you want to filter by. 2. (Optional) Repeat the previous step to add all the rows you want to filter by. 3. When finished, select Save to keep your changes and close the modal.
B. Custom filter 1. Under Include Values That Match These Rules, choose a filter condition. 2. To the right of the filter condition, enter the value or string or select the date that completes the condition.
 Note: If you choose the Is between condition, two fields display—the first for the minimum value or start date, the second for the maximum value or end date.
- (Optional) To add more rules, select Add Rule and repeat the previous steps to add all rules.
-
When finished, select Save to keep your changes and close the modal.
Note: For this filter type to work, you must enable any managed attributes in the Attributes section of the governance Admin Settings. Learn about managed attributes.- In the Attribute dropdown, select the managed attribute to use as a dynamic filter.
-
When finished, select Save to keep your changes and close the modal.
-
Select Add groups & people in the new policy row to open the Add groups & people modal.
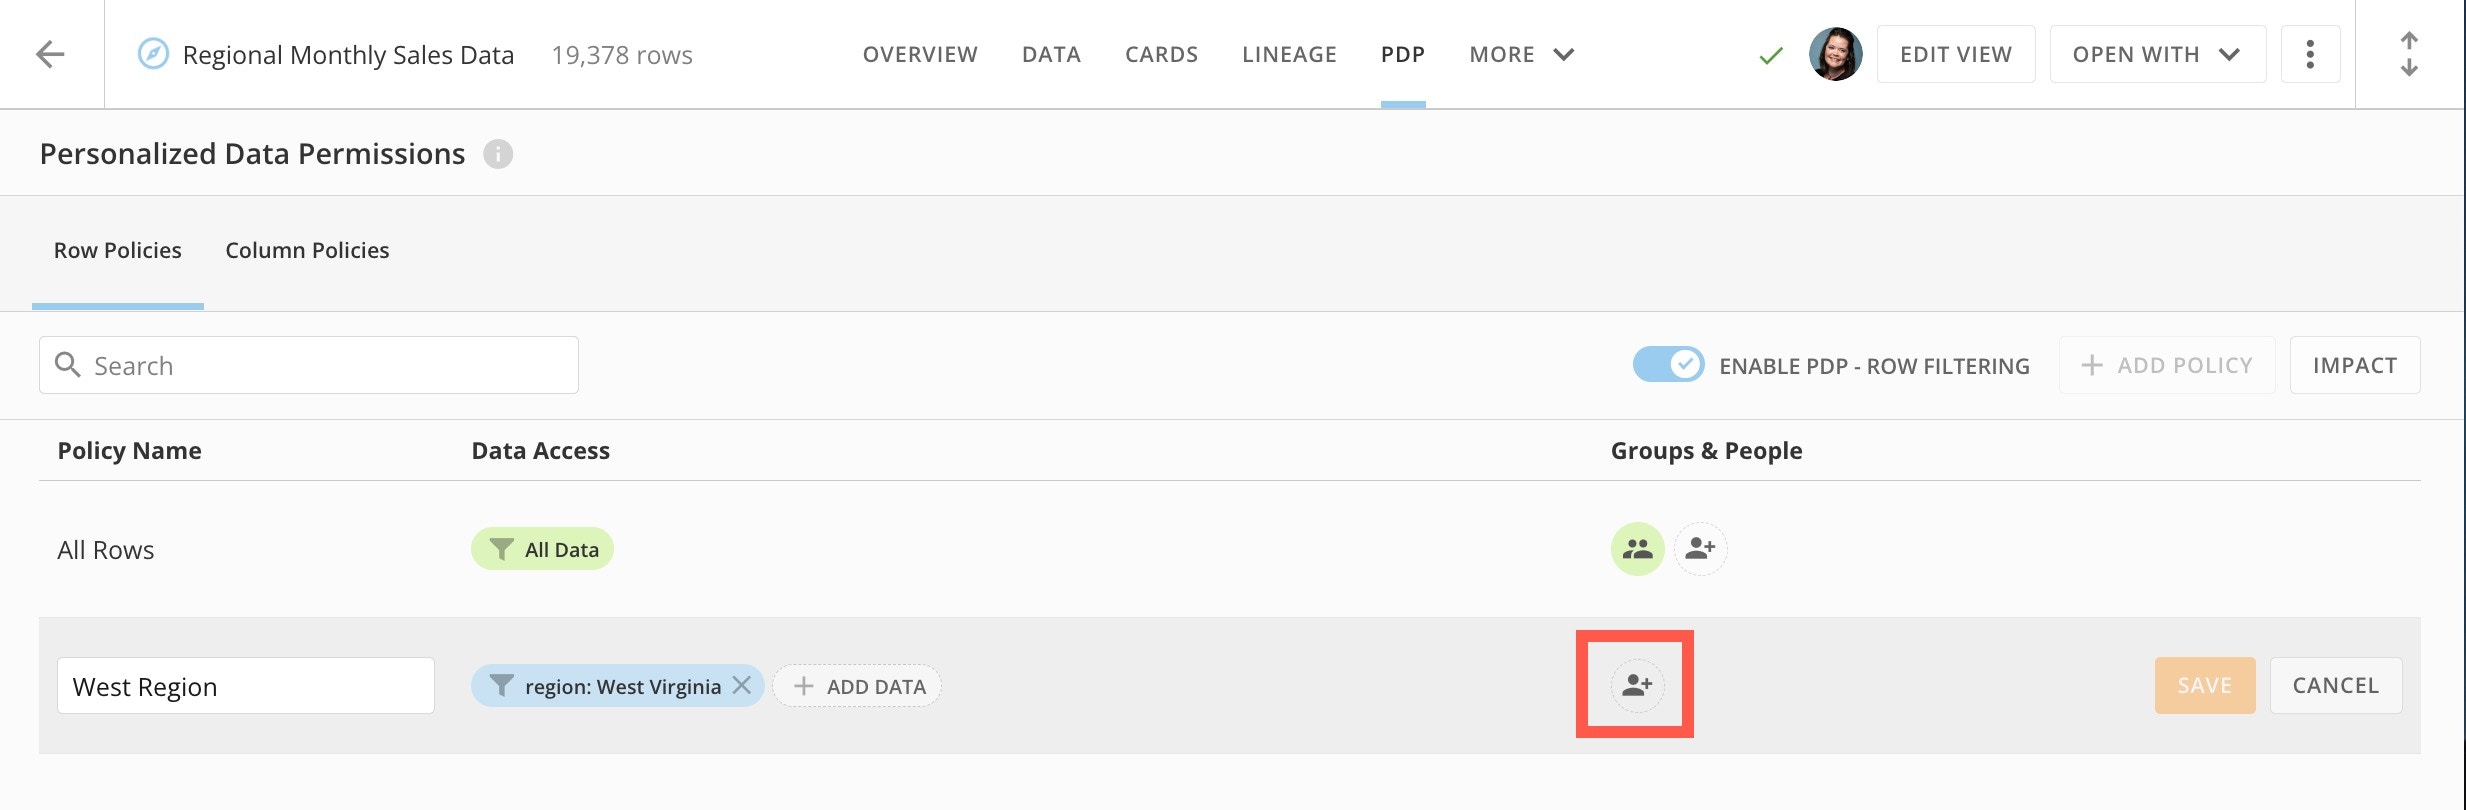
-
In the modal, choose a radio button. The options are:
- Choose specific Groups & People
- Include everyone with DataSet access.
-
(Conditional) If you are choosing specific groups and people, search for and select them. We recommend using groups where possible so that when group members shift, access changes dynamically.
- Select Save to keep your changes and close the modal.
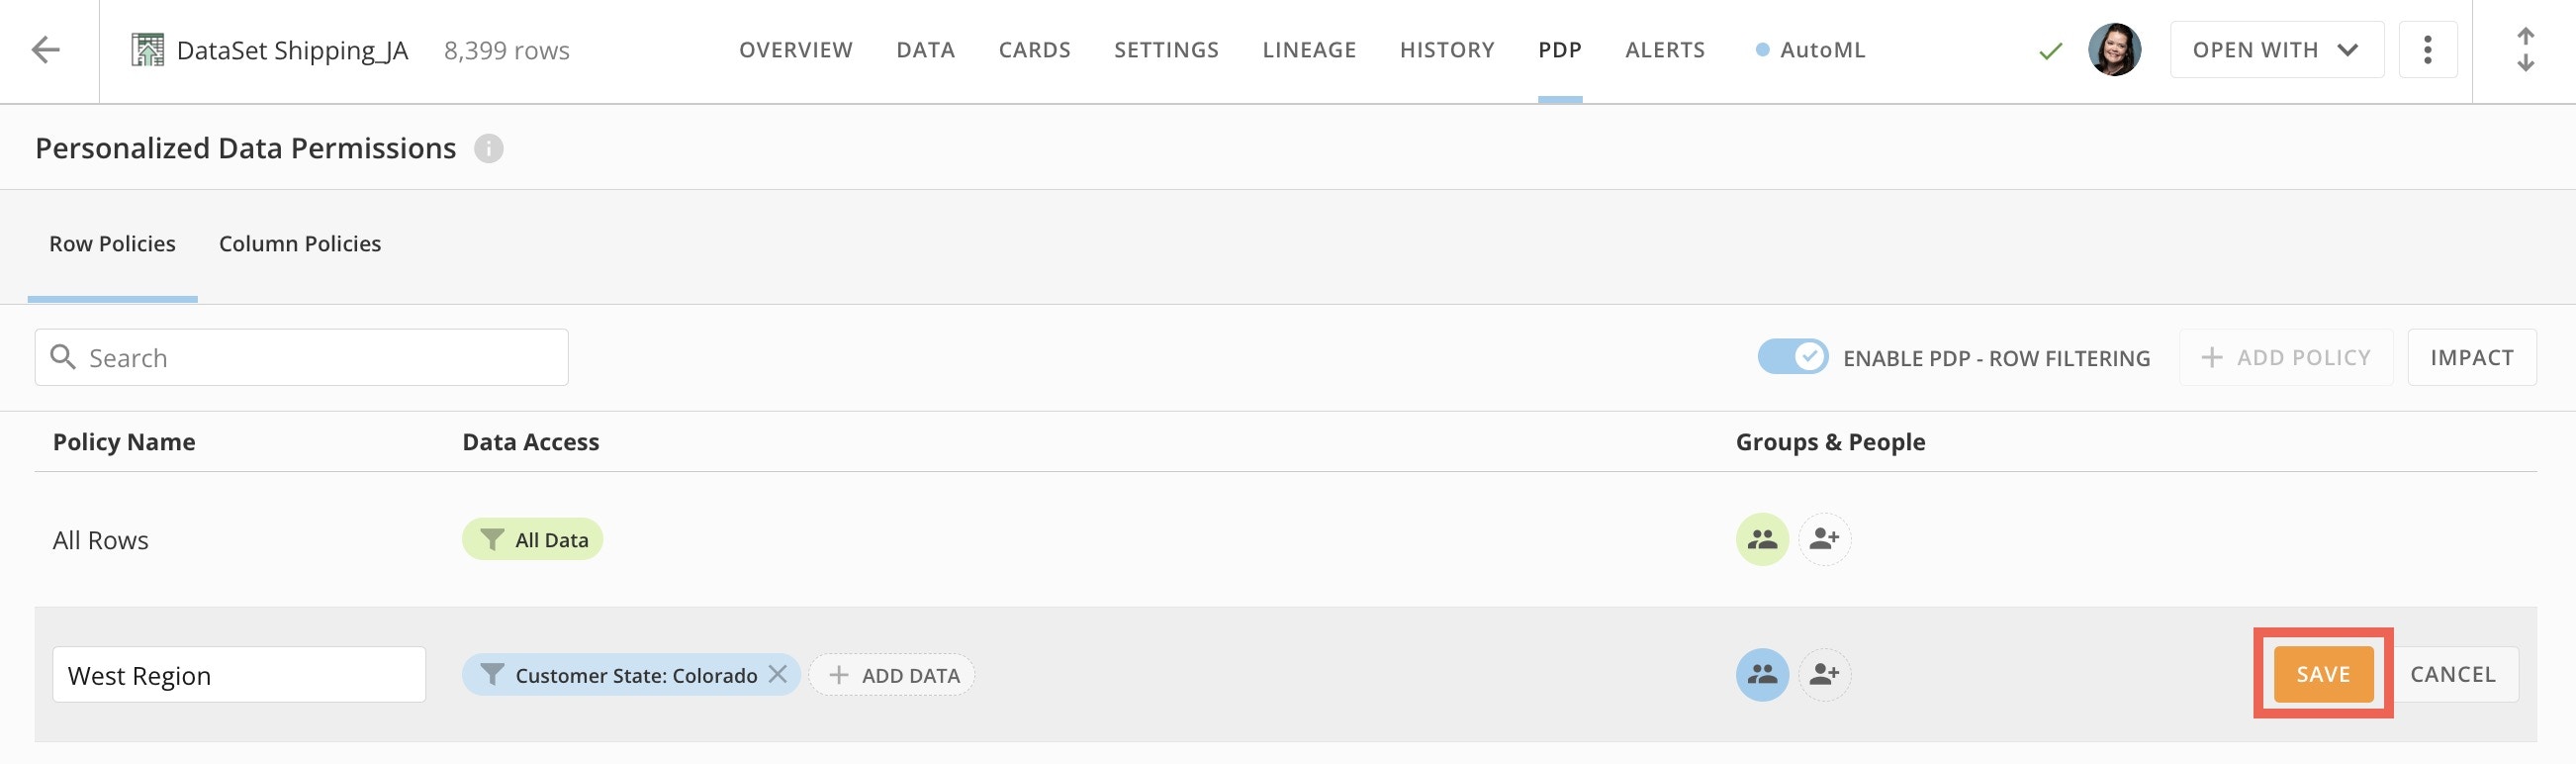
-
In the policy row, select Save.
Preview Configured PDP
After you create a policy, you can preview how it affects the DataSet. We recommend previewing the data before enabling the policy.-
In the policy list, hover over the row for the policy you want to preview and select Preview.
The data preview displays.
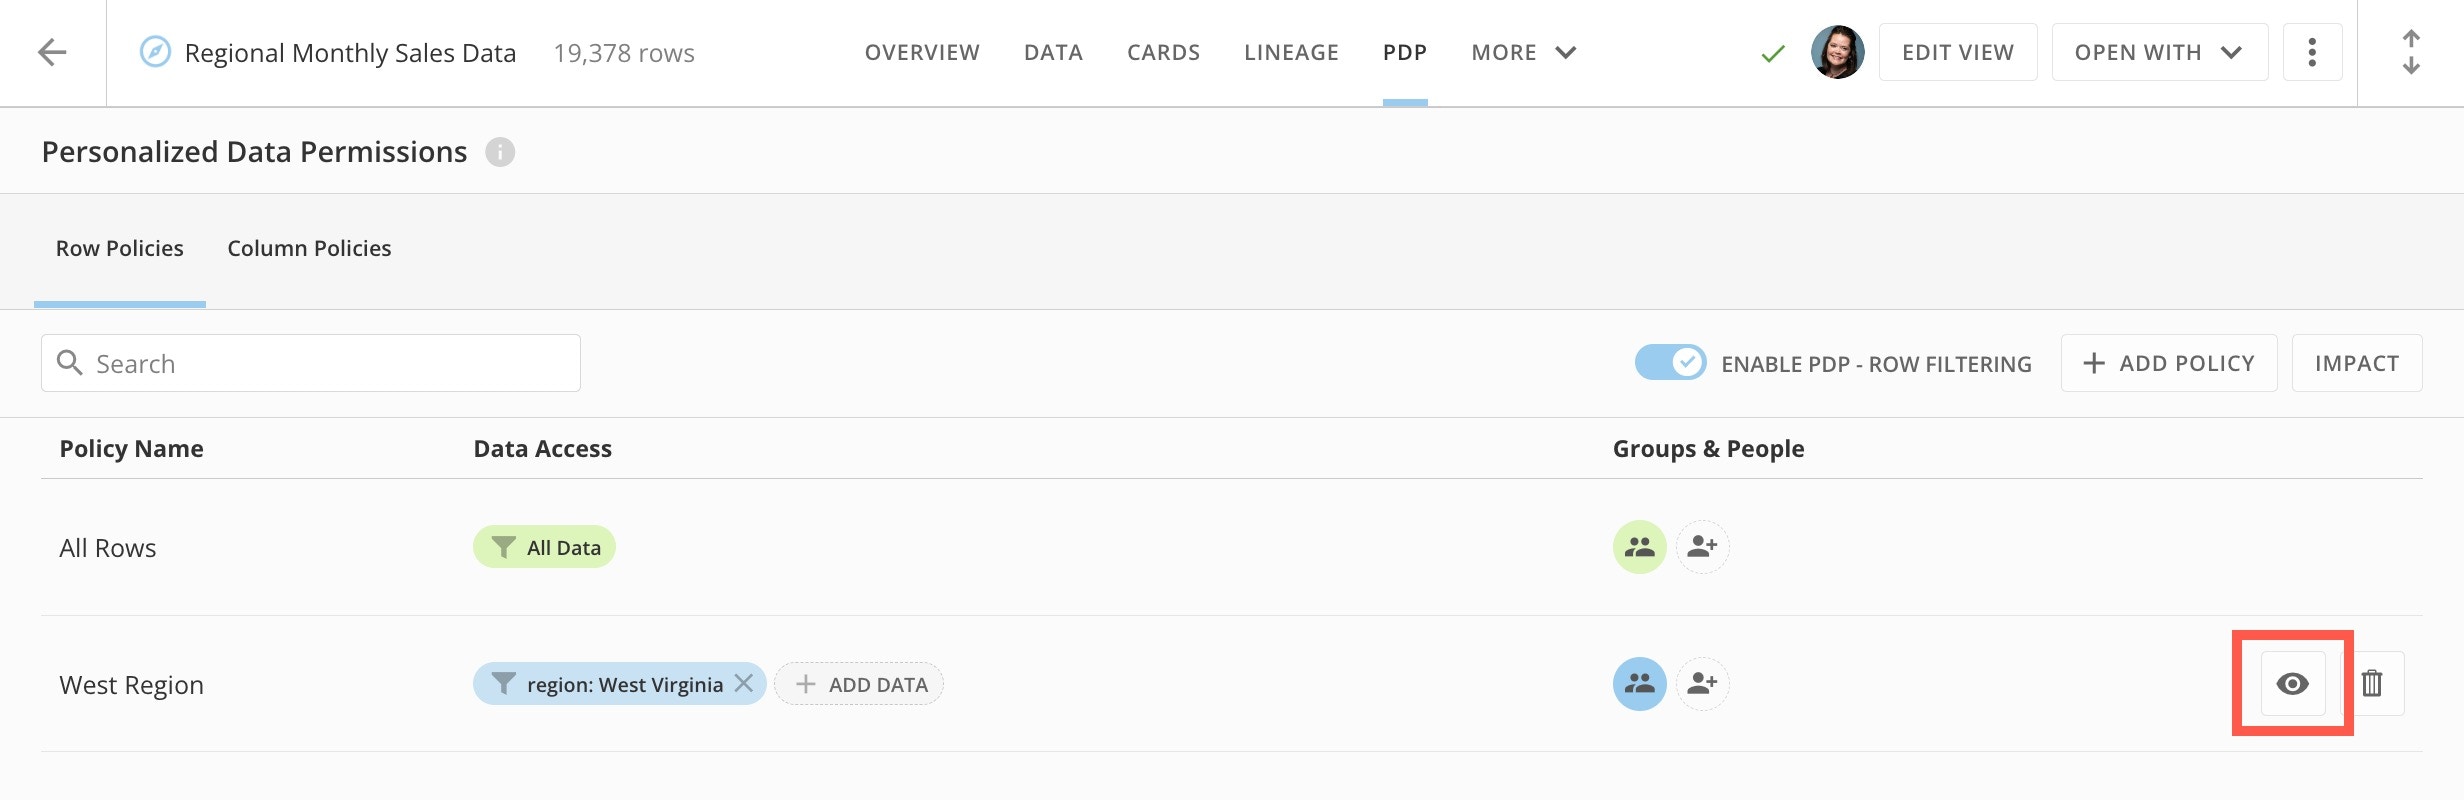
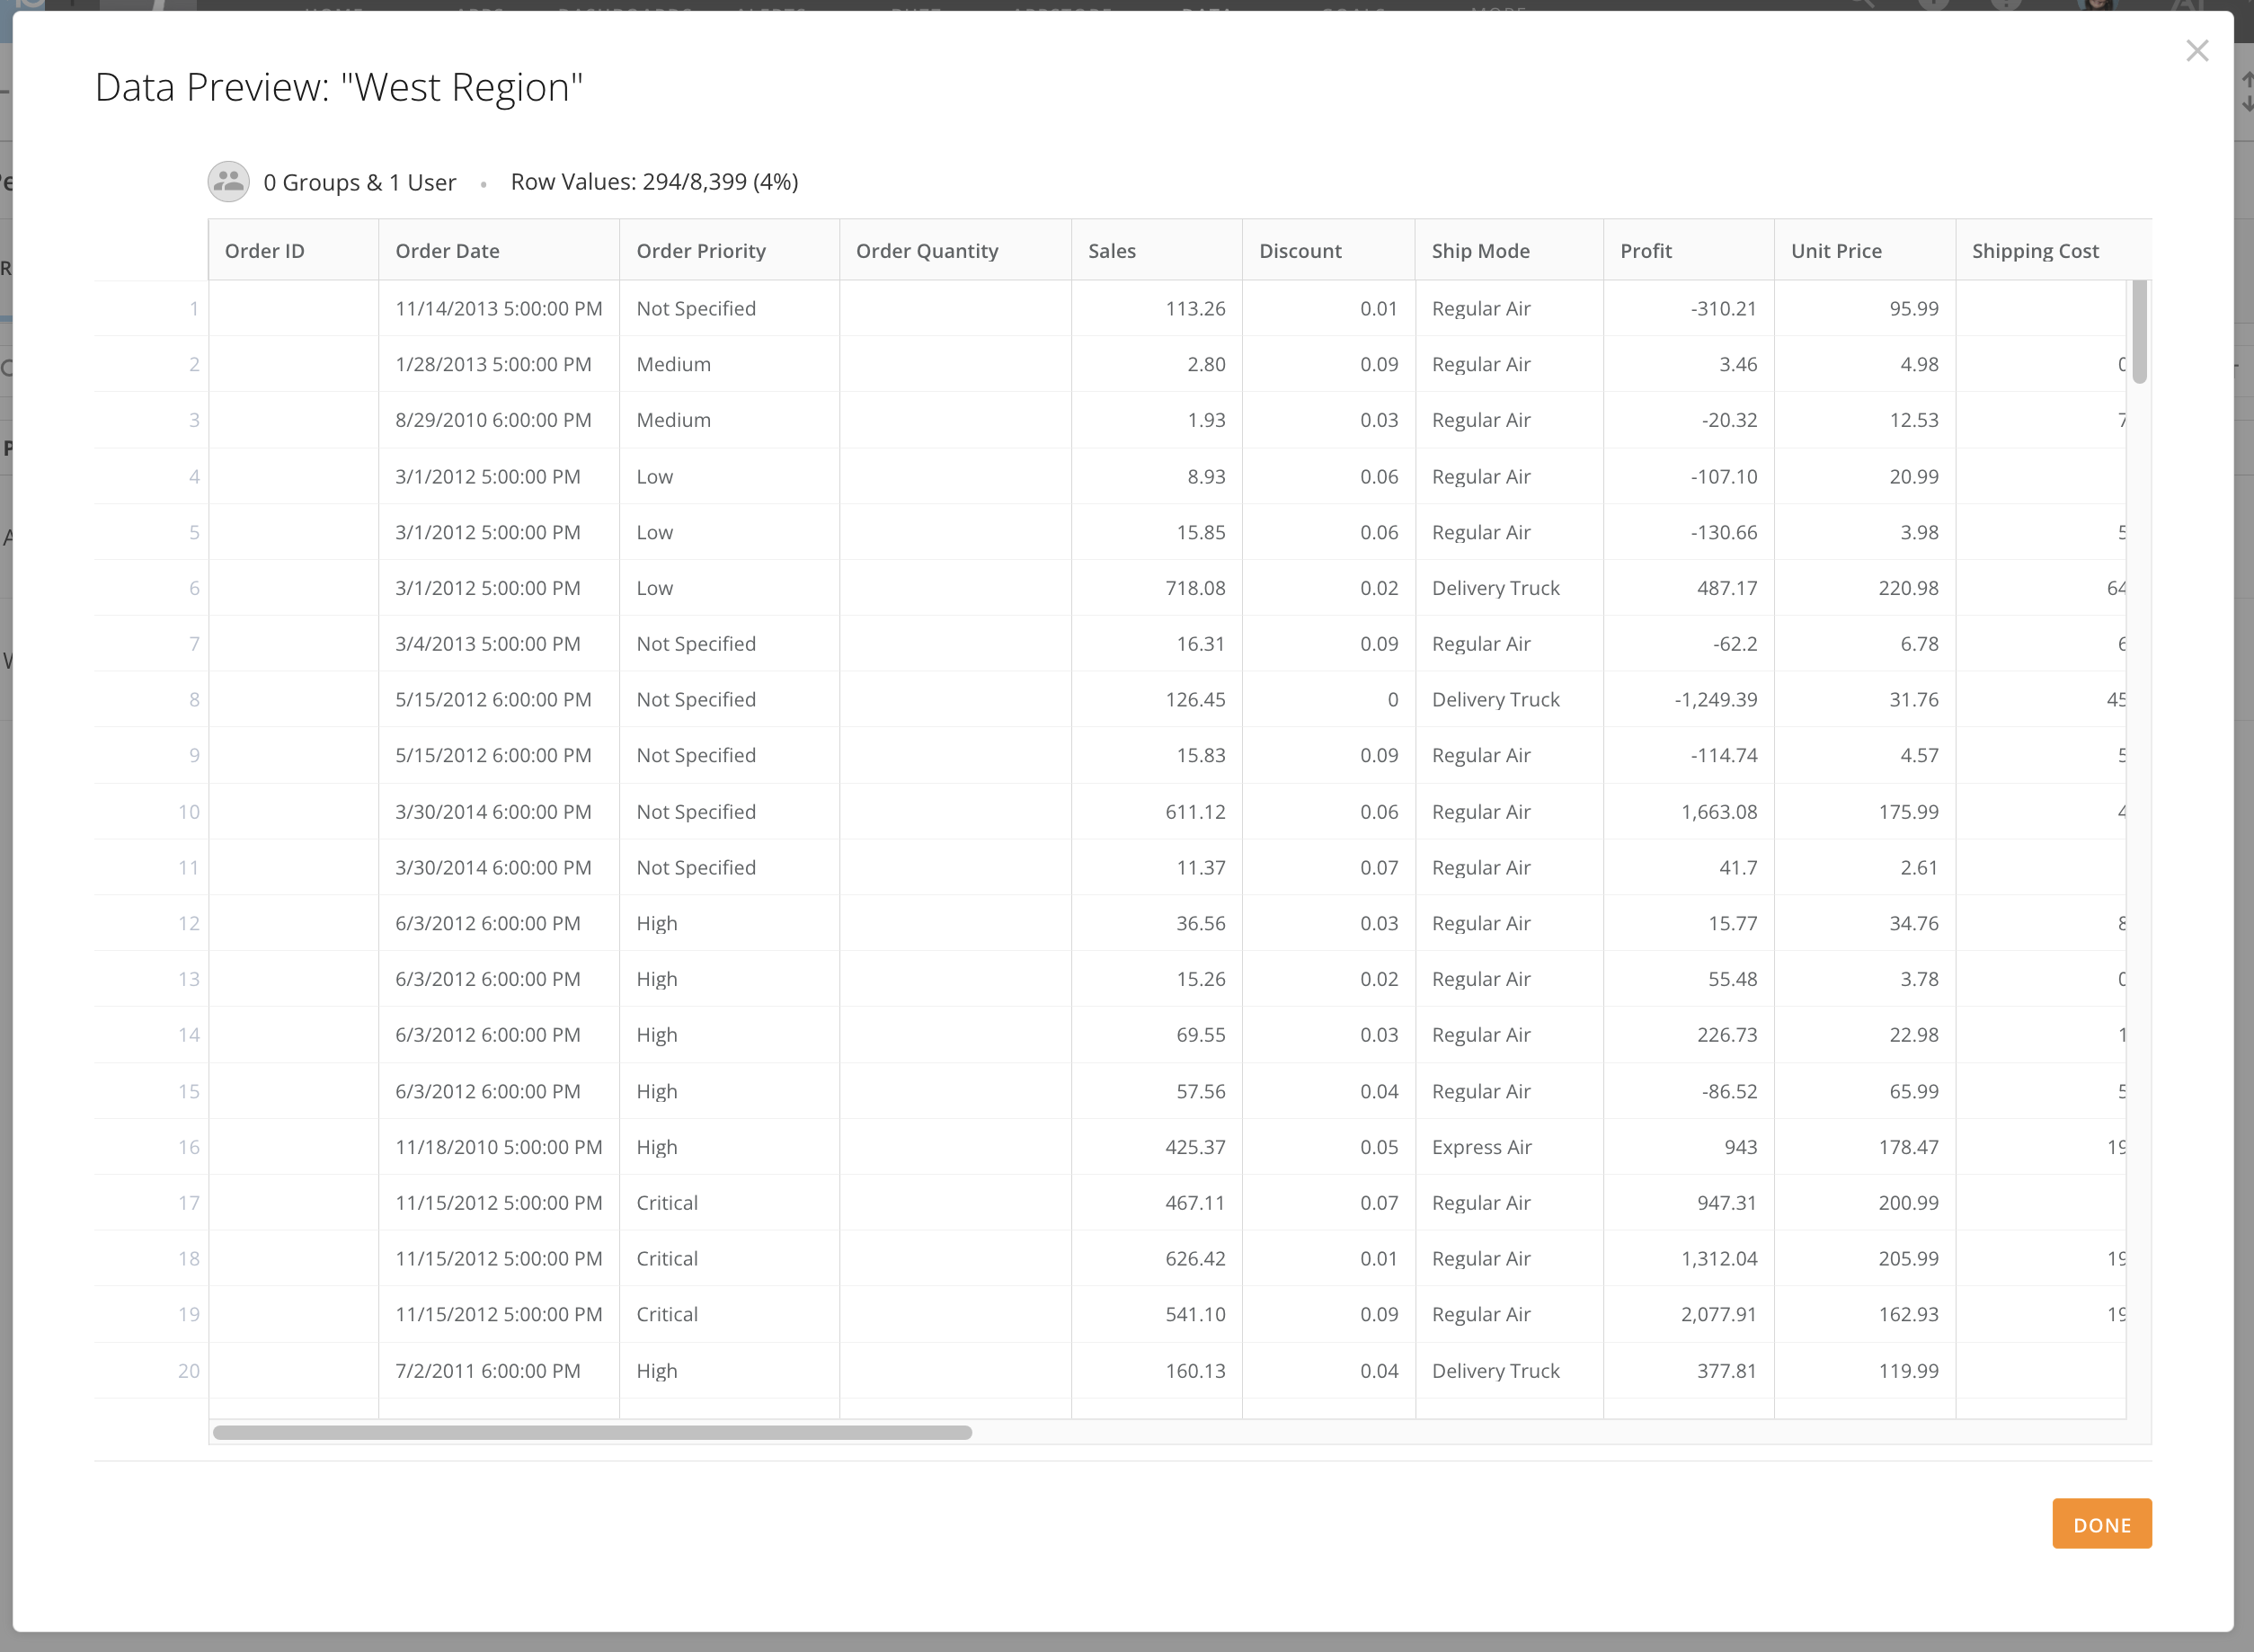
-
(Conditional) If you are filtering by managed attribute, you can choose a person from the preview dropdown to see how they view the data.
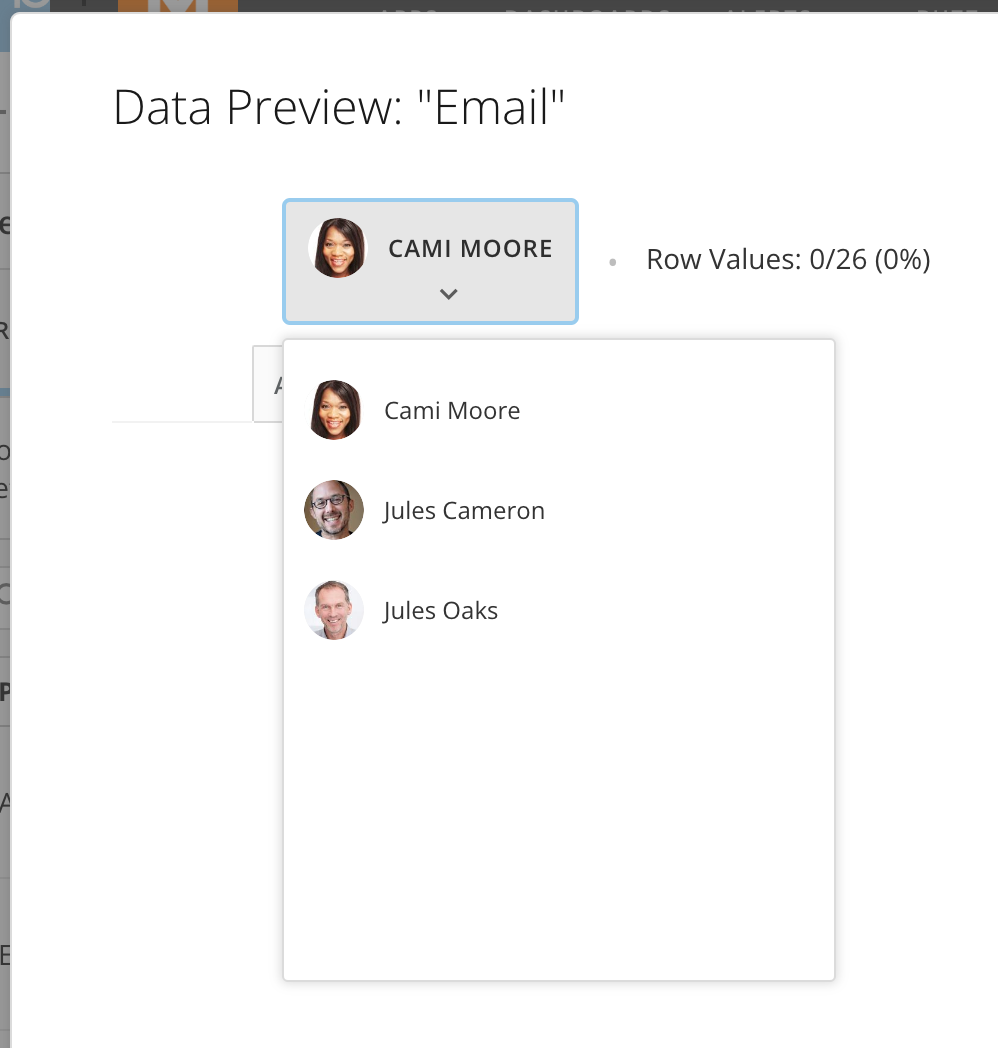
- Select Done to close the preview.
AND/OR Logic with Multiple PDP Policies
You may want to add a person or group to multiple policies on the same DataSet. You can do this by adding a new policy, choosing the appropriate filter, and adding the needed person or group. Separate policies for the same DataSet are considered OR logic. One policy with two or more values are considered AND logic. Configuring AND/OR logic is important to make sure people and groups see all of the data they need to see.OR Logic
If you add a person to two separate policies, Domo processes them as OR logic—if any row in the data passes either of the filters, the person can see that row. For example, Person A is part of a policy based on product line—they can see all rows where the product line is `camping equipment.`Person A is then added to a policy based on order method—they can now also see all rows where the order method is `web.` When Person A views cards based on this data, they have access to more data than they would have if assigned to only one of these policies. They can see rows for any product line where the order method was `web,` and they can see rows for any order method where the product line was `camping equipment.`
AND logic
If you add two values, `camping equipment` for product line and `web` for order method, to the same policy, Domo processes these as AND logic. Data only passes through the filters if it meets both values. This means that if Person A is part of this policy, they can only see data for when the product line was `camping equipment` AND the order method was `web.`Delete a Row Policy
You can delete a row policy from inside the Row Policies tab in the PDP interface. When you delete a policy, it no longer applies to any assets powered by the DataSet, including alerts and DataFlows.Note: You cannot delete the All Rows policy.
- Access the Row Policies or Column Policies tab.
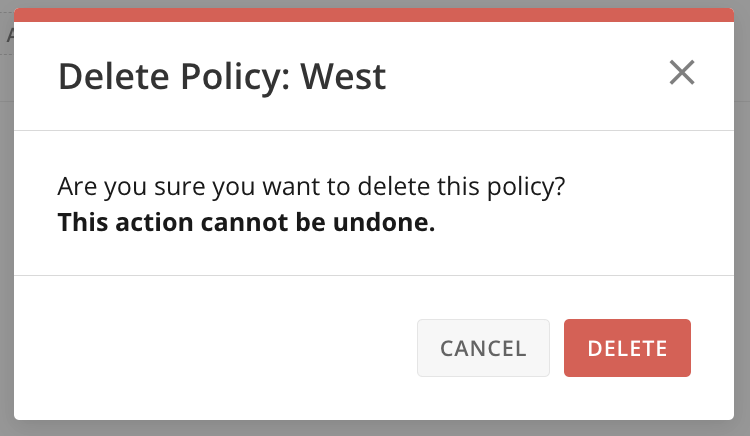
- In the respective policy list, hover over the policy you want to delete and select Delete.
-
In the confirmation dialog, select Delete.
Note: This action cannot be undone.
Column Policies
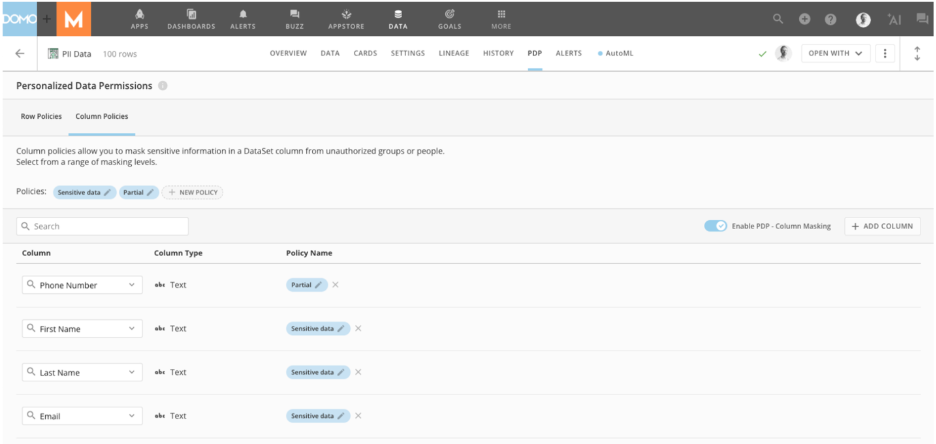
In the Column Policies tab, you can configure column masking policies and enable column masking for the DataSet. There are a variety of masking methods that allow you to hide part or all of the data in a field to protect sensitive information like Personally Identifiable Information (PII) from users.Structure and Mapping
DataSets define and save column policies and can have up to 20 column policies. Policies consist of rules that assign masking methods to users or groups. Since a policy can contain multiple rules, each with its own masking method, you can define column policies to serve many stakeholders and groups with their own business needs for data access.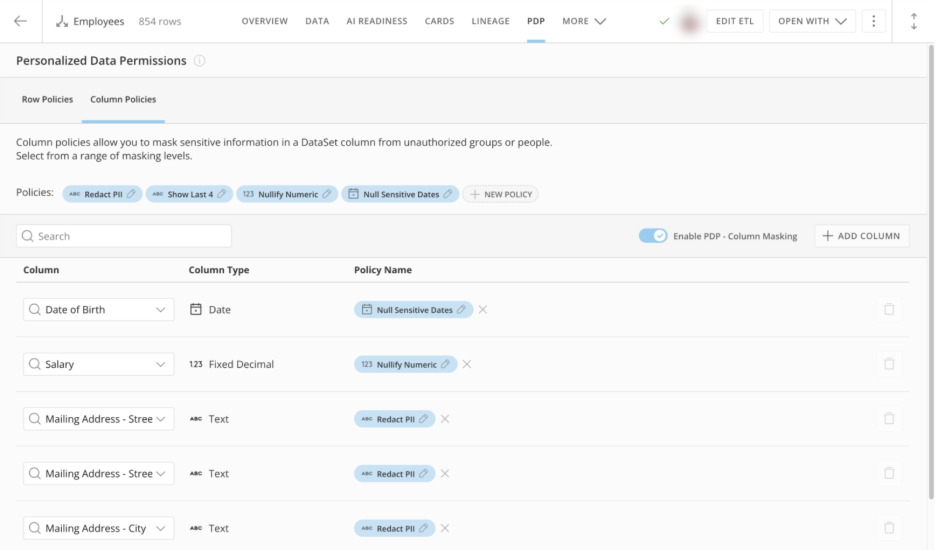
- Masking method — The masking method defines how you mask your data.
- Column policy — The column policy defines the masking methods that users and groups enforce.
- Policy rule — A column policy consists of rules, where each rule has a chosen masking method. You can assign rules to users and groups.
- Rule precedence — Rule precedence determines which rule to enforce if you have assigned a user to multiple rules. Rule precedence enforces only the highest-listed rule.
- Default unmasked rule — This rule exists in all column policies, and you can’t remove or modify it. DataSet owners, co-owners, and users whose Domo role includes the Manage DataSet grant have access to this rule.
- Default rule — This rule exists in all column policies. All users who have access to the DataSet receive the default rule unless you assign them to another rule of higher precedence. You can’t remove it, but you can configure the masking method. You can configure the default rule with the masking method appropriate to the sensitivity of the data.
Masking Methods
The masking method of a column policy rule defines what users assigned to that rule see when they view data in a PDP-controlled column. You have access to the following masking methods:-
Hash — This method masks your data by hashing it with one of the available hashing algorithms.
For example:e09c80c42f -
Show first N — This method unmasks the first N characters of your data while replacing all other characters with a specified number of selected masking characters.
For example: (1 character visible, 5-character mask length, a hyphen mask character)a-----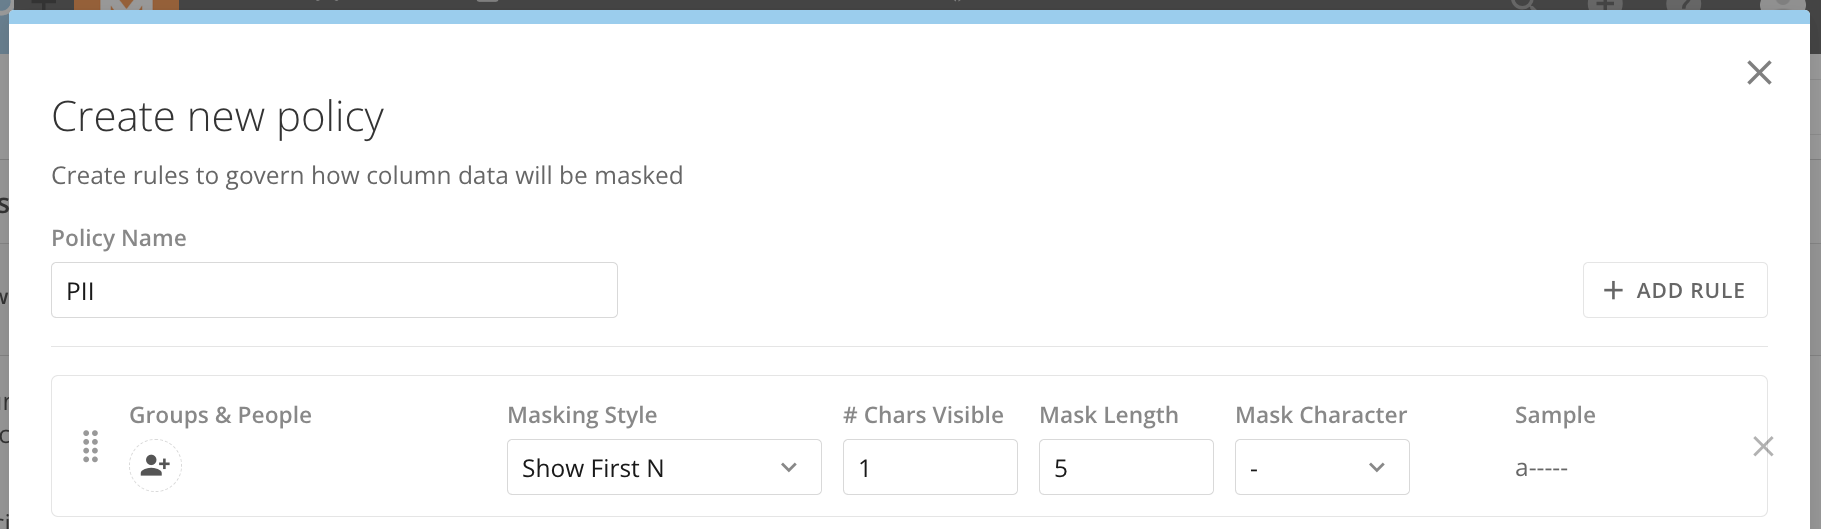
-
Show last N — This method unmasks the last N characters of your data while replacing all other characters with a specified number of selected masking characters.
For example: (3 characters visible, 5-character mask length, and an asterisk mask character)*****com - Redact — This method replaces your data with a specified number of selected masking characters.
- Nullify — This method replaces the data with NULL.
- Unmasked — This method does not mask the data, and as a result, users can view the raw data.
Note: Column policies are data type-specific. You can use all masking
methods with text-type policies. However, you can only use Nullify and
Unmasked with numeric and date/time type policies.
Enable PDP Column Masking on a DataSet
You must enable PDP column masking on your DataSet, regardless of the policies defined or mapped on it. To enable PDP column masking, go to your Personalized Data Permissions dashboard and toggle the Enable PDP - Column Masking switch on.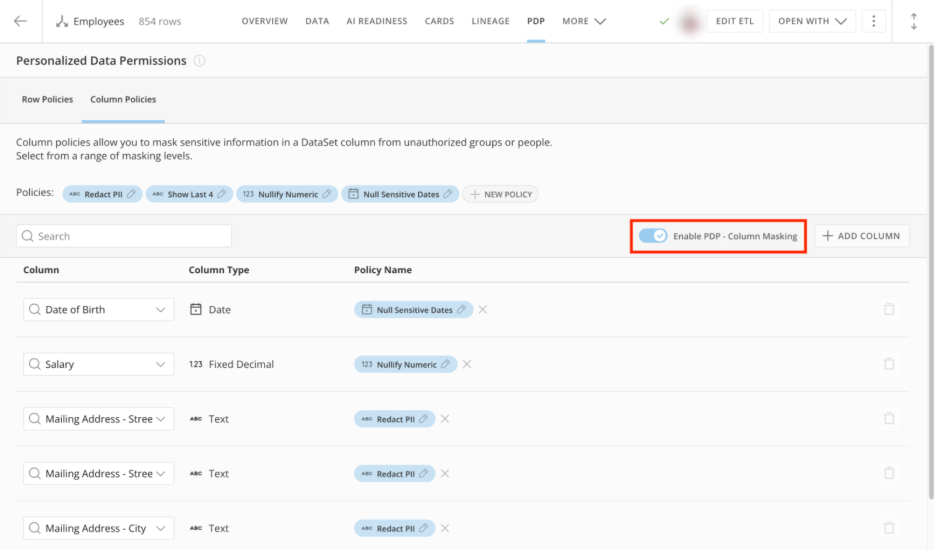
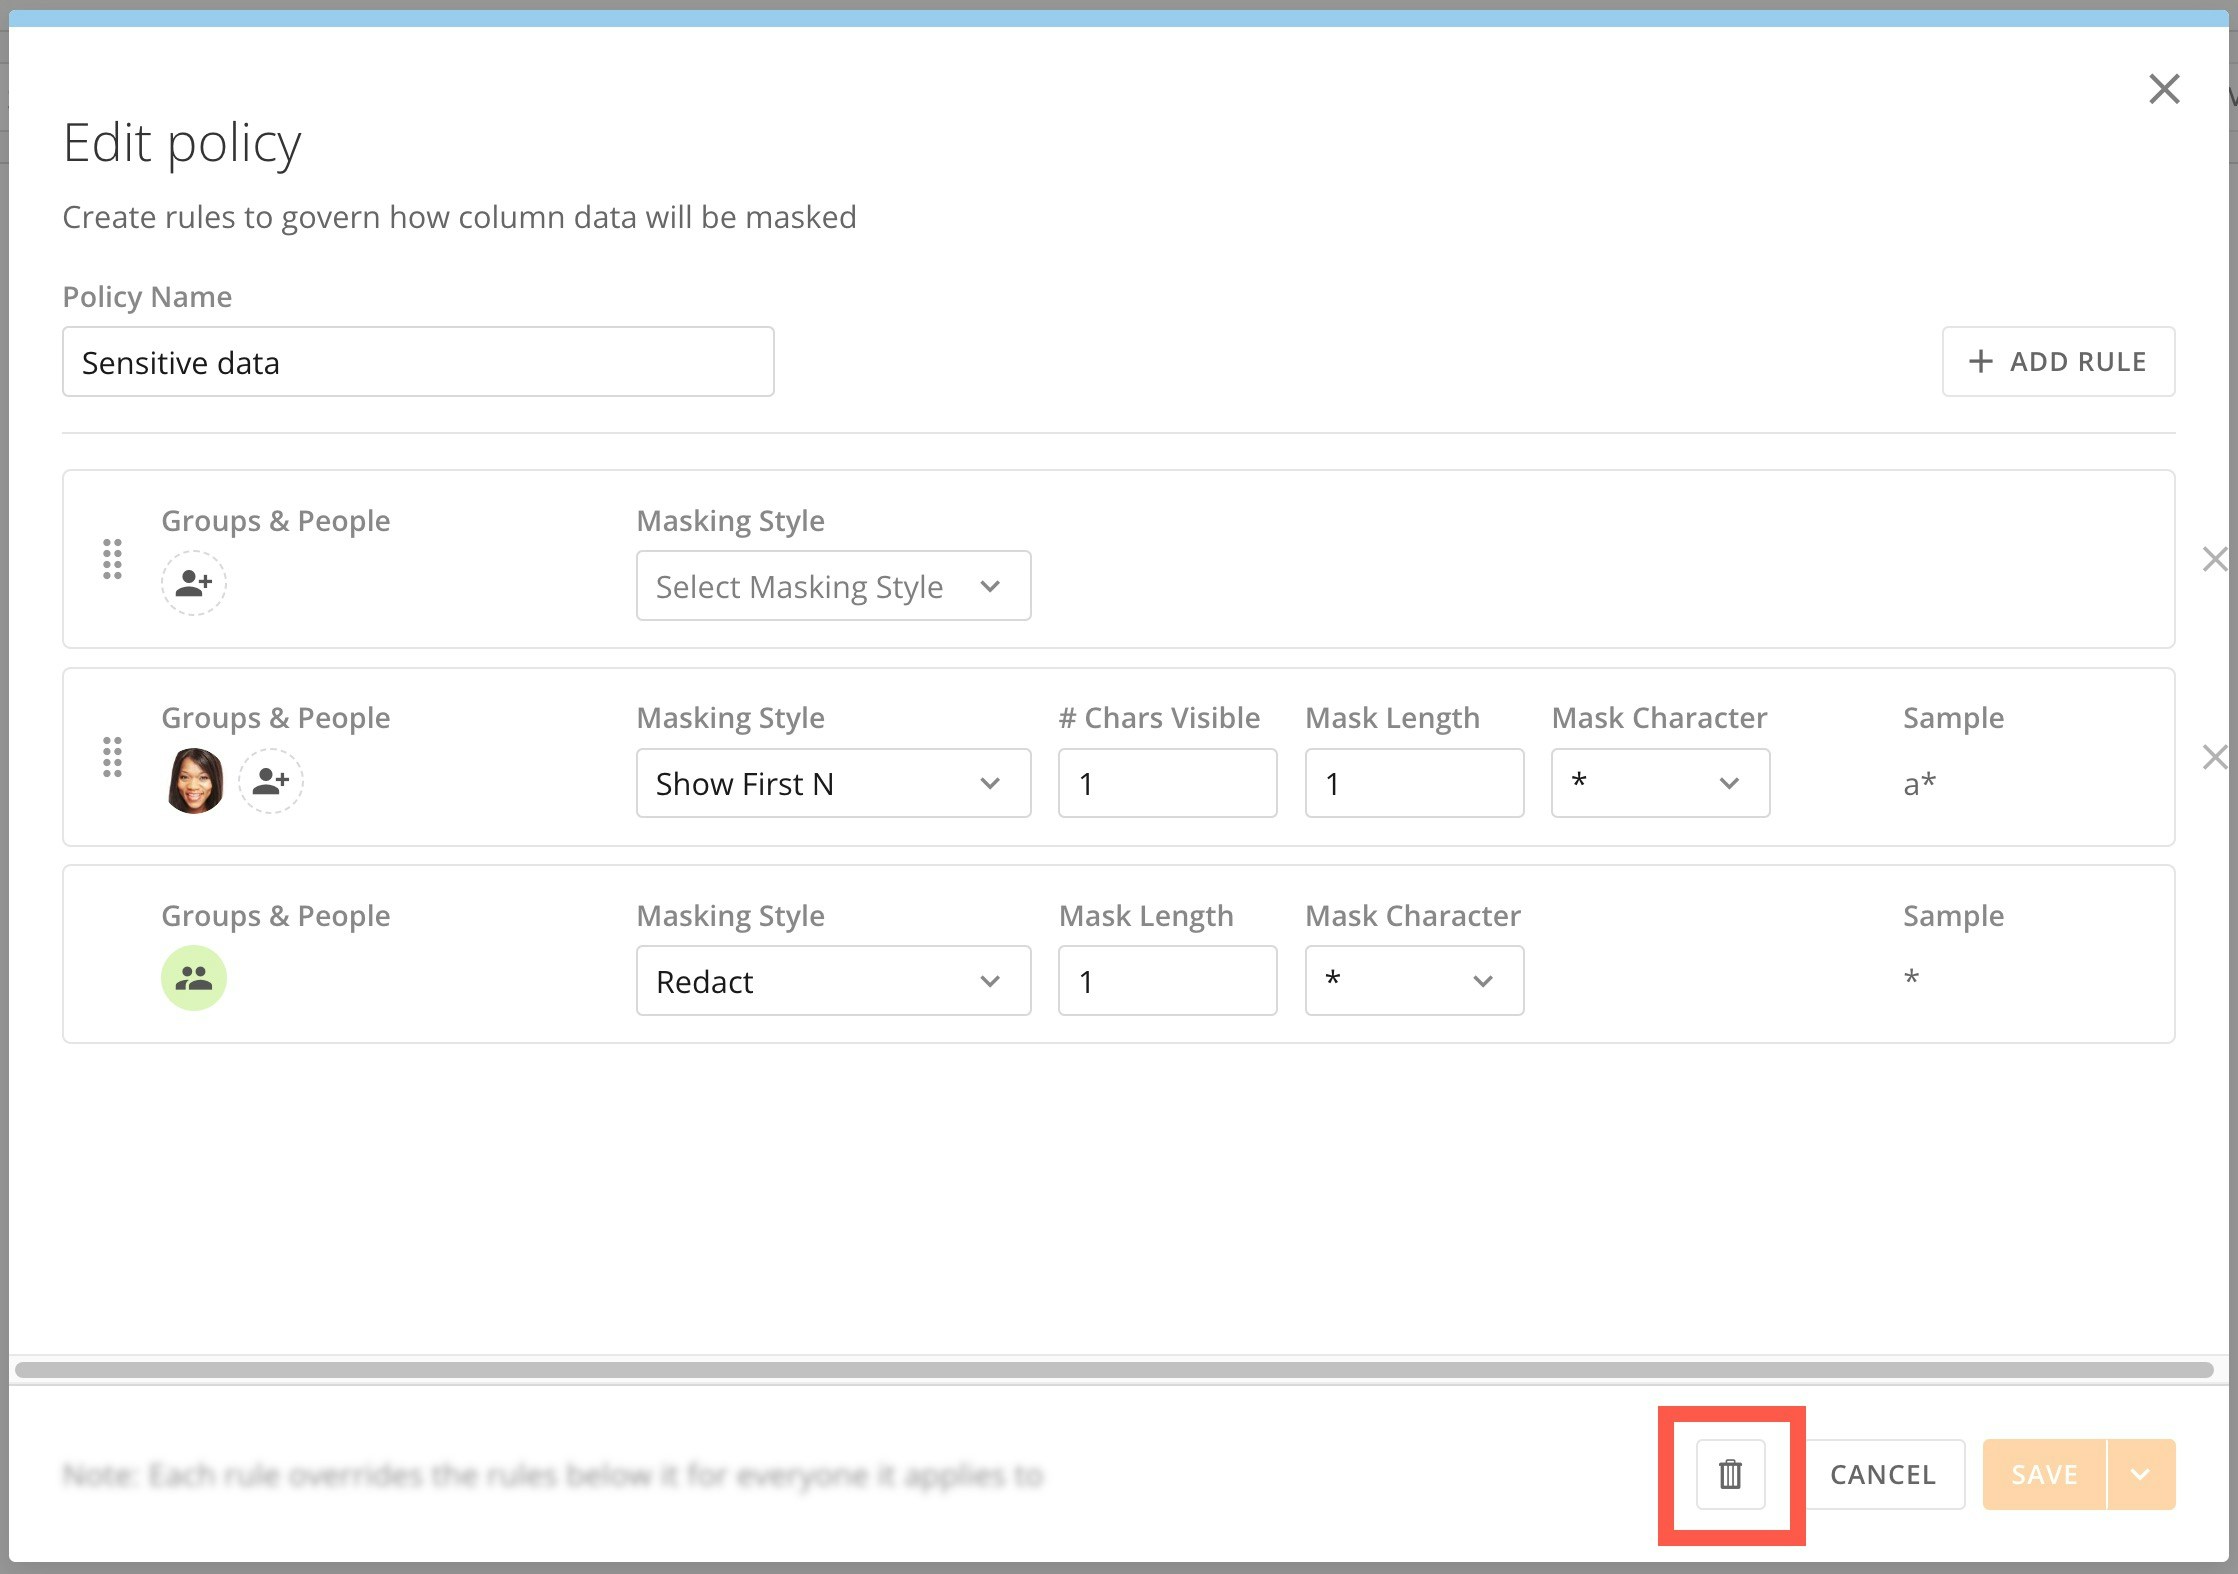
Create a Column Policy
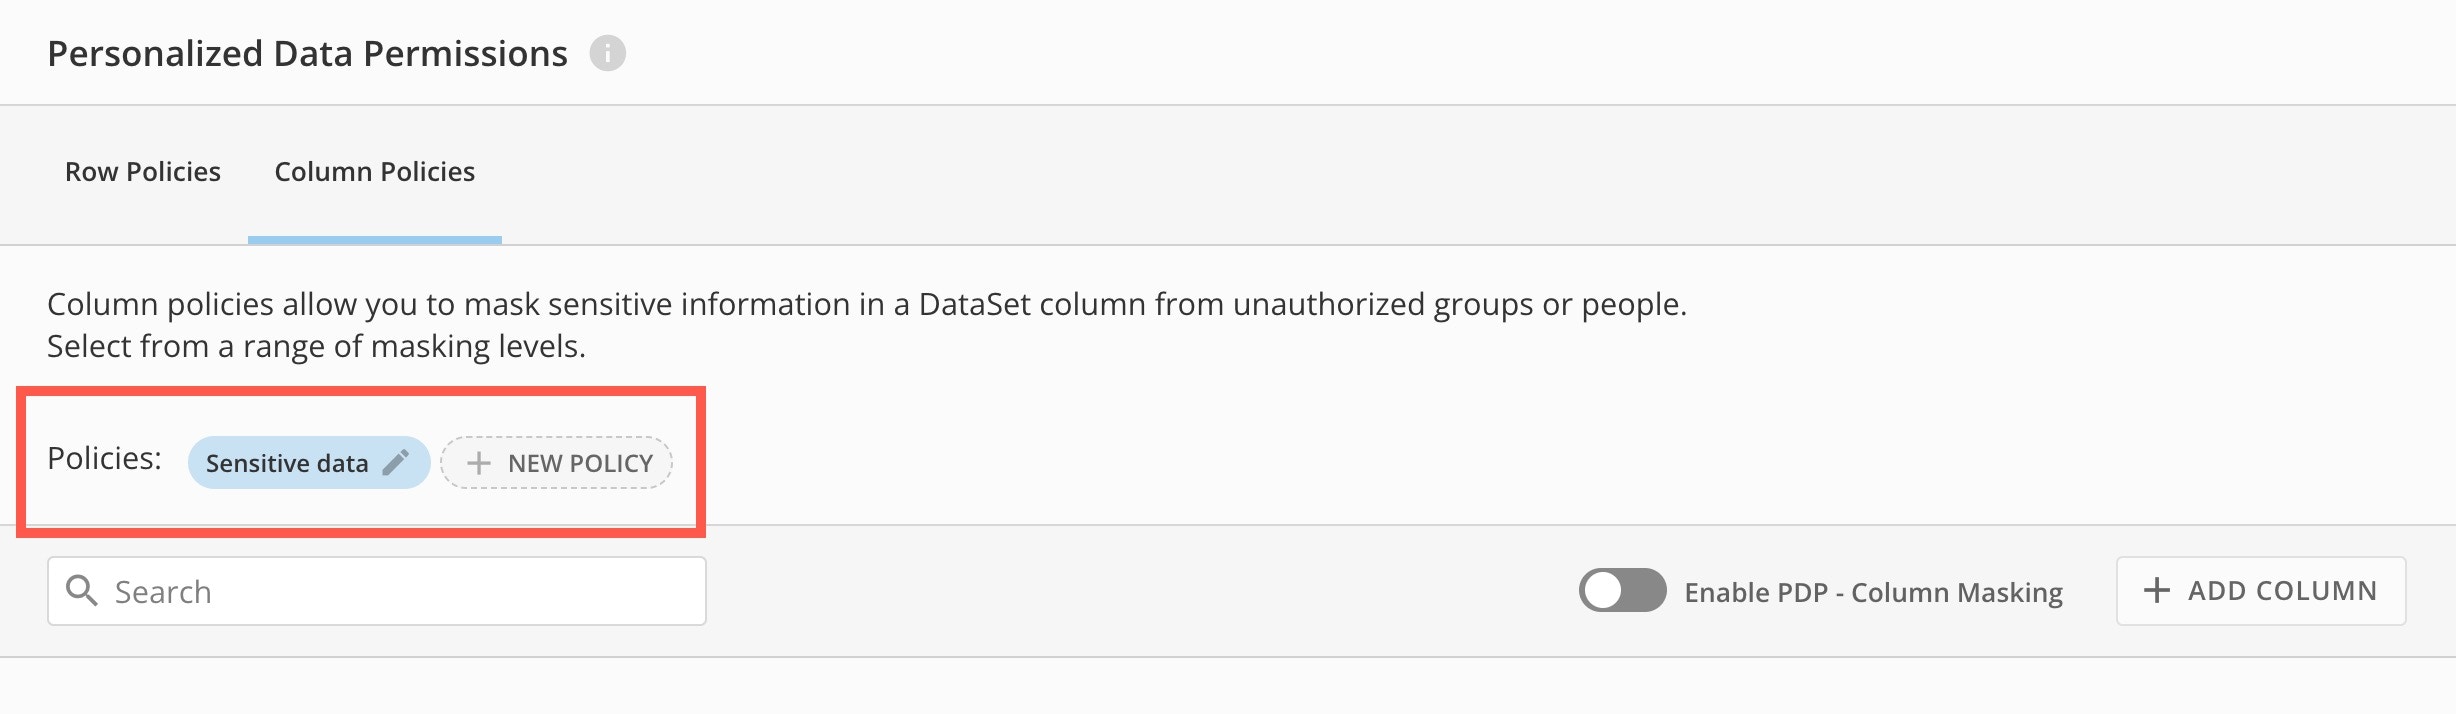
Follow the steps below to create a new column policy.- Access the Column Policies tab of the PDP interface.
- Select + New Policy to open the policy editor.
-
Name the policy and select your data type.
Note: Available masking methods depend on the selected data type. You can only map a column policy to a column of a matching data type.

-
Select the masking method for the default rule.
The default rule applies to everyone with DataSet access, unless you’ve assigned them a higher-priority rule. To keep data secure, set the default rule to use a masking method that fits the sensitivity of your data. If you’re not sure which method to choose, we recommend starting with the most restrictive options: Redact or Nullify. Learn about masking methods.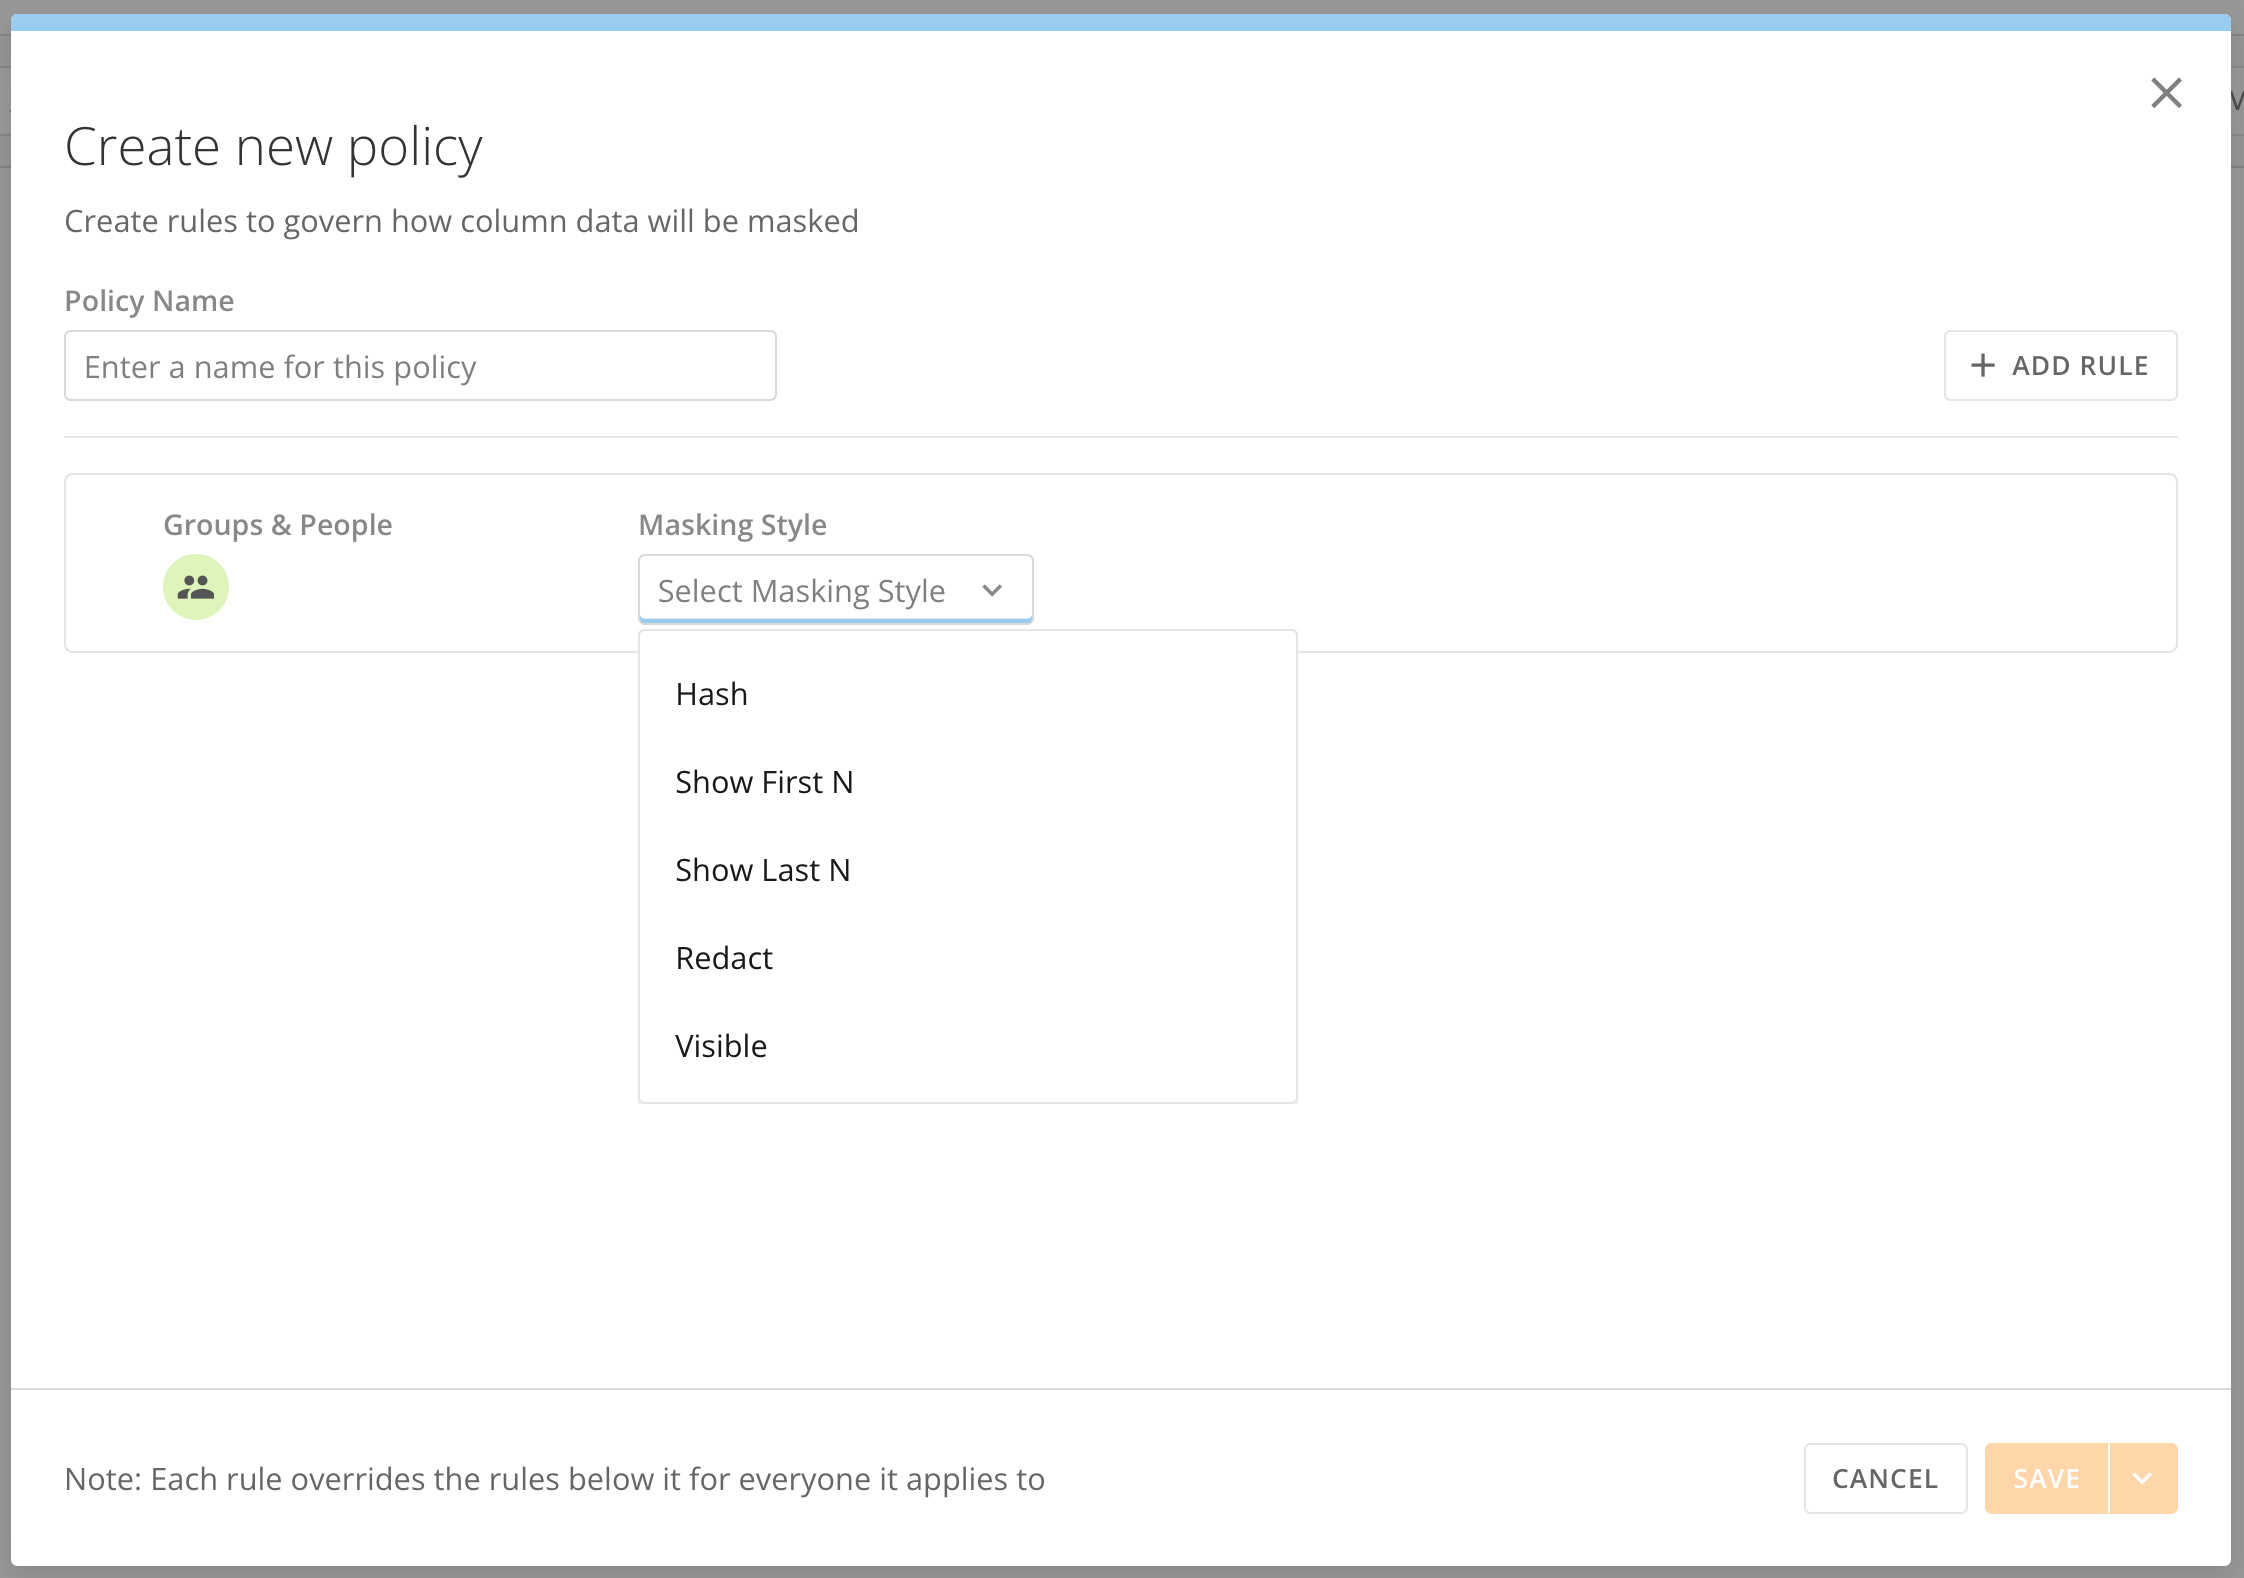
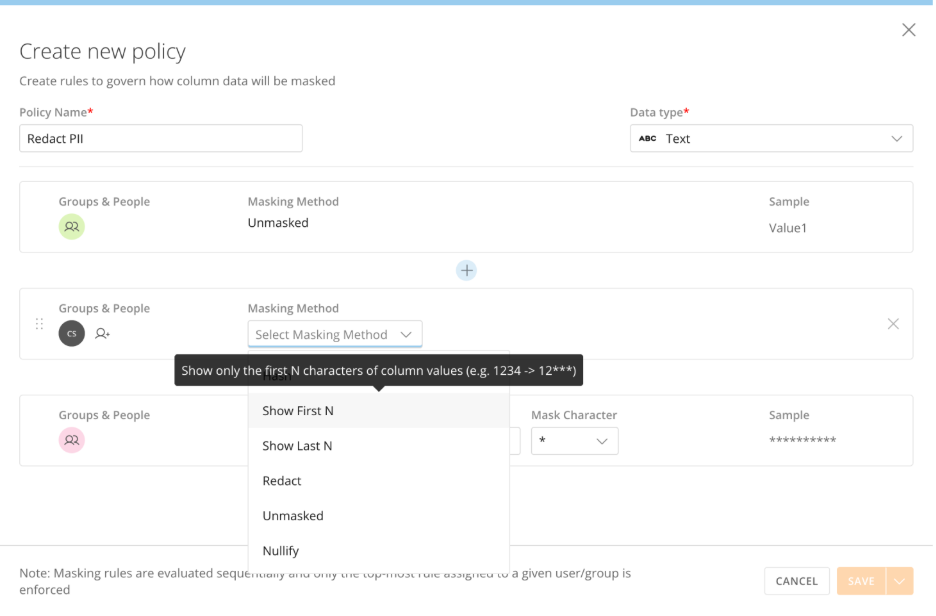
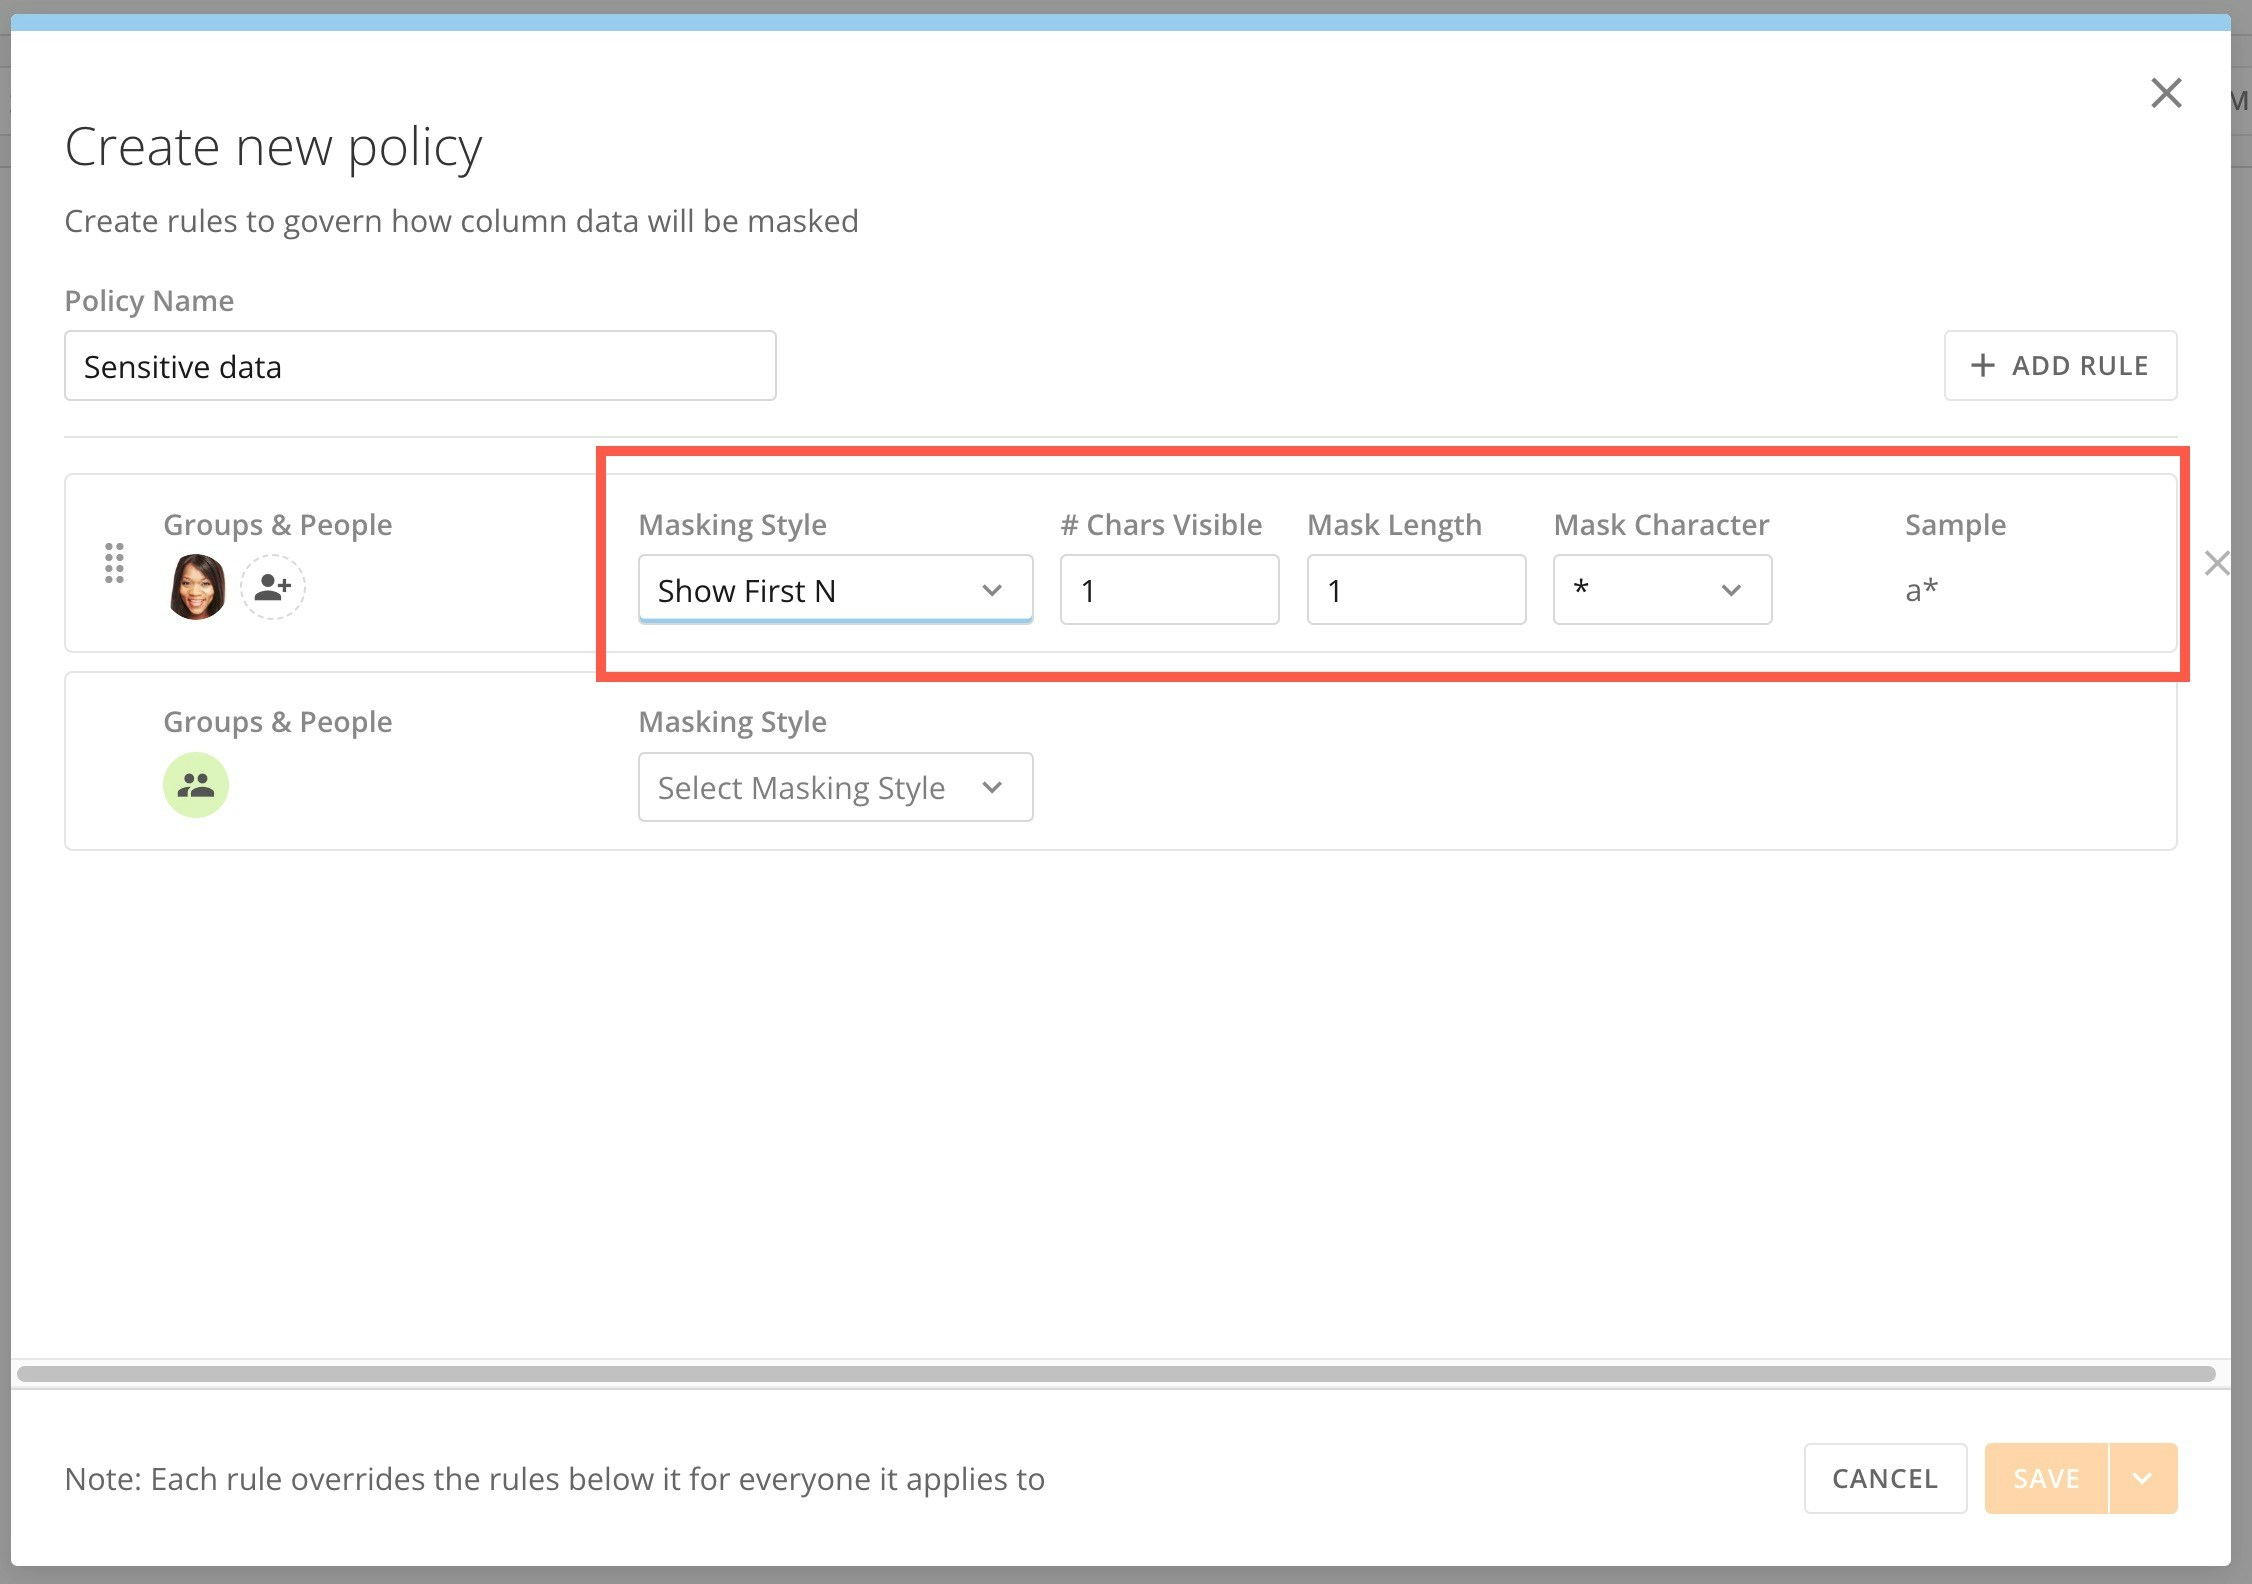
- Add more rules as necessary by selecting the + Add Rule button.
- Assign users and/or groups to the rule by selecting Add groups & people to search for the user or group, then selecting the user or group from the search.
-
From the Masking Method dropdown, choose a masking style and define it. Learn about masking methods.
-
Continue adding rules with assigned users/groups and selecting a masking method as necessary.
Note: You can assign users to multiple rules. However, only the rule listed highest in the policy is enforced.
- Change rule precedence as needed by dragging and dropping rules.
-
Save the policy.
Note: You can select Cancel at any time to close the policy editor without saving your changes.

Edit a Column Policy
- Access the Column Policies tab of the PDP interface.
-
View the available policies and select Edit to edit the policy.
The policy editor opens.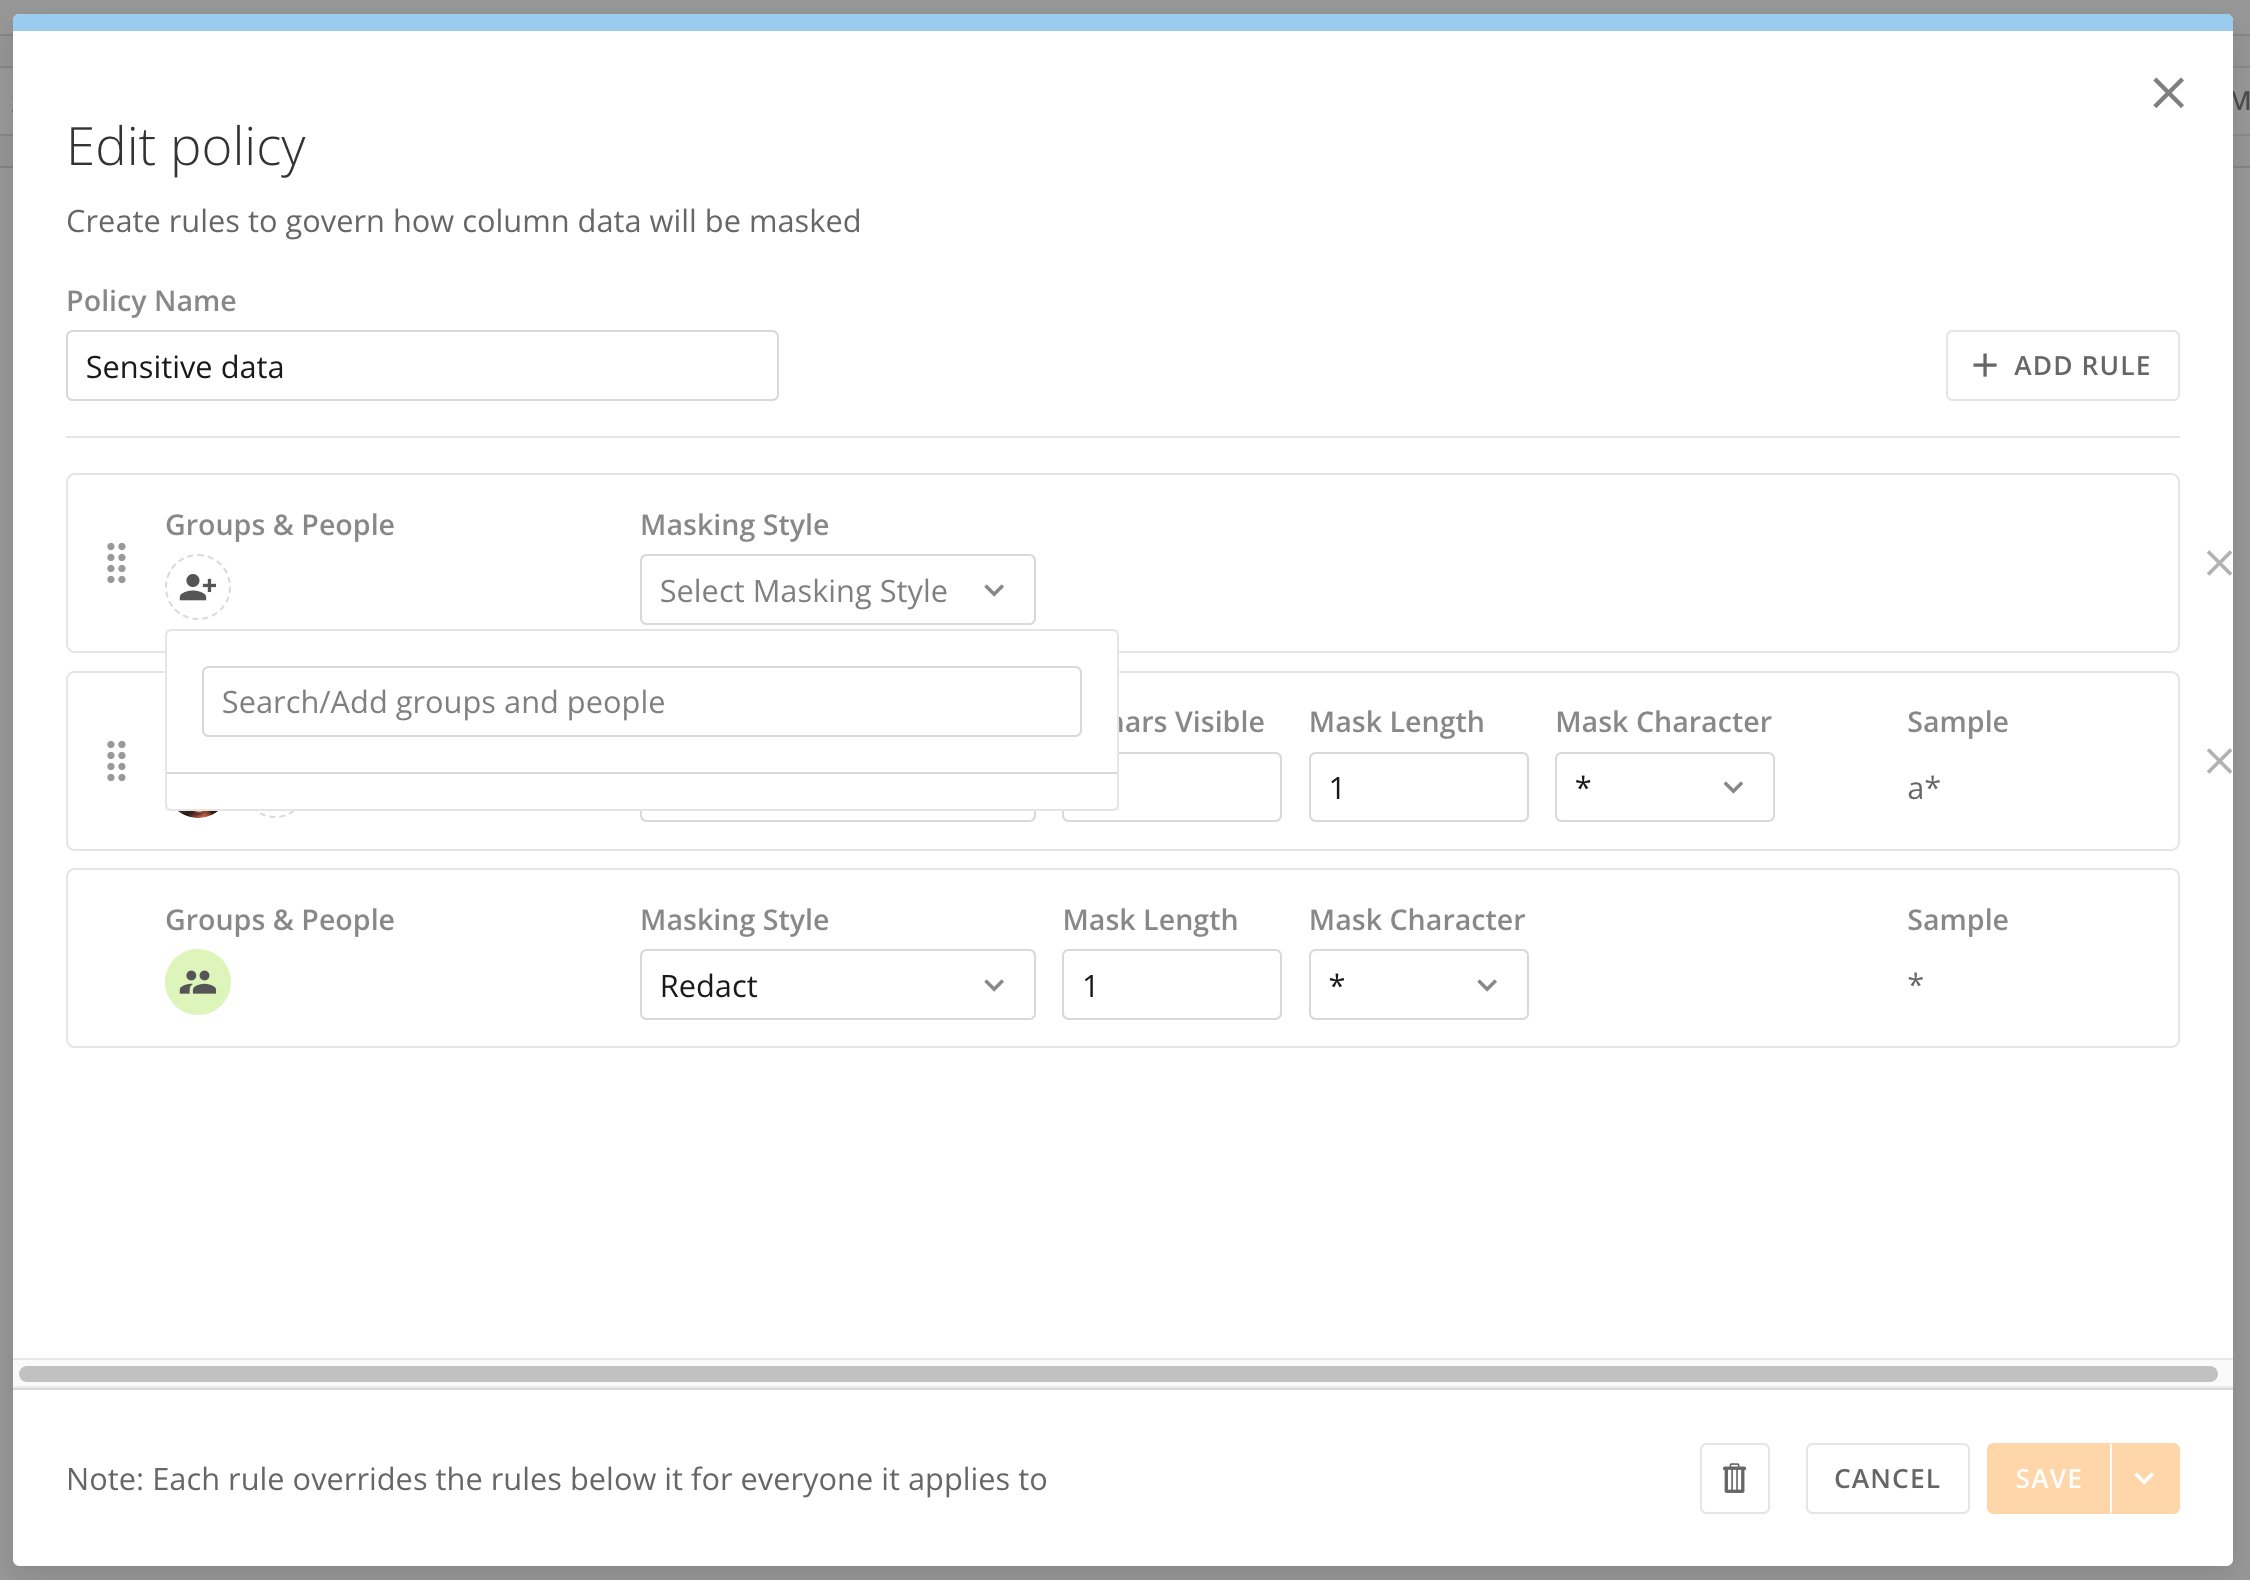
-
Make any desired changes to the policy name, data type, rules, assignments, and masking methods.
Note: If you currently have a policy mapped to one or more columns, you can’t change the policy data type. You must remove the policy from all column mappings before changing the data type.
- Save your changes.
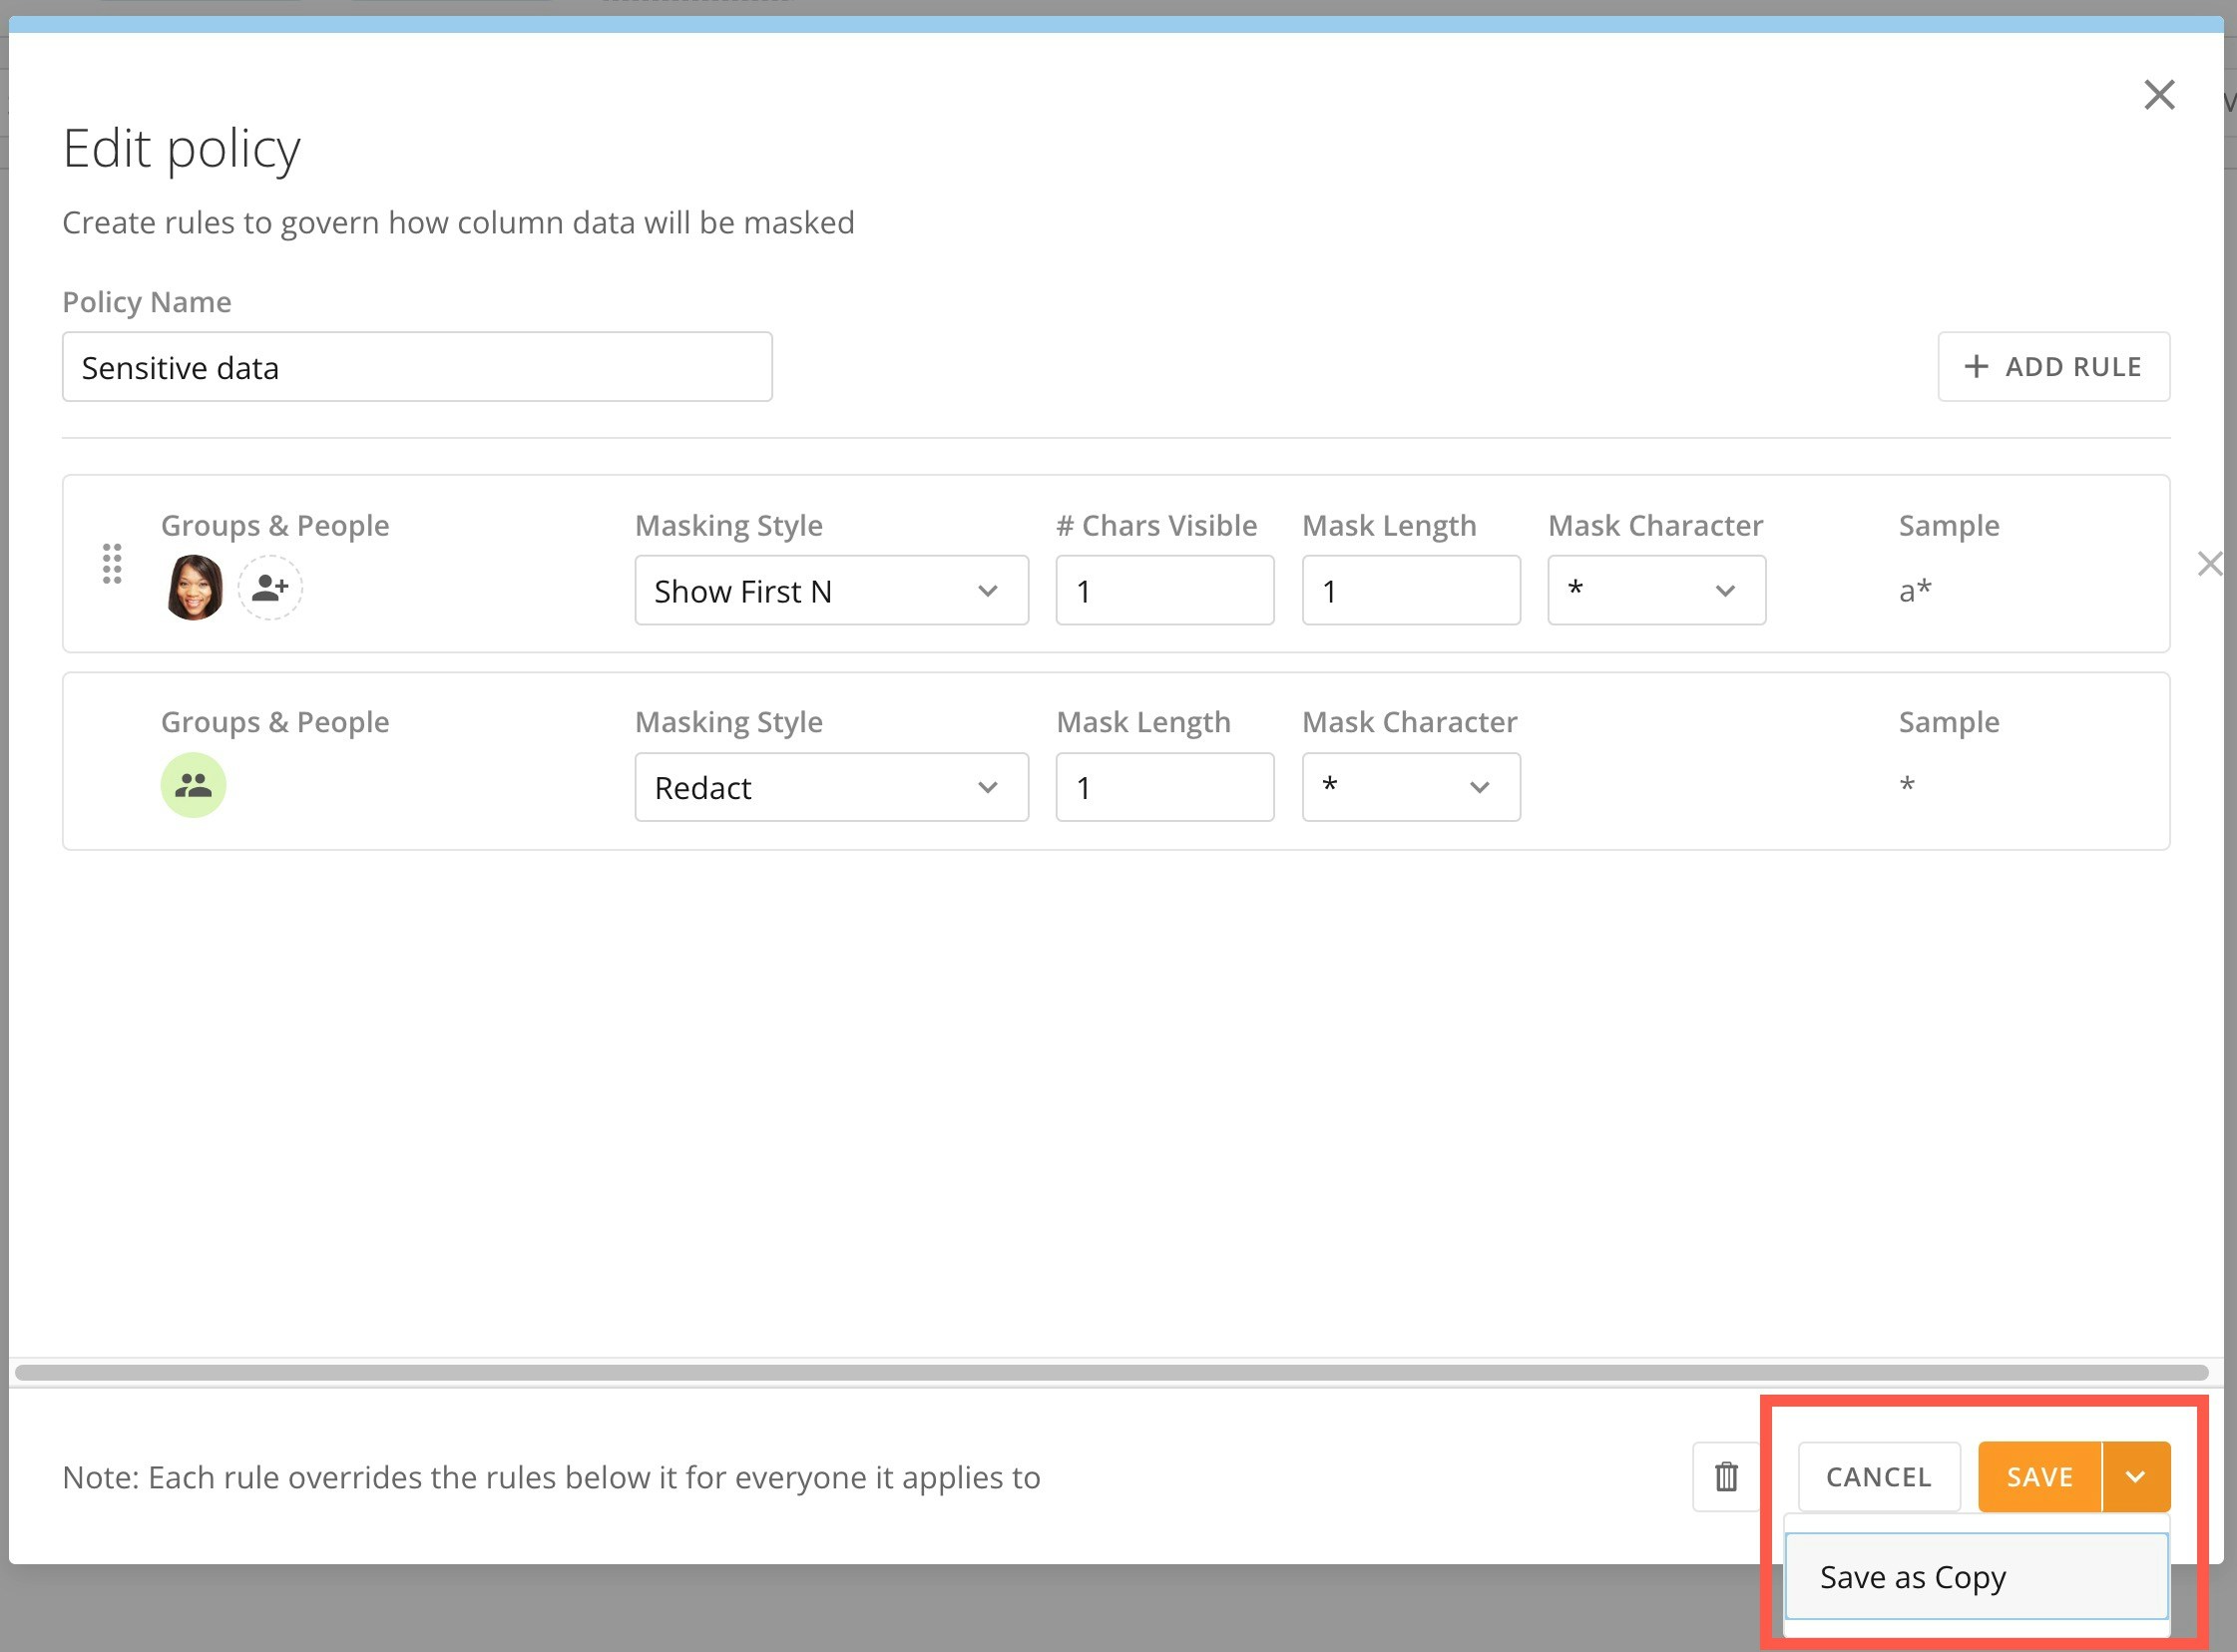
Copy an Existing Policy
- Select Edit on the policy you want to copy.
- Change the policy name.
- Make any other desired changes to rules, assignments, or masking methods.
- Select Save as Copy.
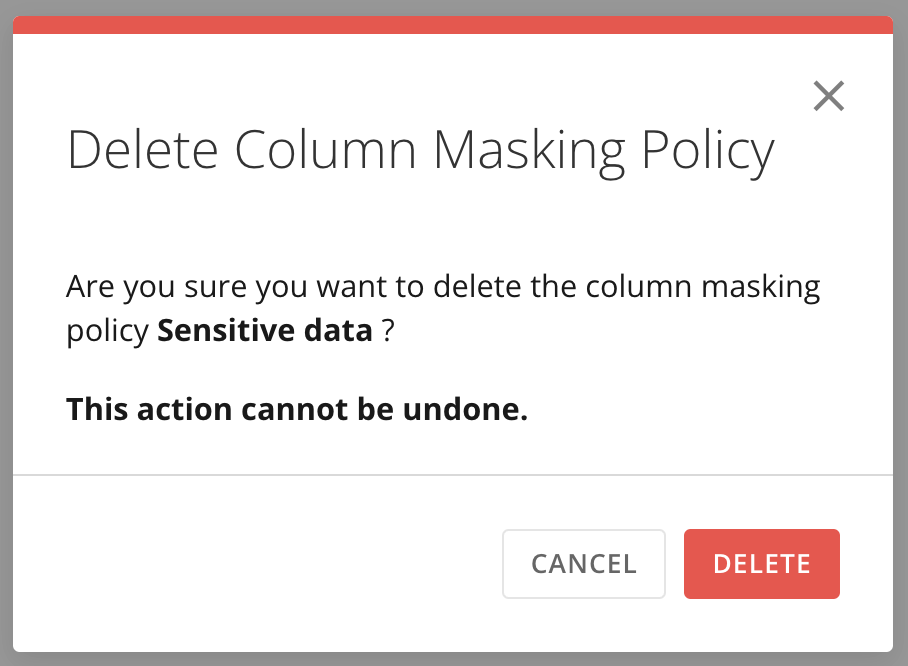
Delete a Column Policy
- Access the Column Policies tab of the PDP interface.
-
View the available policies and select Edit for the policy you want to delete.
The policy editor opens. -
Select Delete.
The confirmation dialog displays.

-
Select Delete to delete the policy. This action cannot be undone. Select Cancel to keep the policy and reopen the editor.
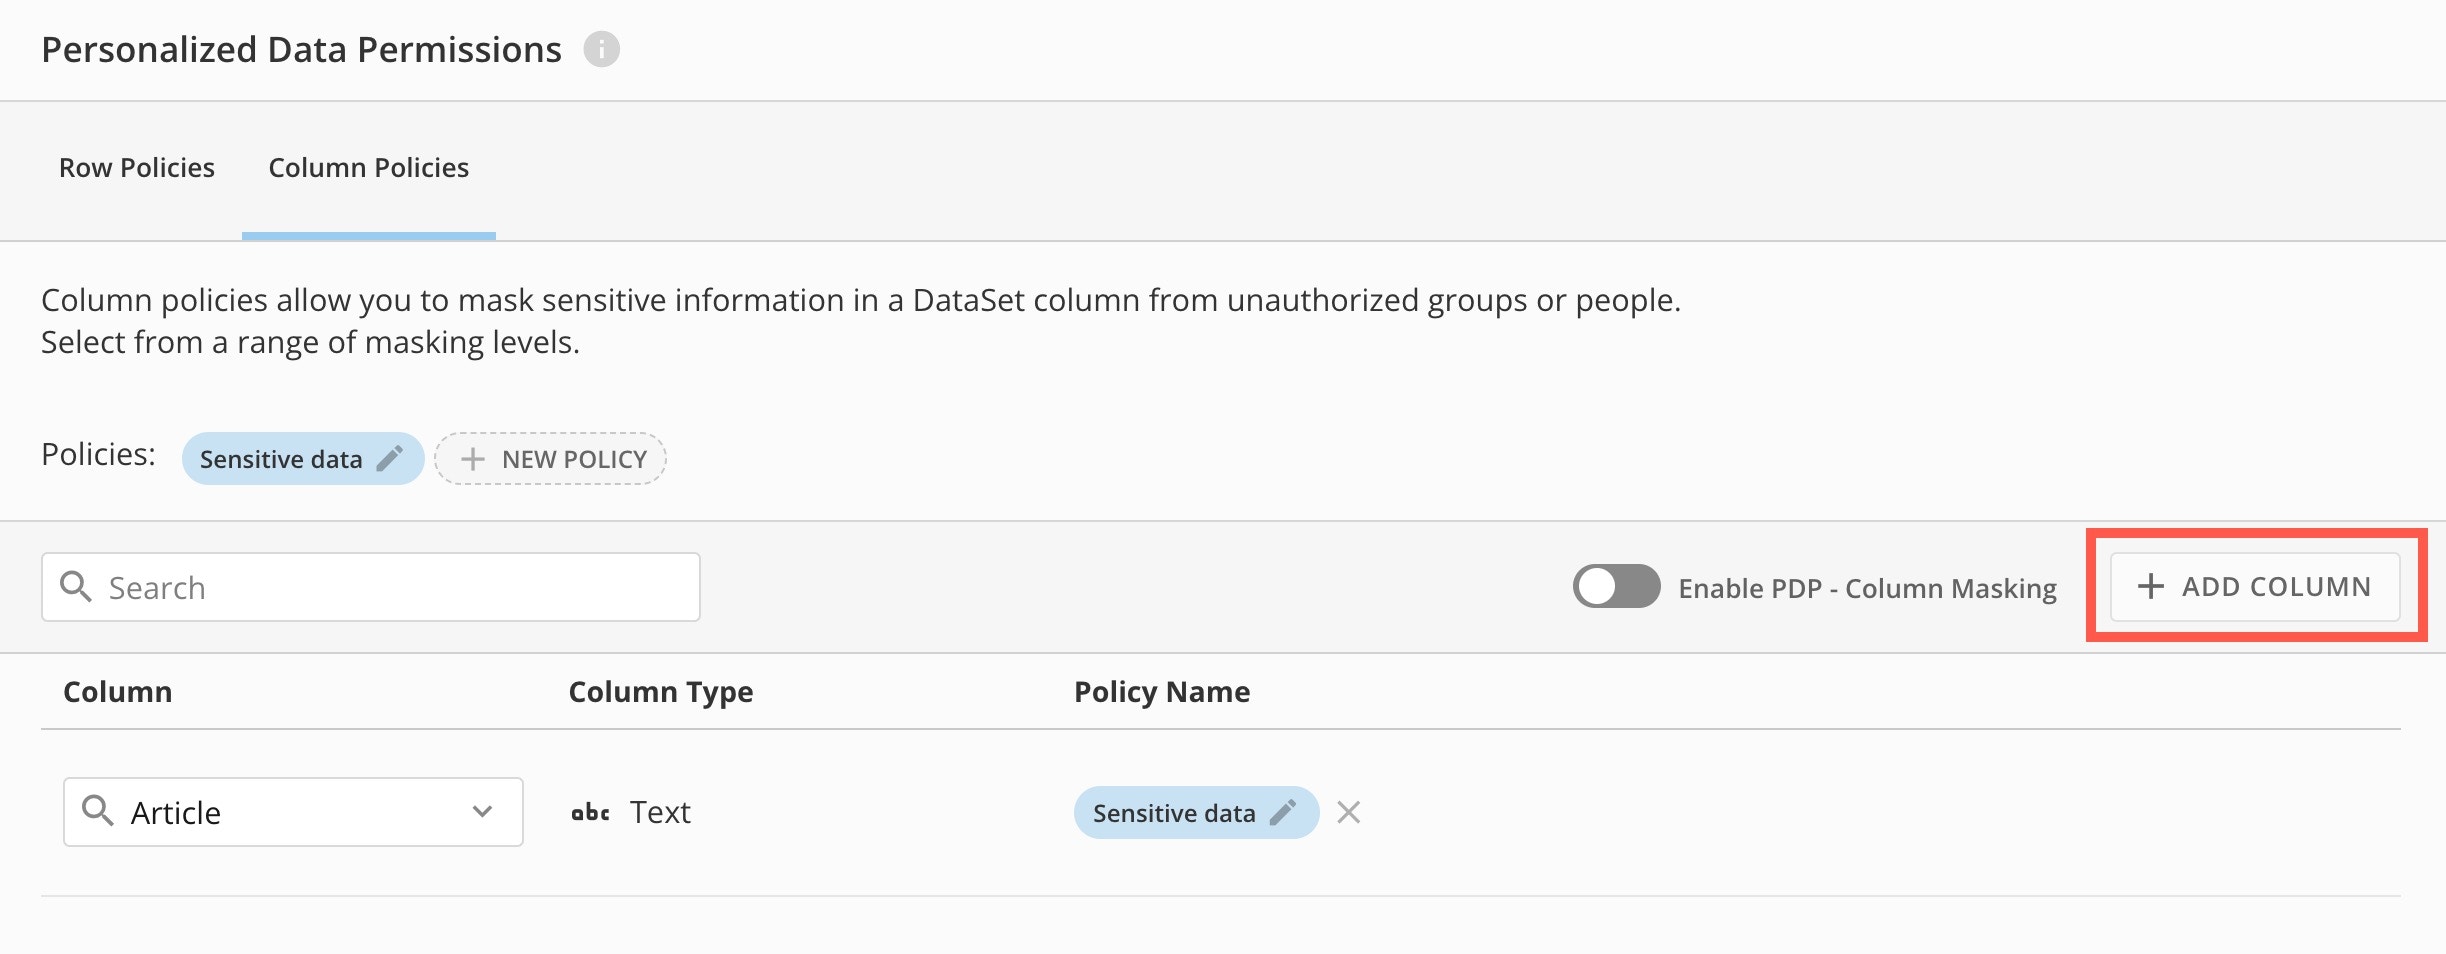
Map a Policy to a Column
Column policies only apply to the columns you map them to. Any columns without a policy stay visible to everyone. You can map one policy to multiple columns, but each column can only have one policy—or none at all. To map a policy to a column:- Access the Column Policies tab of the PDP interface.
-
Select + Add Column to add a new column to the mapping list.
-
In the Column dropdown in the mapping list item, select the column you want to mask.
When you select the column, the data type under Column Type populates automatically.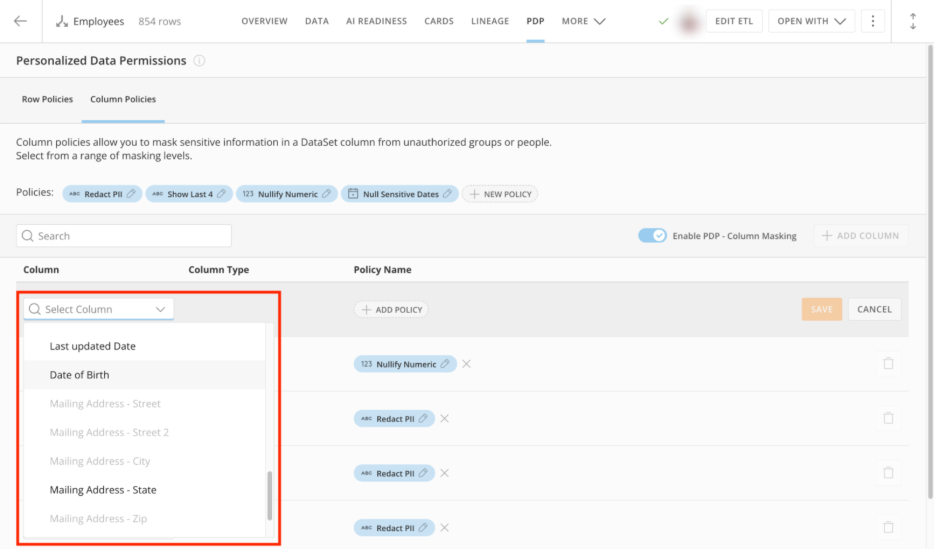

- To populate the Policy Name, select + Add Policy to open the Select Column Policy modal.
-
Select an existing column policy or create a new one.
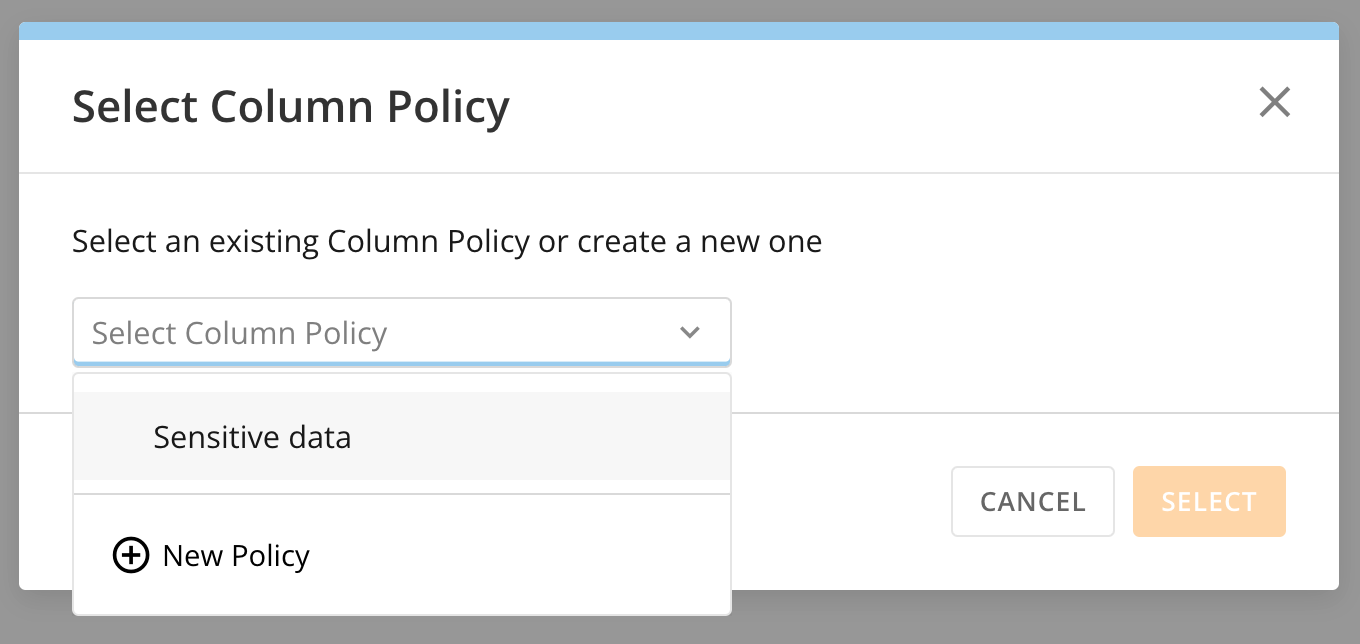
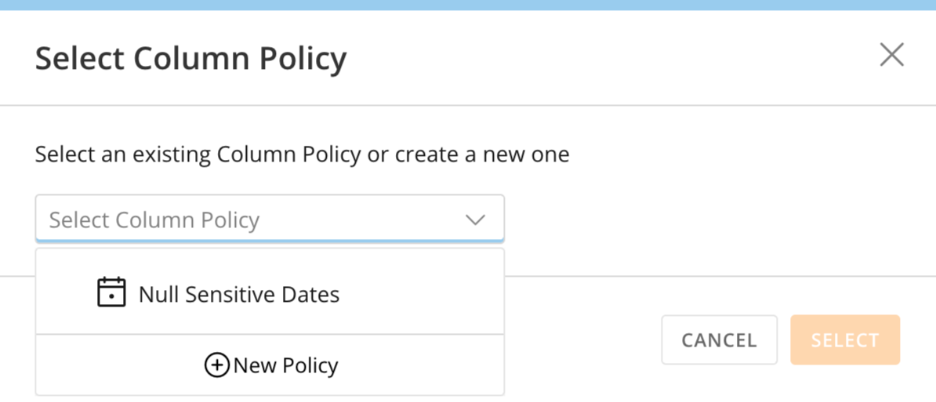
- Choose Select to close the modal and assign the policy.
-
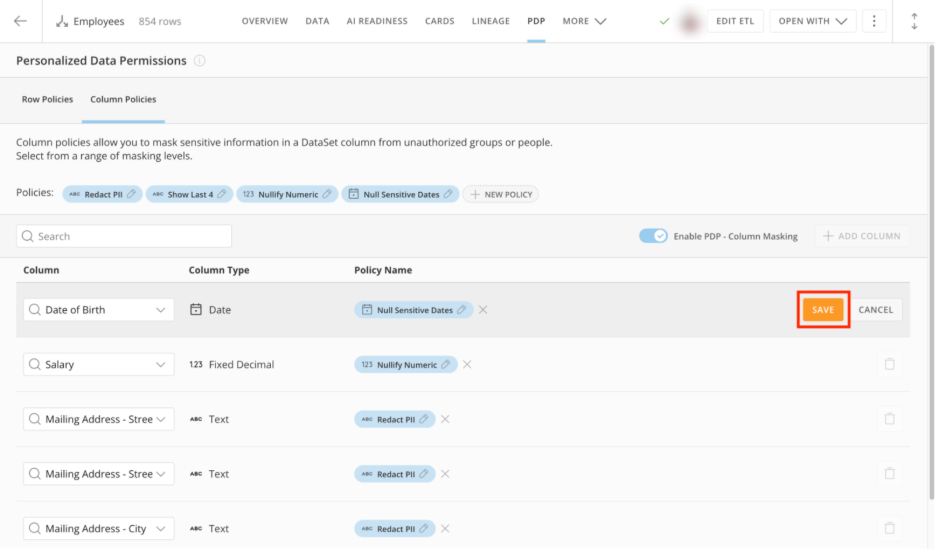
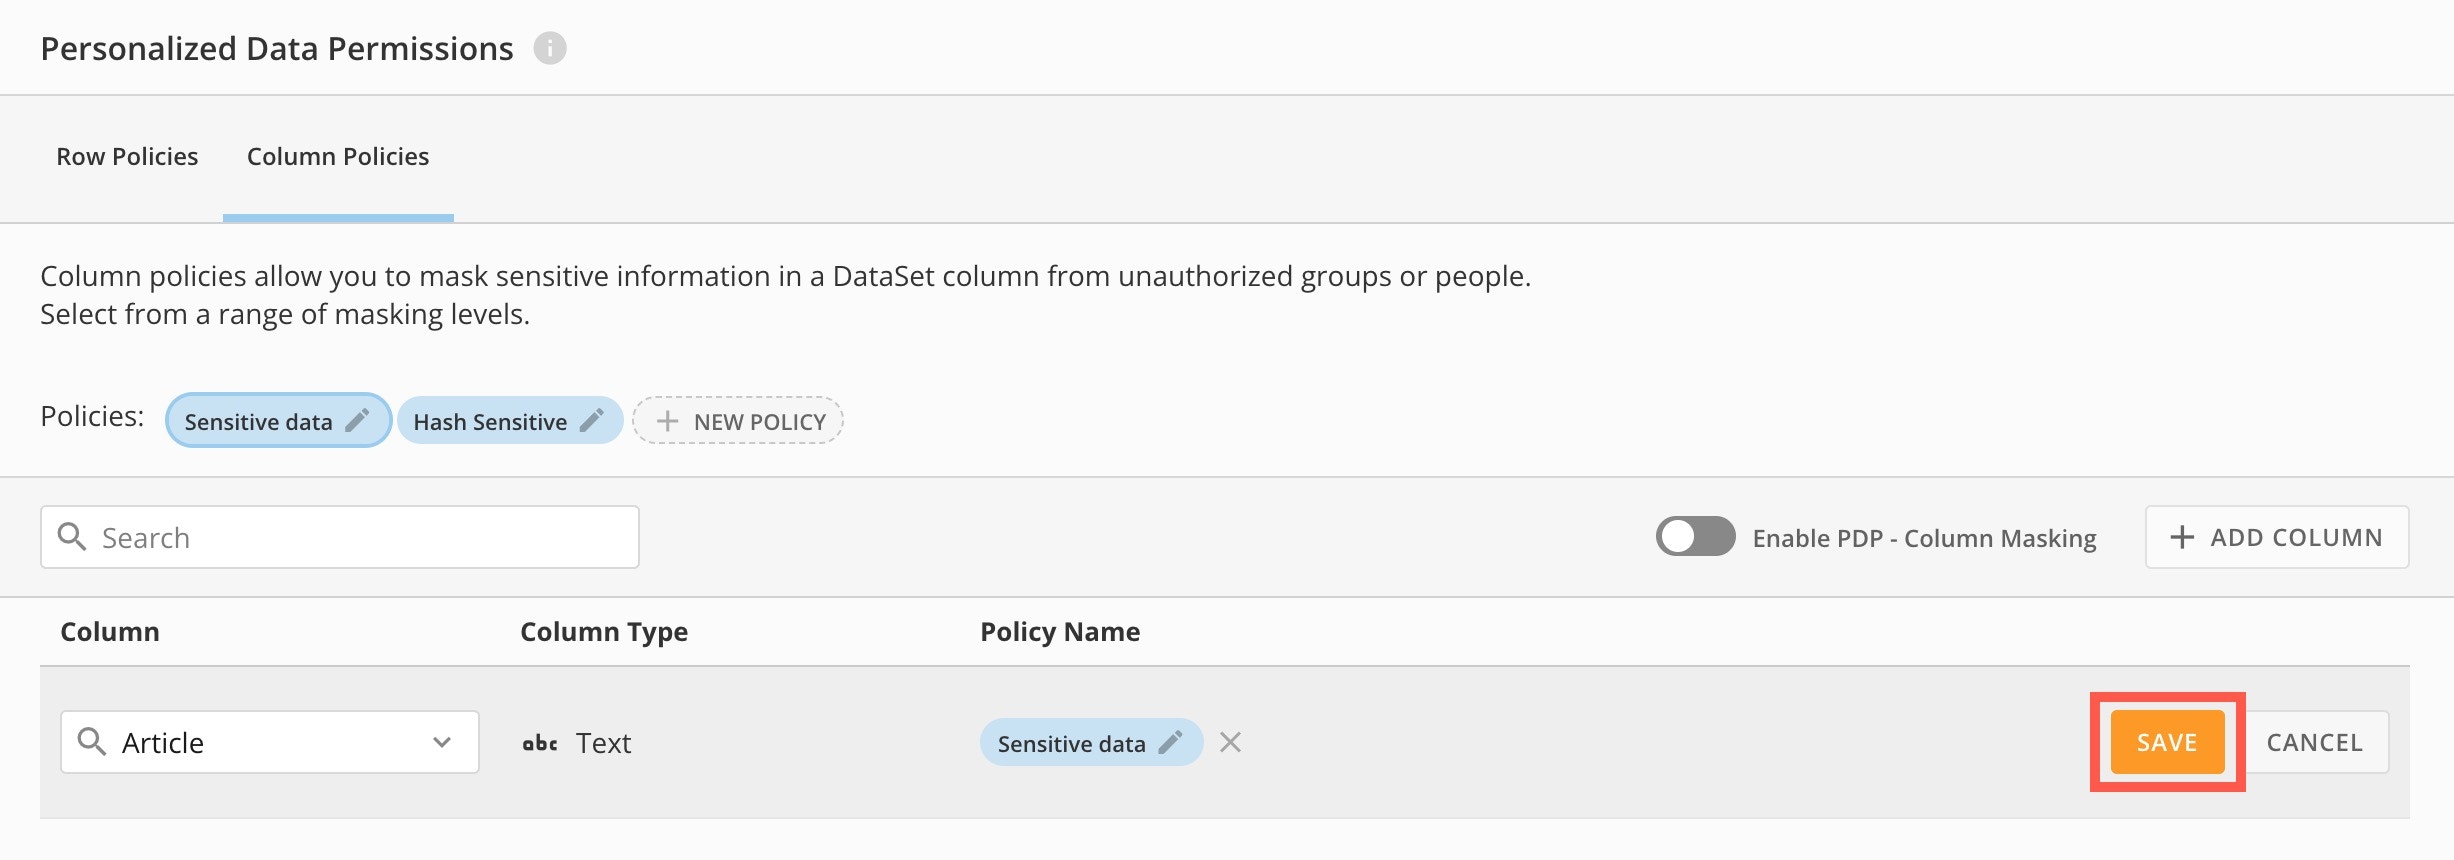
After you’ve assigned a new or existing policy, select Save to complete the mapping of the policy to the column.
Change the Column Policy Mapping
You can change the column policy that you’ve mapped to a column by dragging and dropping an existing policy to the Policy Name.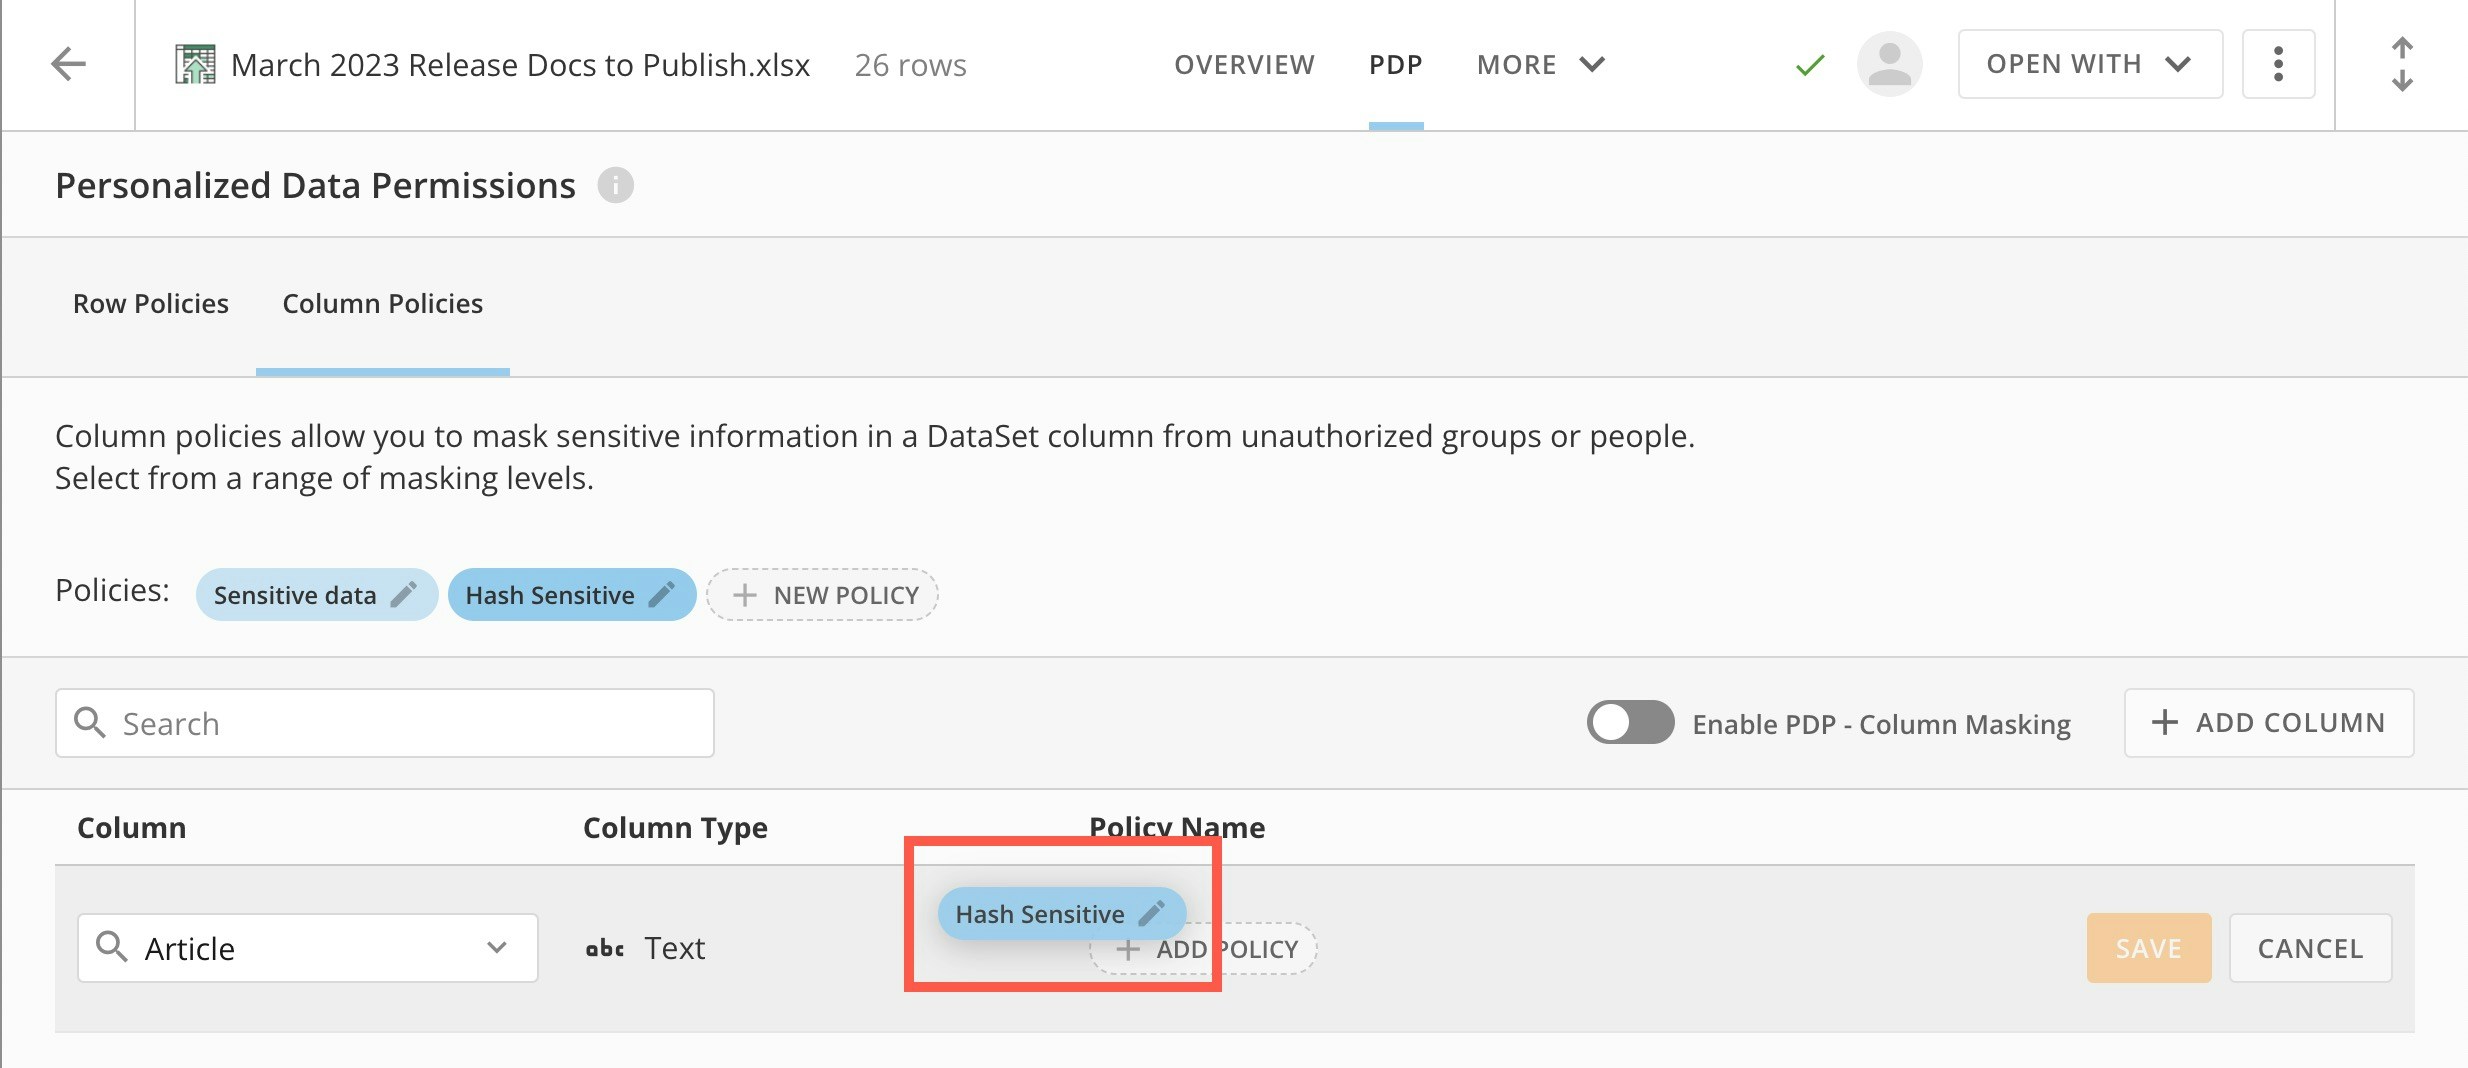
Remove Column Masking
You can remove all column masking from a column by following these steps:- Hover over the mapping list item and select Delete.
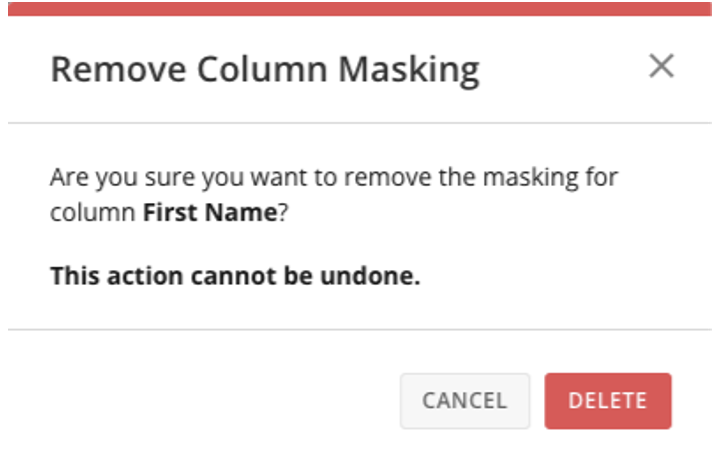
The confirmation dialog displays.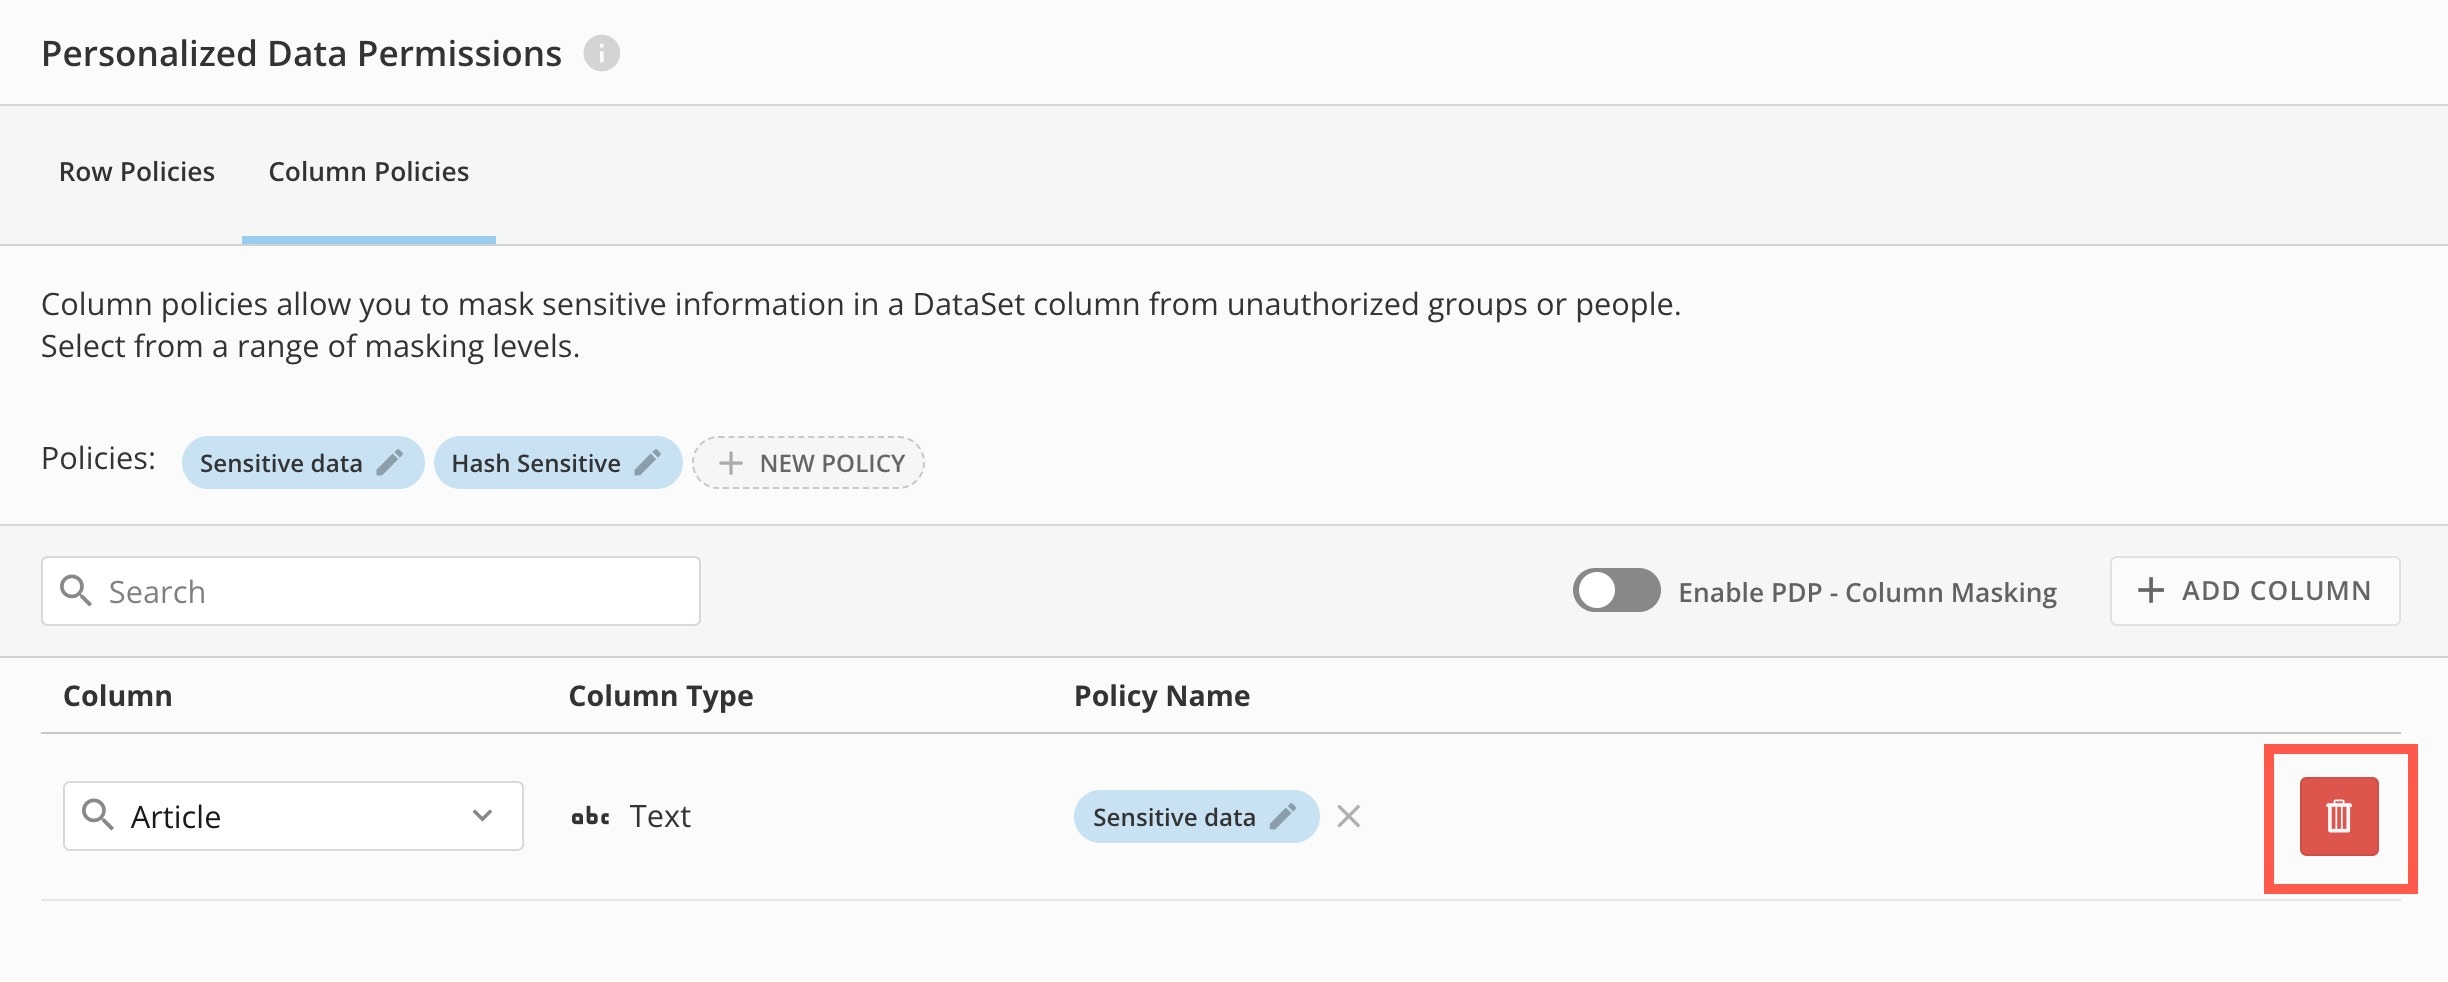
- In the confirmation dialog, select Delete to remove the masking from the column. This action cannot be undone. Select Cancel to close the dialog and keep the current masking.
Known Limitations
When you enable PDP Column Policies, keep these limitations in mind:- Alerts on Cards and DataSets
You can’t create Alerts on DataSets (or Cards powered by them) if PDP Column Policies are enabled. Any Alerts you set up before turning on Column Policies will stop working once the policies are active.
Use Case — Row Policies
This use case shows how row policies for a DataSet affect a card powered by the DataSet. The example DataSet tracks sales throughout the U.S. based on region—East and West. The data is presented using a U.S. map. By default, no PDP policies are in place, so all data in the DataSet displays, as in the image below.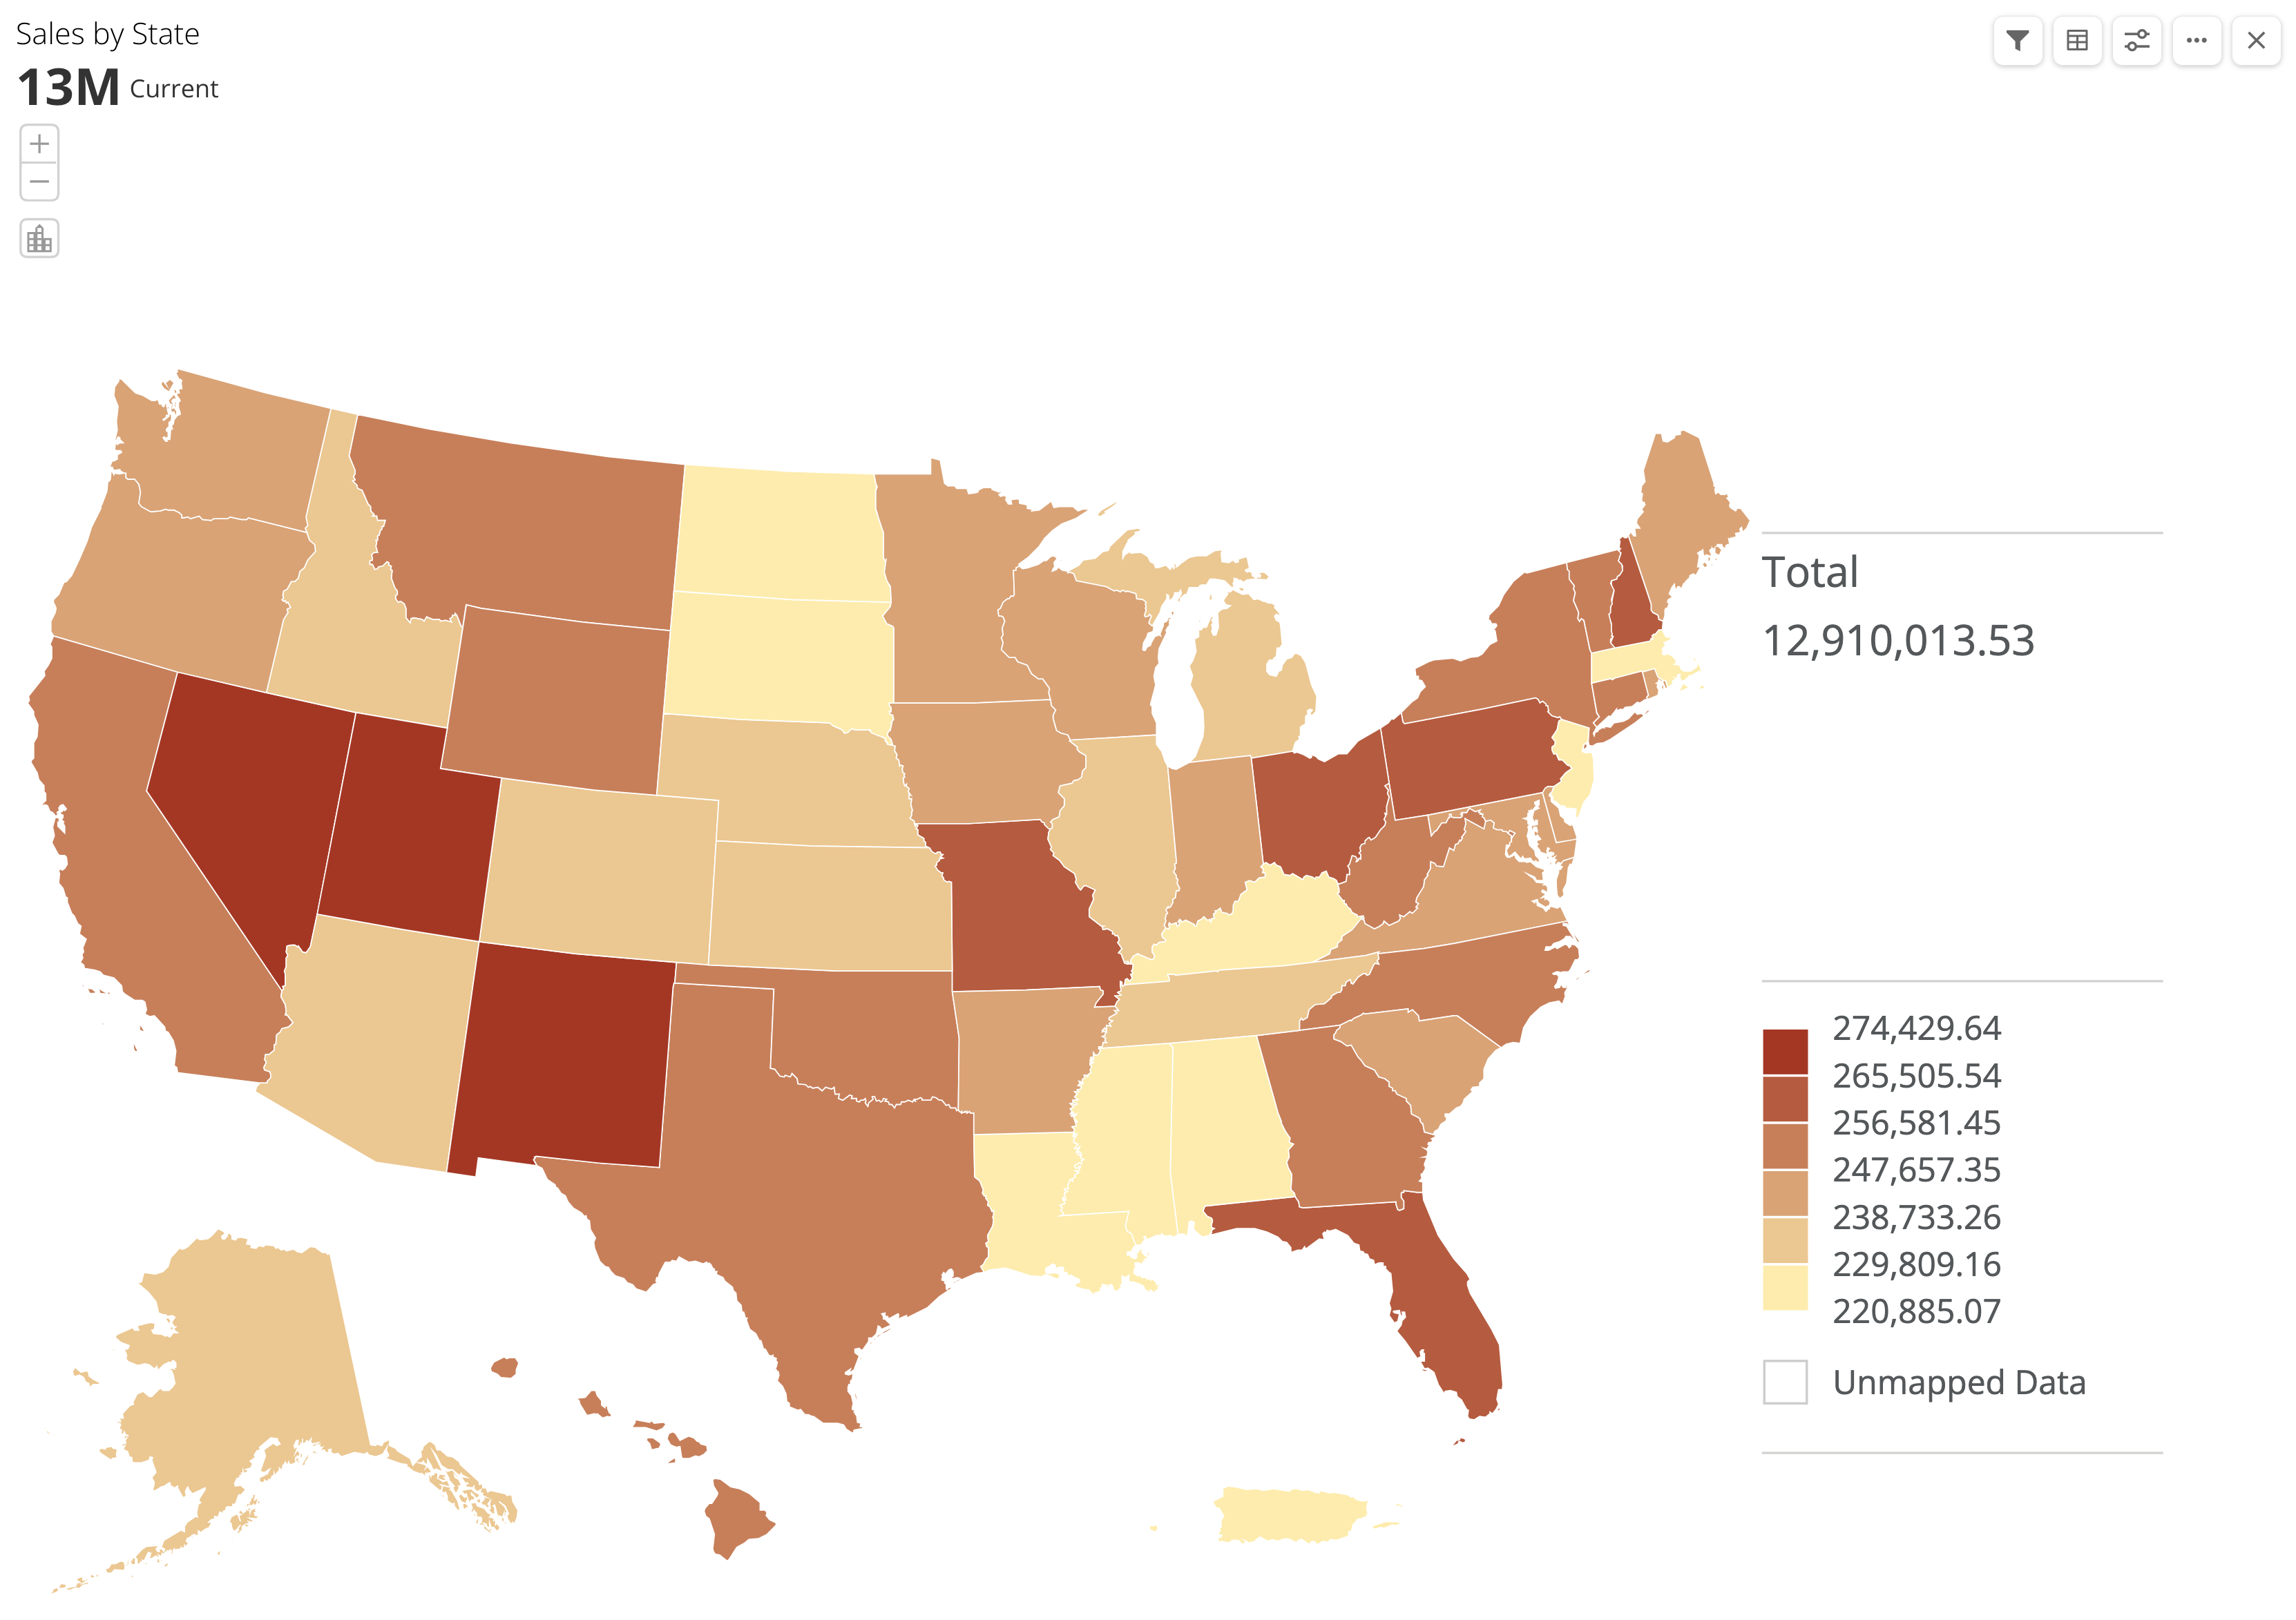
The sales manager’s Row Policies tab now displays as shown below.
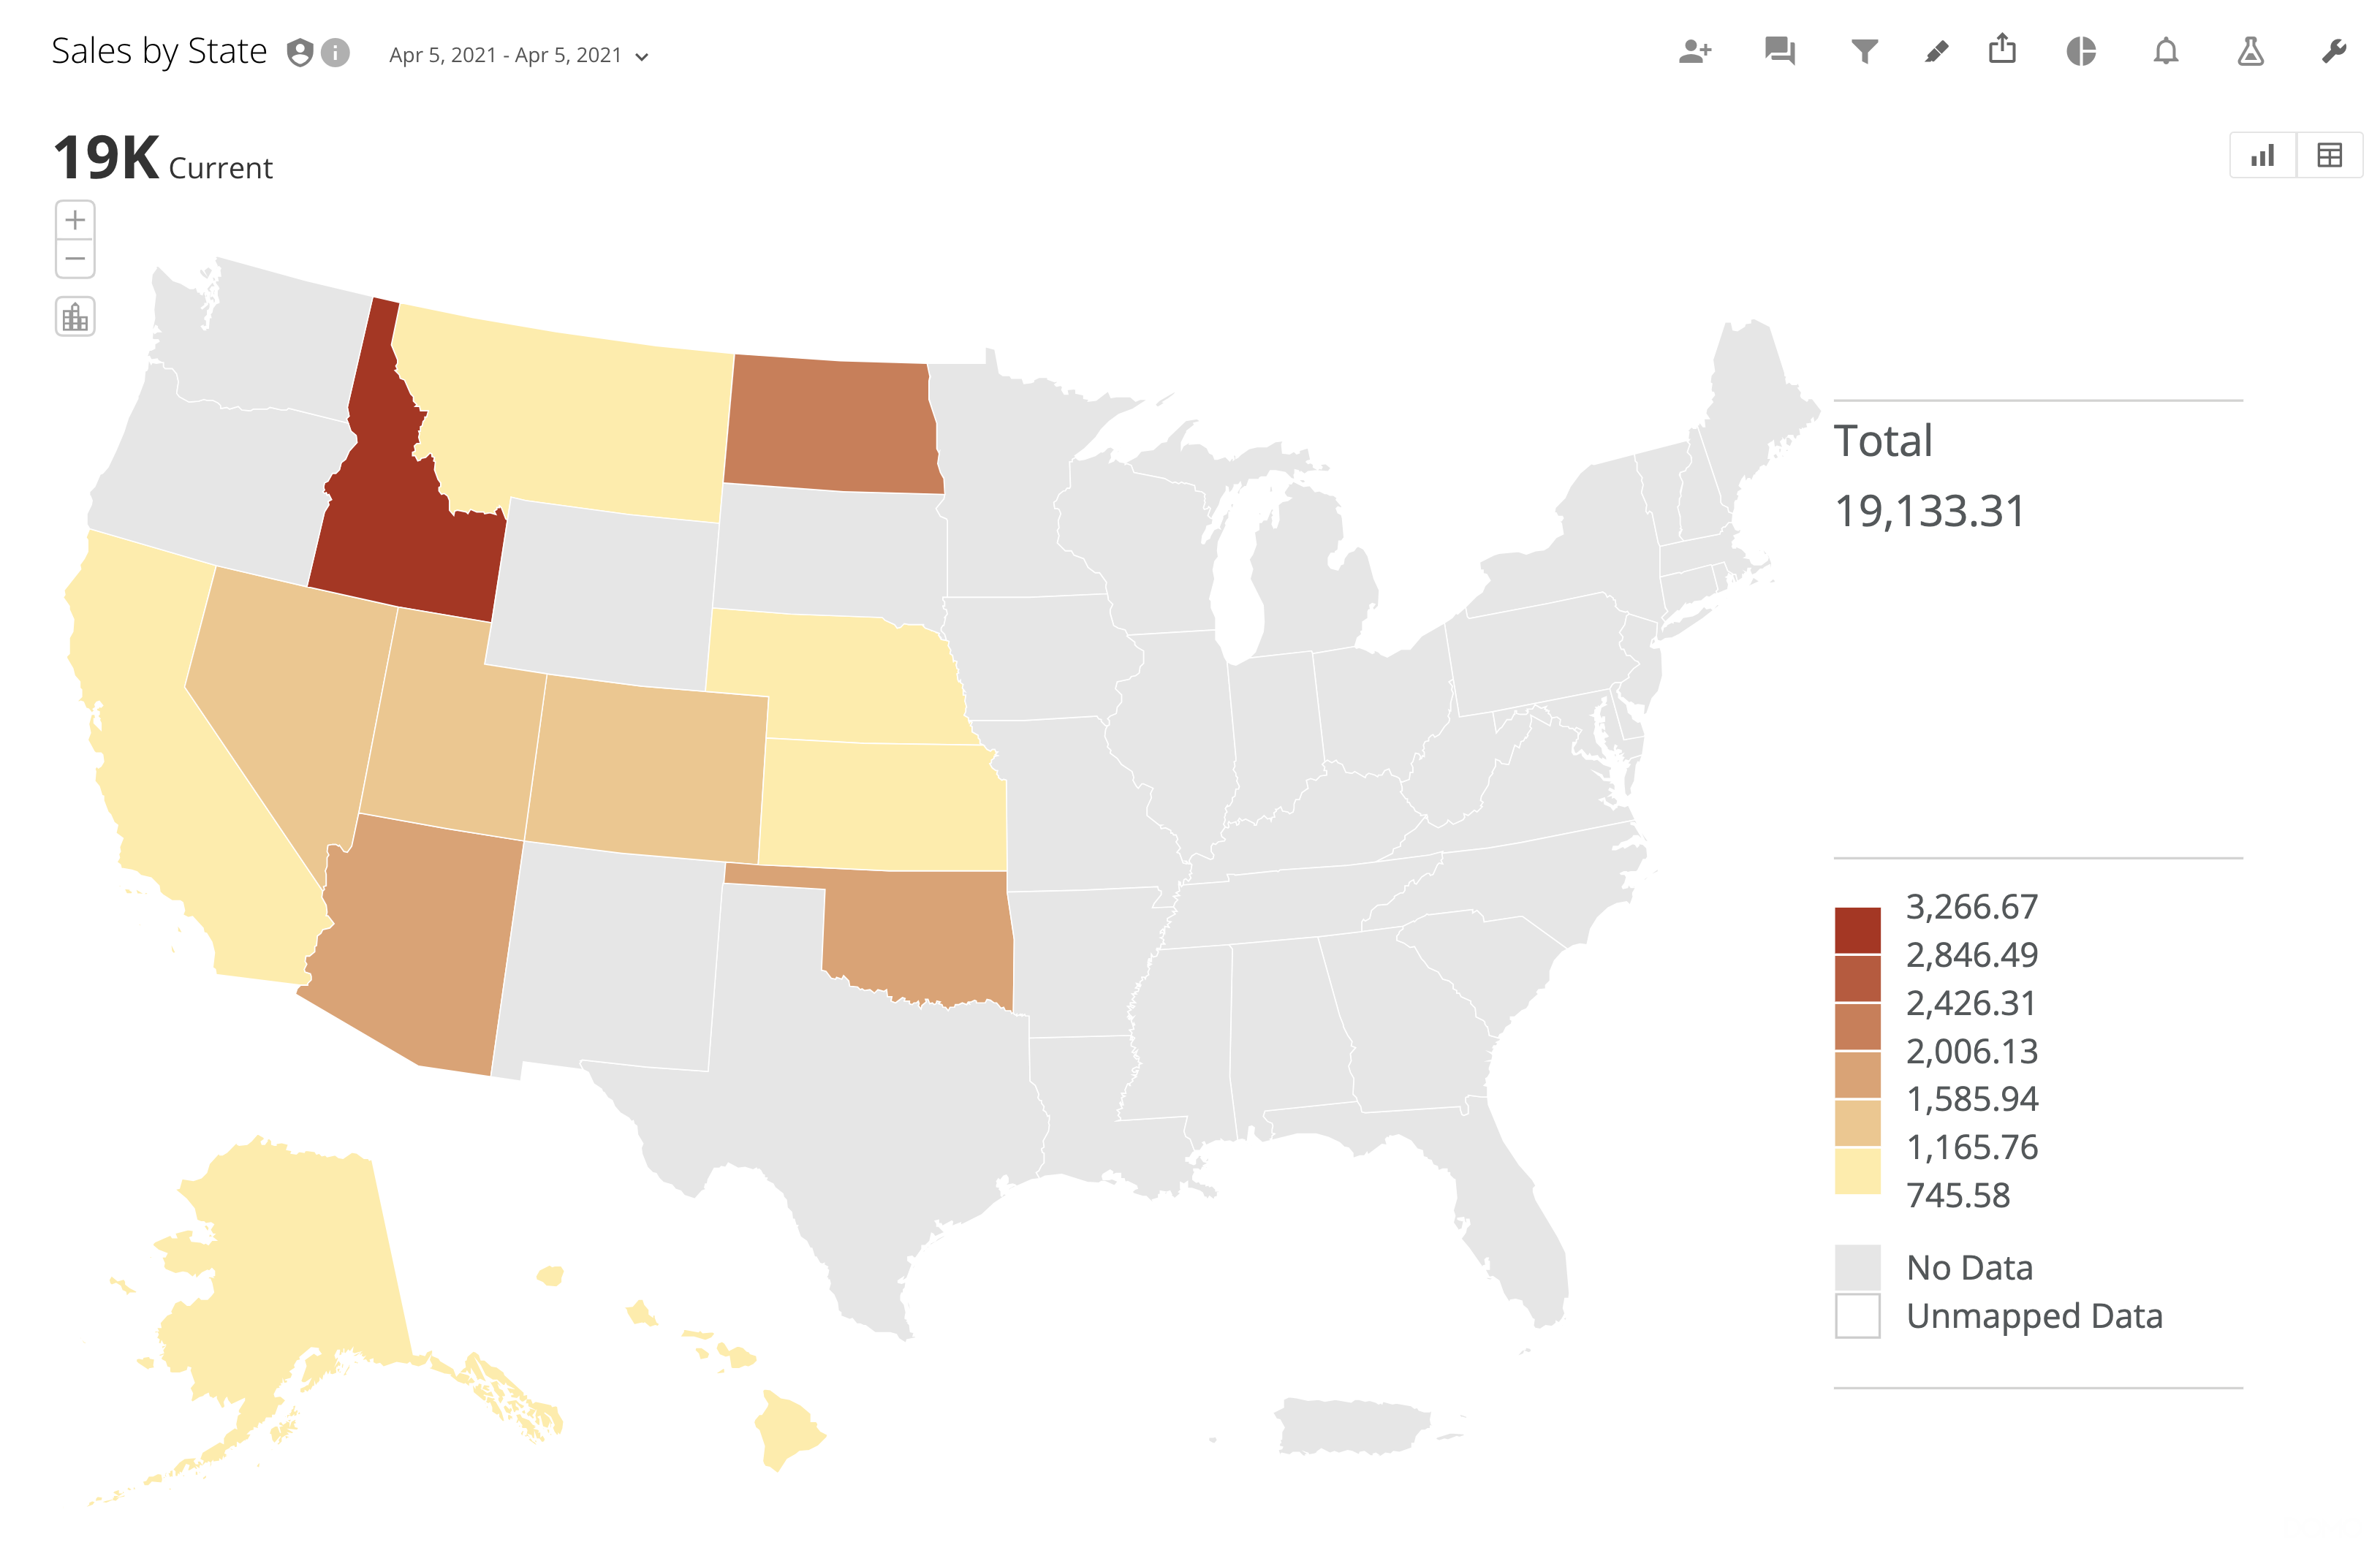
Note: Data only displays for those states that fall into the West Region.
Also notice that the chart total has changed to reflect the PDP policy and
that a PDP stamp appears near the title to indicate that this view shows a
PDP-filtered version of the data.
Dynamic PDP
Dynamic PDP builds upon Simple PDP and offers a more advanced and flexible solution for managing data permissions. It uses real-time, attribute-based permission adjustments, meaning that as user attributes or data context change, so does access to data without needing to manually update and reconfigure your policies.Use an IdP and the Governance Toolkit
To leverage Dynamic PDP in Domo, dynamically source and update your integration with a connected Identity Provider (IdP) or utilize the Domo Governance Toolkit. The Toolkit offers both manual and automated options for attribute management. Using IdP ensures that changes in user roles or other attributes are reflected in real time in Domo. The Governance Toolkit allows for precise control and automates attribute updates within the Domo platform.Configuring Attributes and Set
You need to configure your sourced attributes in Domo before they can be used for Dynamic PDP. Learn more about configuring attributes. Dynamic PDP policies can be created manually or automatically. To learn more about the automatic creation and management of PDP policies, see PDP Automation.PDP and DataFlows/DataFusion
Be aware of the following considerations before configuring a PDP policy on a DataSet powering a DataFlow or DataFusion.DataFlows Considerations
DataFlows with PDP applied to the input DataSet(s) only work if at least one of the following is true:- The DataFlow owner has the Admin role or a custom role with the Manage DataFlow grant enabled
- The DataFlow owner also owns the input DataSet
- The DataFlow owner has PDP policies that grant full access to all rows and columns in the input DataSet:
- (If you’ve enabled PDP row filtering) must be assigned to the All Rows policy
- AND (if you’ve enabled PDP column masking) must be assigned to the Unmasked rule for each column where you’ve applied a masking policy
DataFusion Considerations
For a DataFusion, you can apply PDP to both input and output DataSets. If you are creating a DataFusion that includes one or more DataSets with PDP enabled, you must be part of the All Rows policy for the DataSet(s). If the owner of a DataFusion loses access to one or more input DataSets with active PDP, the DataFusion is disabled. When you build a DataFusion from one or more input DataSets with PDP policies in place, those policies are incorporated into the output DataSet.DomoStats
Domo provides PDP policy configuration metadata through DomoStats reports. Three reports cover row policies, and four reports cover column policies. These reports explain what each policy does, the logic it uses, and which users and groups it applies to. Because DomoStats reports include policy definition and assignment details—including filter values in the PDP — Row Policy Conditions report—we recommend enabling PDP on these report DataSets to help protect potentially sensitive data.PDP—Row Policies Beta
This report lists all PDP row policies by ID, whether you have enabled row policies on the DataSet or not.PDP—Row Policy Conditions Beta
This report shows the conditions that make up each row of the policy. A single policy can include multiple conditions, and the report lists each condition on its own row. The report includes all policy conditions. It does not exclude any policies; however, the All Rows policy does not appear because it has no conditions.Note: You won’t see the All Rows policy in this report because it doesn’t
have conditions.
PDP—Row Policy Assignments Beta
This report shows all users and groups that you explicitly assign to row policies. The All Rows policy is a special case: it can exist without any user or group assignments. As a result, the All Rows policy appears in this report only when you explicitly assign users or groups to it.Note: You won’t see the All Rows policy in this report unless you have
explicitly assigned users or groups to it.
PDP—Column Policies
This report shows every PDP column policy by ID, whether you have enabled column policies on the DataSet or not.PDP—Column Policy Rules
This report lists every PDP column policy rule by ID.Note: You won’t see the default unmasked rule in this report because every
policy includes it, and you can’t delete or modify it.
PDP—Column Policy Rule Assignments
This report shows which users or groups are assigned to column policy rules.Note: You won’t see the default unmasked rule in this report because every
policy includes it, and you can’t delete or modify it.
PDP—Column Policy Mappings
This report shows how PDP column policies map to DataSet columns. Only mapped policies appear here.FAQ
Can I use a row policy to filter based on a column and simultaneously apply a column policy using that same column?
Can I use a row policy to filter based on a column and simultaneously apply a column policy using that same column?
No, this is not supported.
Can I create or update Card or DataSet alerts where the underlying DataSet has PDP column policies enabled?
Can I create or update Card or DataSet alerts where the underlying DataSet has PDP column policies enabled?
No, this is a known limitation. Domo will be evaluating how we may be able to
allow Alerts on DataSets where PDP column policies have been enabled.