> ## Documentation Index
> Fetch the complete documentation index at: https://www.domo.com/docs/llms.txt
> Use this file to discover all available pages before exploring further.
# Connect Tables in Cloud Integrations
## Intro
After setting up a Cloud Integration, you can connect tables from your cloud data warehouse to make them available as DataSets in Domo.
This article explains how to connect, manage, and disconnect those tables.
***
## Prerequisites
Set up at least one integration before connecting tables. See [Cloud Integrations Overview](/s/article/4412849158167).
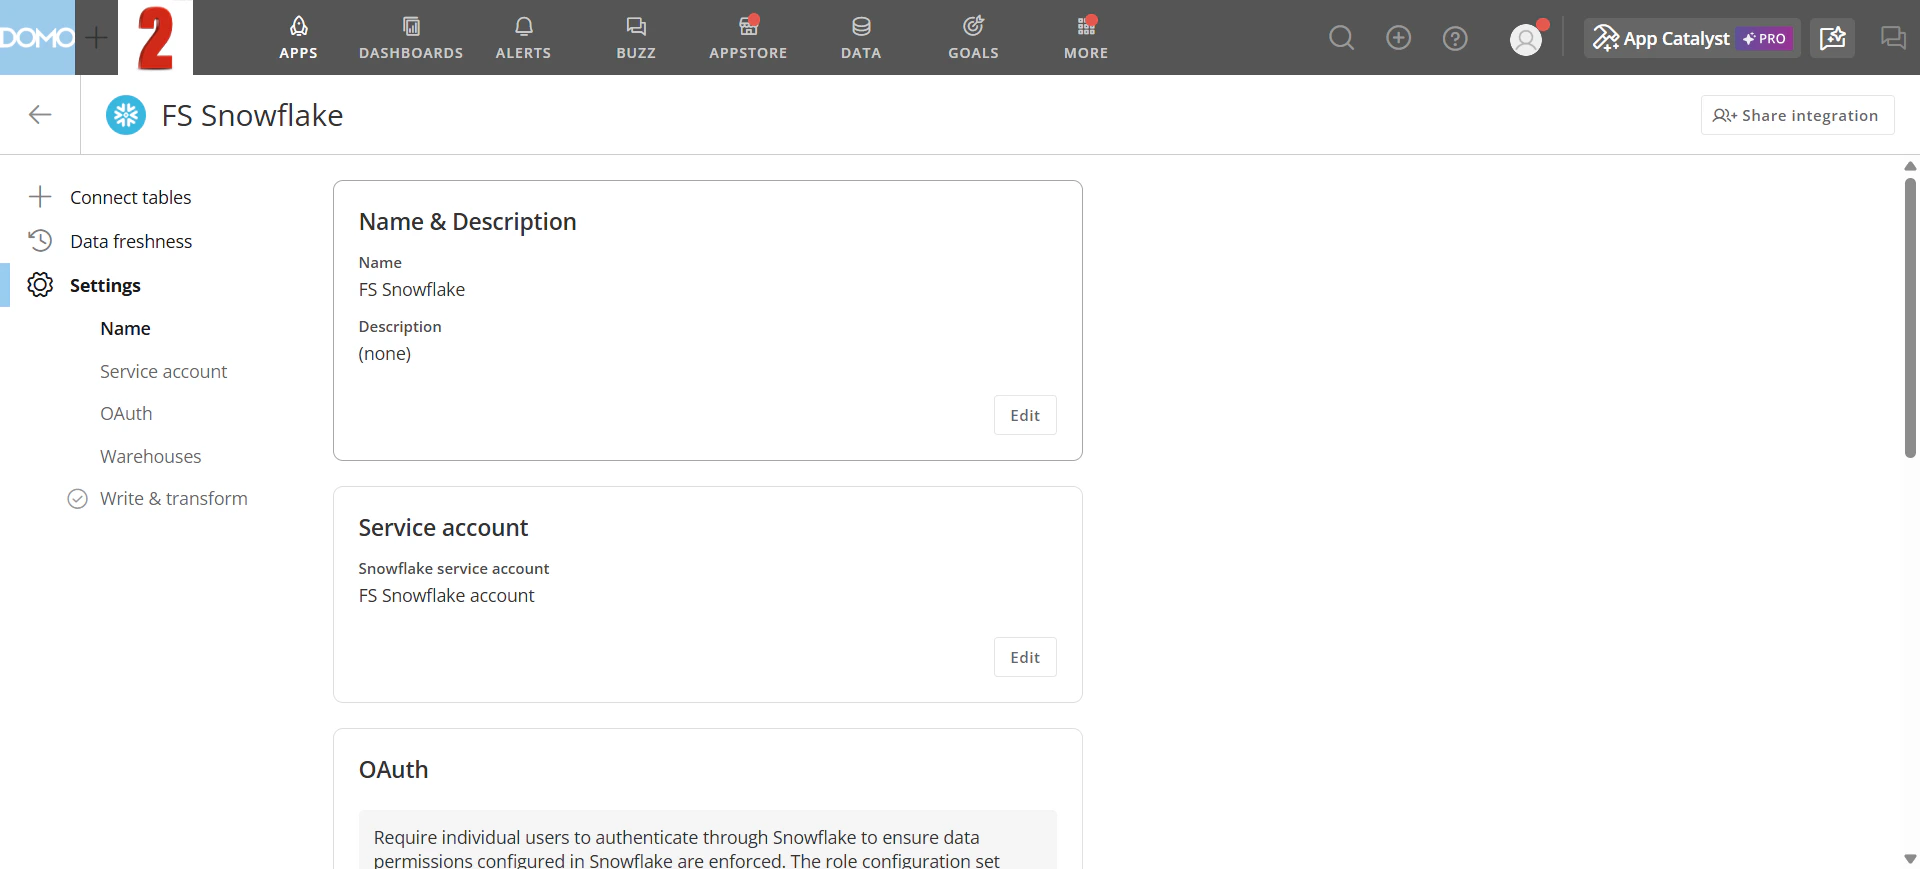
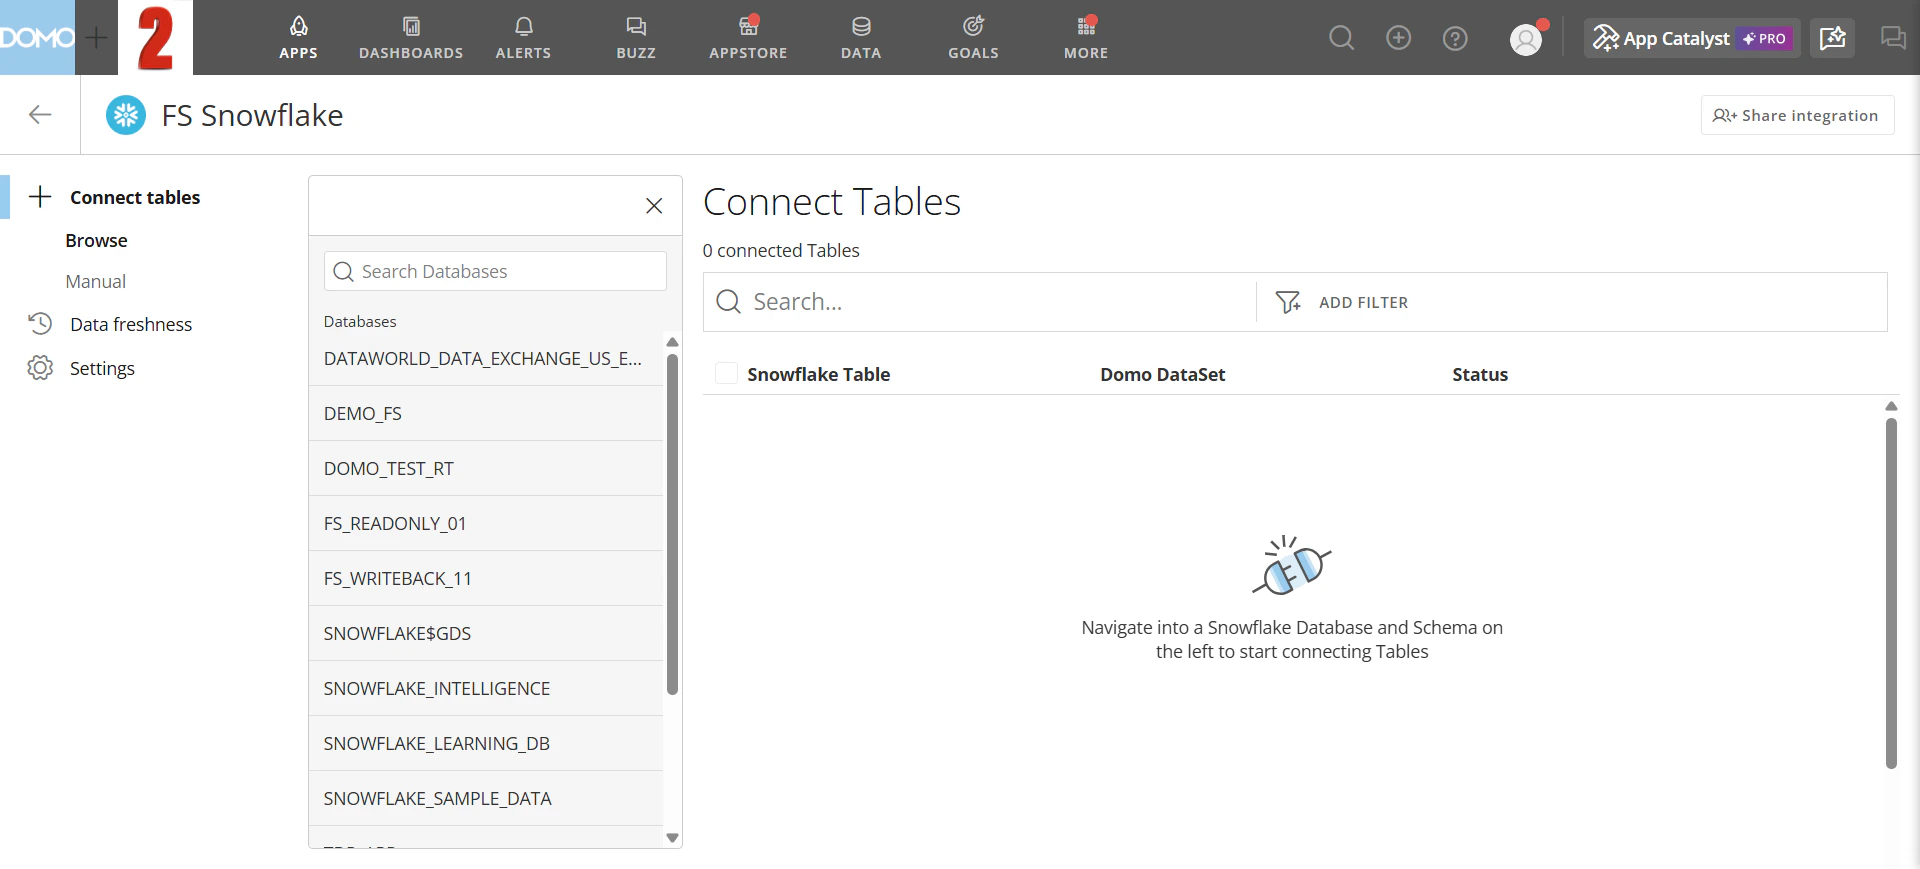
## Connect Tables
To open the Connect Tables panel, go to **Data > Data Warehouse**, select the integration you want to work with, then select **Connect tables** in the left navigation.
 **Note:** Each connect operation supports a maximum of 500 tables. To avoid exceeding this limit, select no more than 500 tables per operation.
You can connect tables using the **Browse** tab or the **Manual** tab.
### Browse
Use the Browse tab to navigate your warehouse hierarchy and select tables to connect.
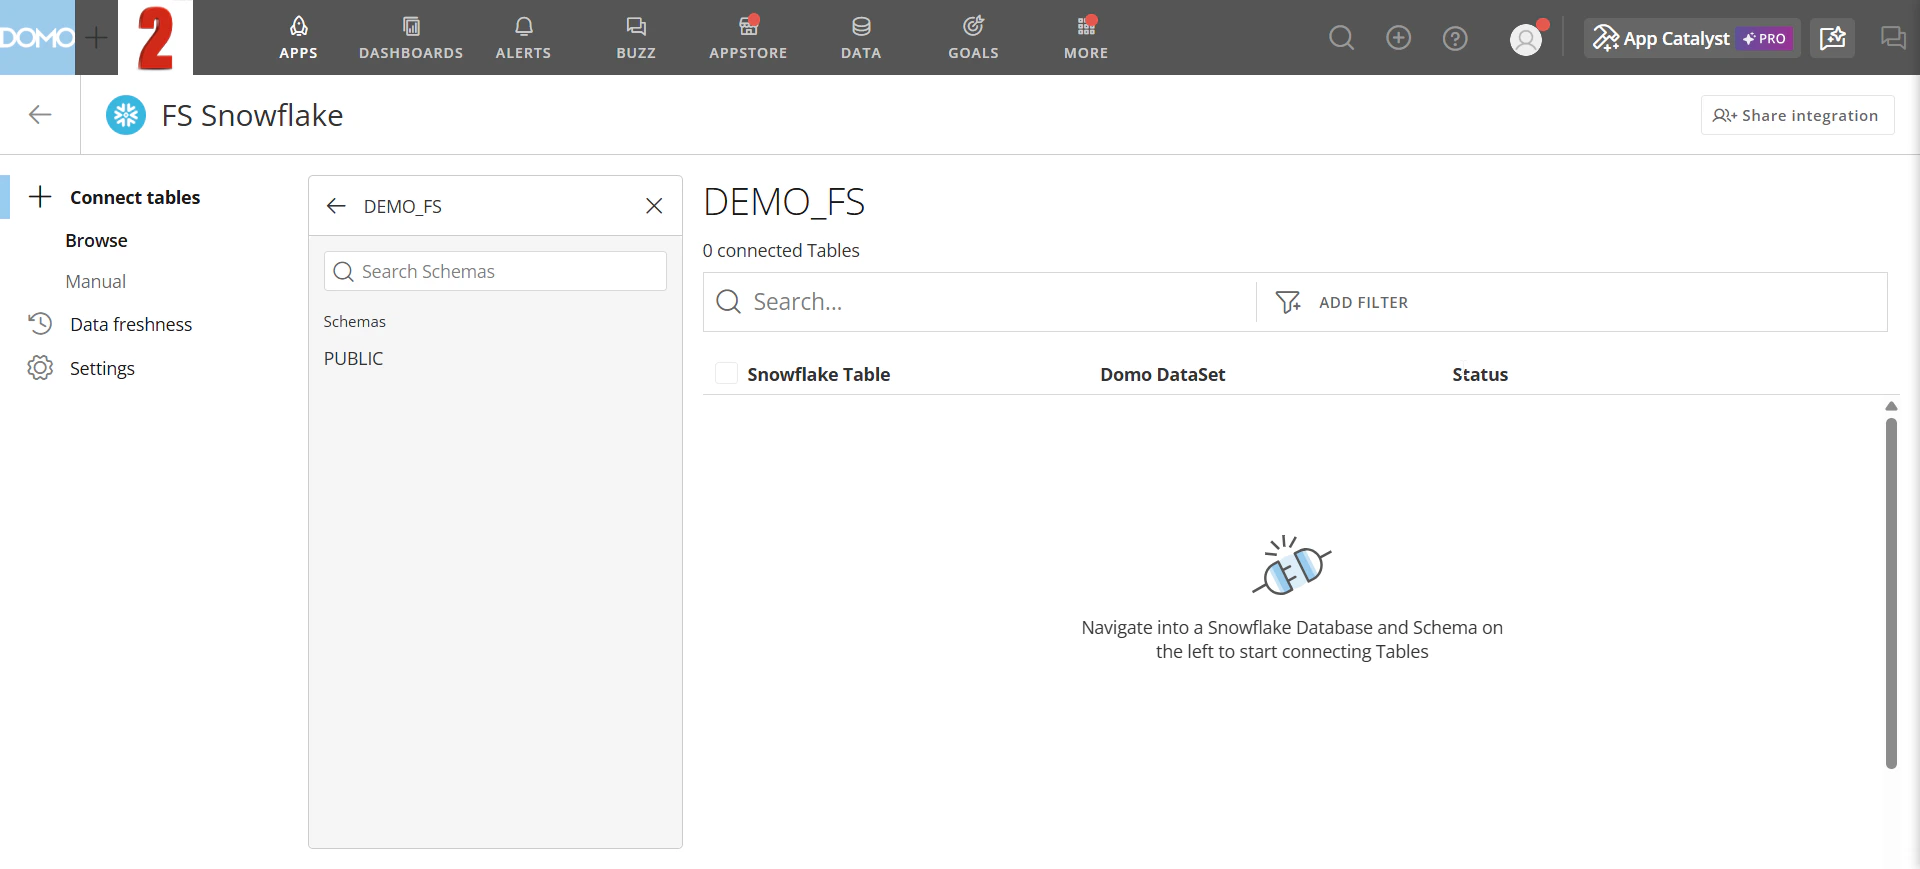
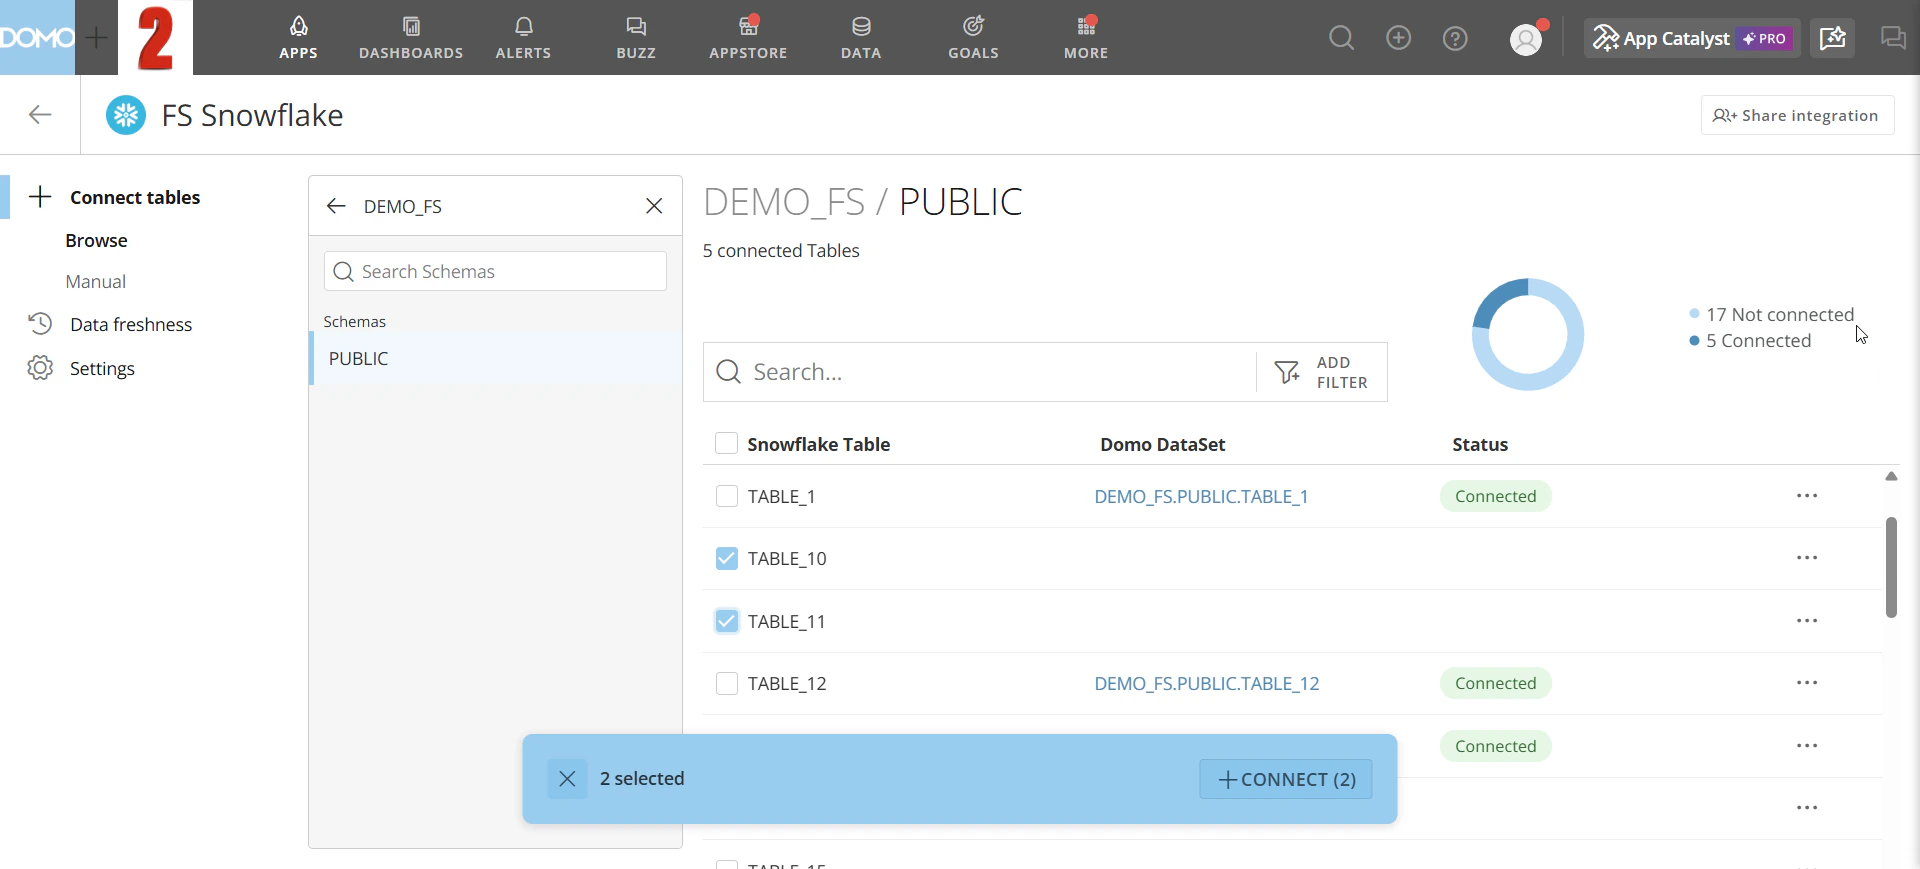
1. In the left panel, select a database. The schemas in that database appear below it.
**Note:** Each connect operation supports a maximum of 500 tables. To avoid exceeding this limit, select no more than 500 tables per operation.
You can connect tables using the **Browse** tab or the **Manual** tab.
### Browse
Use the Browse tab to navigate your warehouse hierarchy and select tables to connect.
1. In the left panel, select a database. The schemas in that database appear below it.
 2. Select a schema. The right panel lists each table's name, its corresponding Domo DataSet (if connected), and its status.
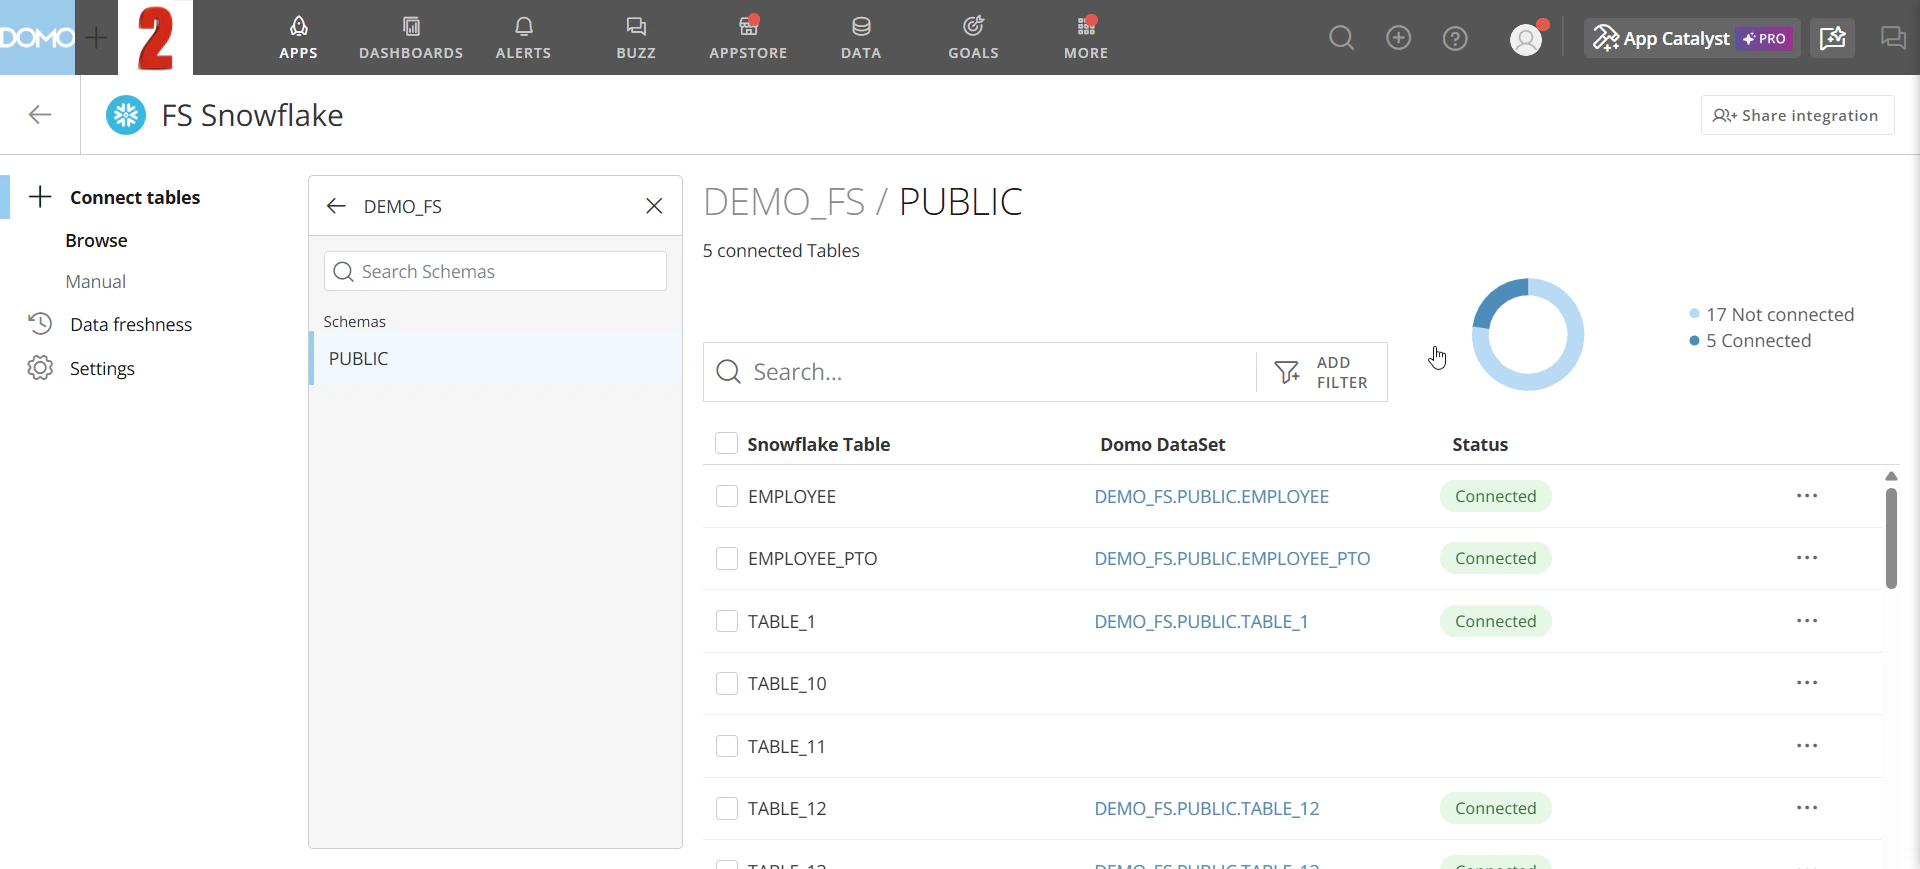 3. Select the checkbox next to each table you want to connect. A selection bar appears at the bottom of the panel showing the number of selected tables.
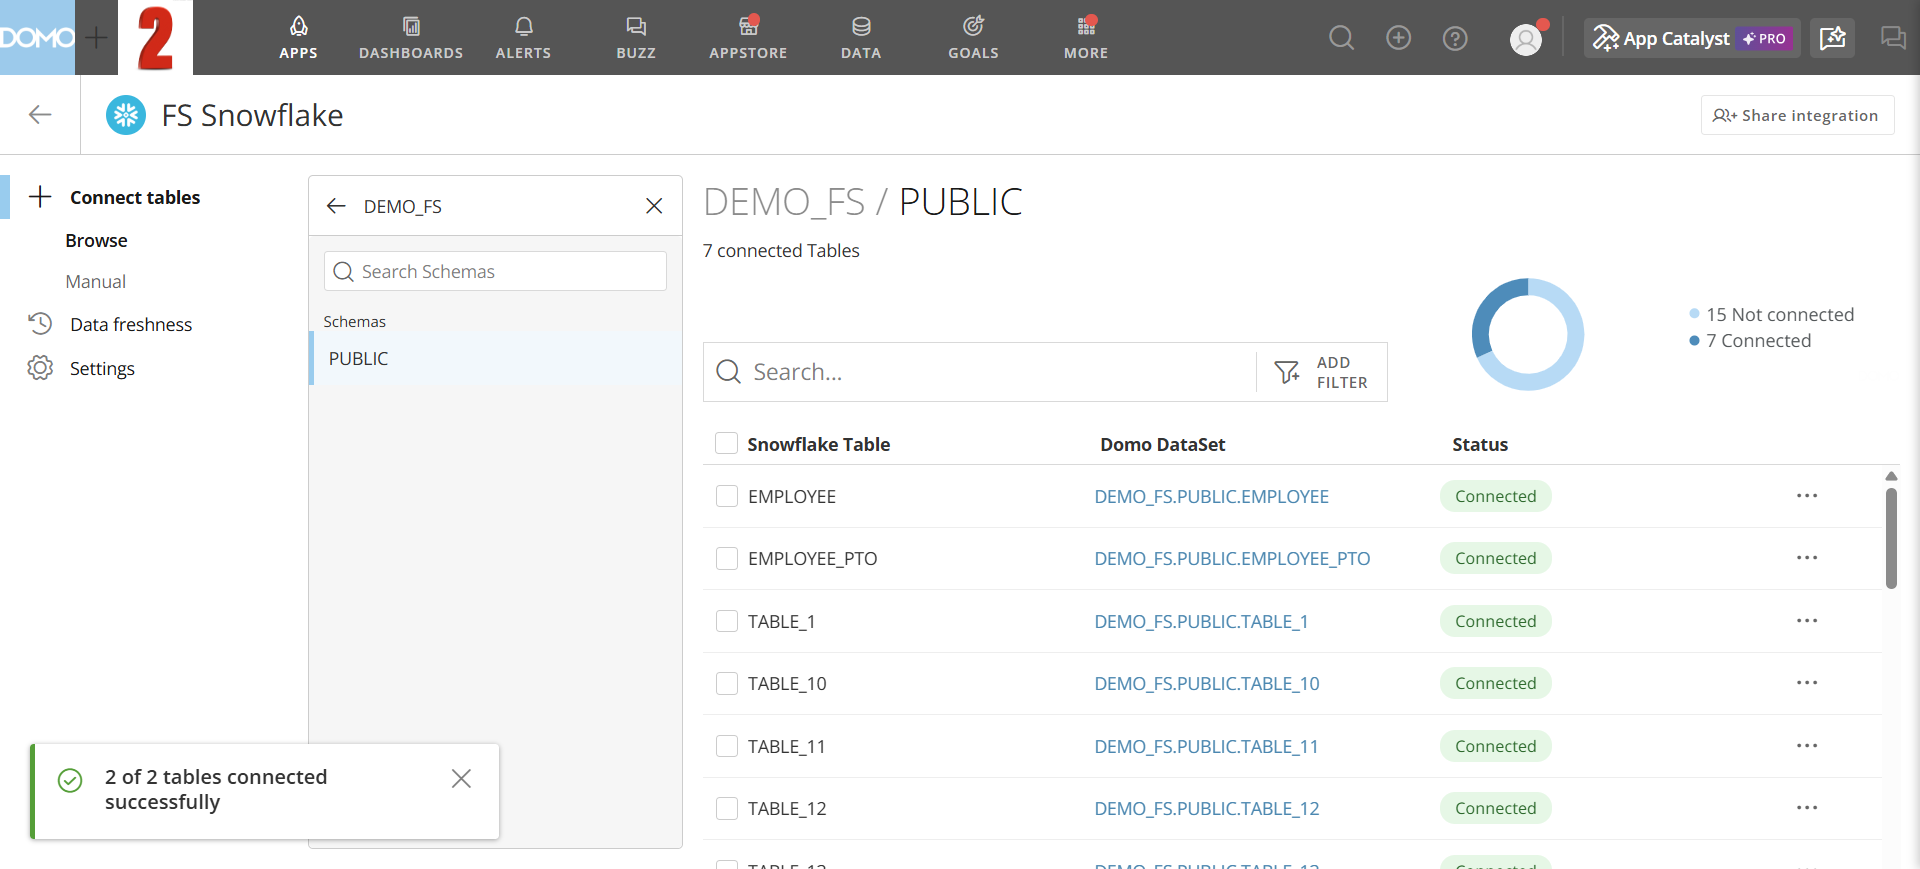
 4. Select **Connect** in the bottom bar. A success message appears confirming how many tables were connected, and each table's status updates to **Connected**.
 ### Manual
Use the Manual tab to connect tables by entering their location directly (**Add Table**) or by uploading a list (**Upload List**).
### Manual
Use the Manual tab to connect tables by entering their location directly (**Add Table**) or by uploading a list (**Upload List**).
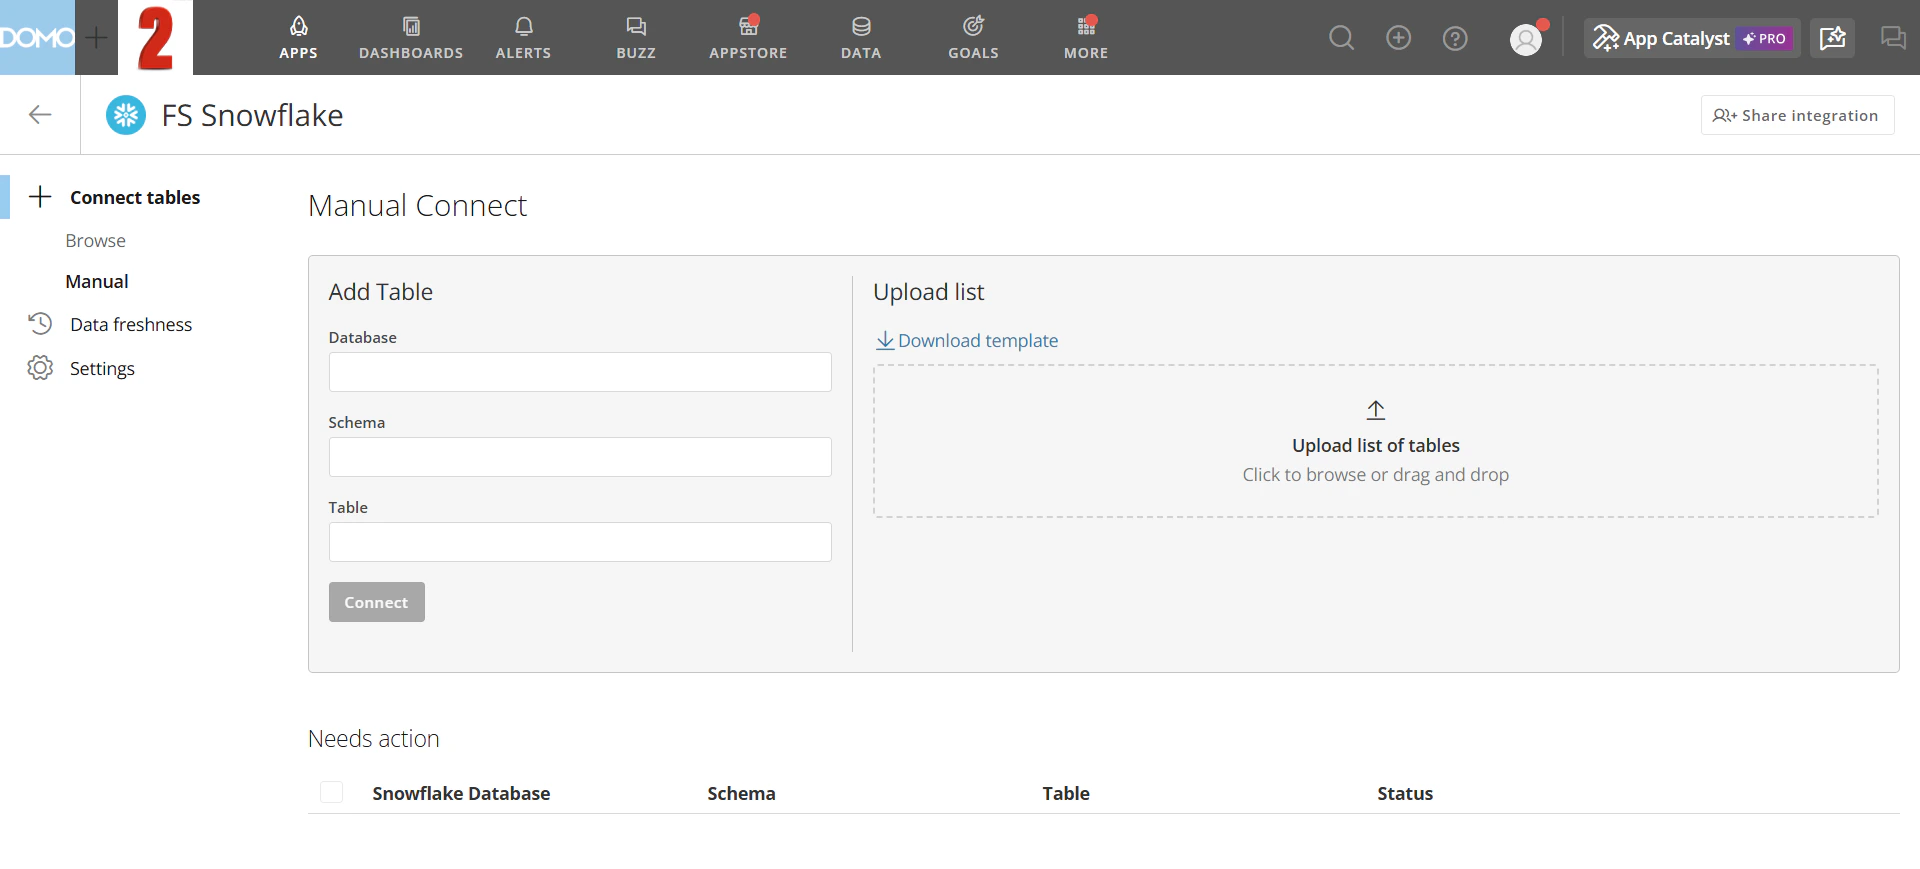 #### Add a Single Table
1. In the **Add Table** form, enter the **Database**, **Schema**, and **Table** values.
2. Select **Connect**.
#### Upload a List of Tables
1. Select **Download Template** to get the CSV template.
2. Open the template and enter the **Database**, **Schema**, and **Table** values for each row.
3. Upload the file by dragging it into the **Upload List** area or selecting **Browse** to locate the file on your computer. The tables in the file are listed. Any rows that could not be matched are labeled **Needs Action**.
4. For any table labeled **Needs Action**, correct the entry in your CSV file and upload it again, or connect that table using the **Browse** tab or the **Add Table** form.
## Manage Connected Tables
Use the Connect Tables panel to search, filter, and disconnect tables.
### Search and Filter Tables
Use the search bar to filter the table list by name. The list updates as you type to show only tables whose names contain the search text.
To filter by connection status, select **Add Filter** and choose a **Status**:
* **Connected —** tables currently connected to a Domo DataSet.
* **Not connected —** tables available to connect.
### Disconnect Tables
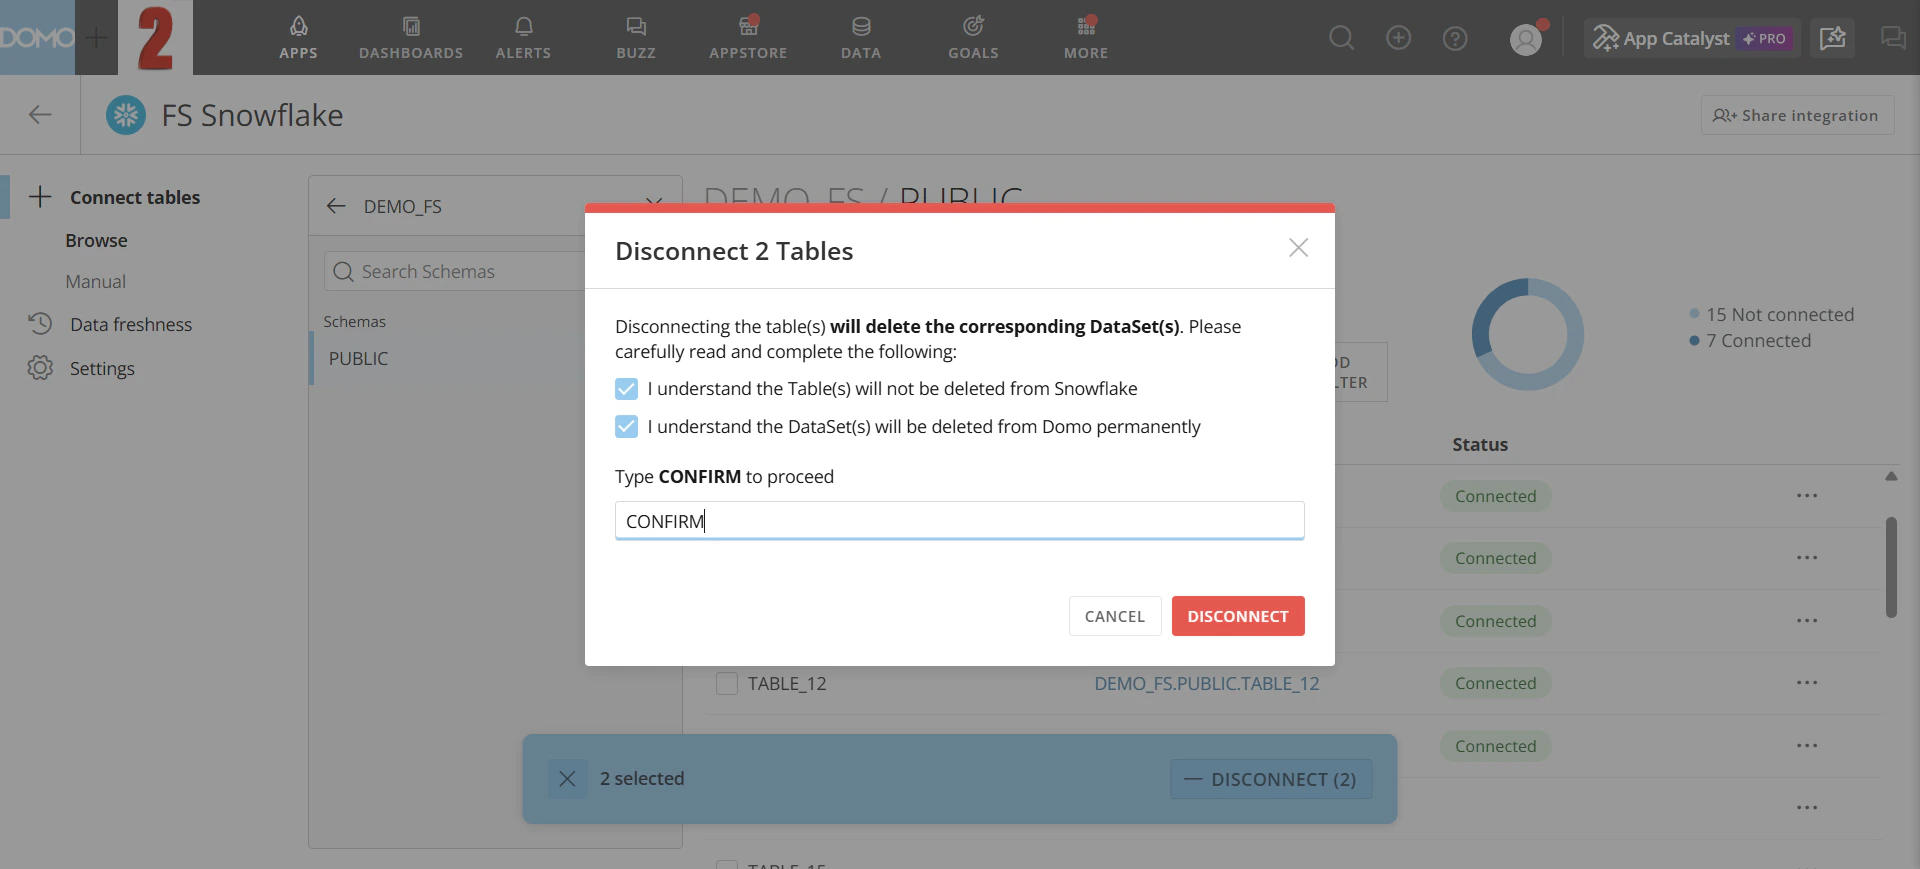
**Important:** Disconnecting a table permanently deletes the corresponding DataSet from Domo. Your source table in the data warehouse remains unchanged.
1. In the left panel, select the database and schema that contain the tables you want to disconnect.
2. Select the checkbox next to each table you want to disconnect. A selection bar appears at the bottom of the panel showing the number of selected tables.
#### Add a Single Table
1. In the **Add Table** form, enter the **Database**, **Schema**, and **Table** values.
2. Select **Connect**.
#### Upload a List of Tables
1. Select **Download Template** to get the CSV template.
2. Open the template and enter the **Database**, **Schema**, and **Table** values for each row.
3. Upload the file by dragging it into the **Upload List** area or selecting **Browse** to locate the file on your computer. The tables in the file are listed. Any rows that could not be matched are labeled **Needs Action**.
4. For any table labeled **Needs Action**, correct the entry in your CSV file and upload it again, or connect that table using the **Browse** tab or the **Add Table** form.
## Manage Connected Tables
Use the Connect Tables panel to search, filter, and disconnect tables.
### Search and Filter Tables
Use the search bar to filter the table list by name. The list updates as you type to show only tables whose names contain the search text.
To filter by connection status, select **Add Filter** and choose a **Status**:
* **Connected —** tables currently connected to a Domo DataSet.
* **Not connected —** tables available to connect.
### Disconnect Tables
**Important:** Disconnecting a table permanently deletes the corresponding DataSet from Domo. Your source table in the data warehouse remains unchanged.
1. In the left panel, select the database and schema that contain the tables you want to disconnect.
2. Select the checkbox next to each table you want to disconnect. A selection bar appears at the bottom of the panel showing the number of selected tables.
 3. Select **Disconnect** in the bottom bar. A confirmation dialog appears.
4. Select both checkboxes in the confirmation dialog.
5. Type `CONFIRM` in the field, then select **Disconnect**.
3. Select **Disconnect** in the bottom bar. A confirmation dialog appears.
4. Select both checkboxes in the confirmation dialog.
5. Type `CONFIRM` in the field, then select **Disconnect**.
 ## Related Articles
* [Cloud Integrations Overview](/s/article/4412849158167)
## Related Articles
* [Cloud Integrations Overview](/s/article/4412849158167)